

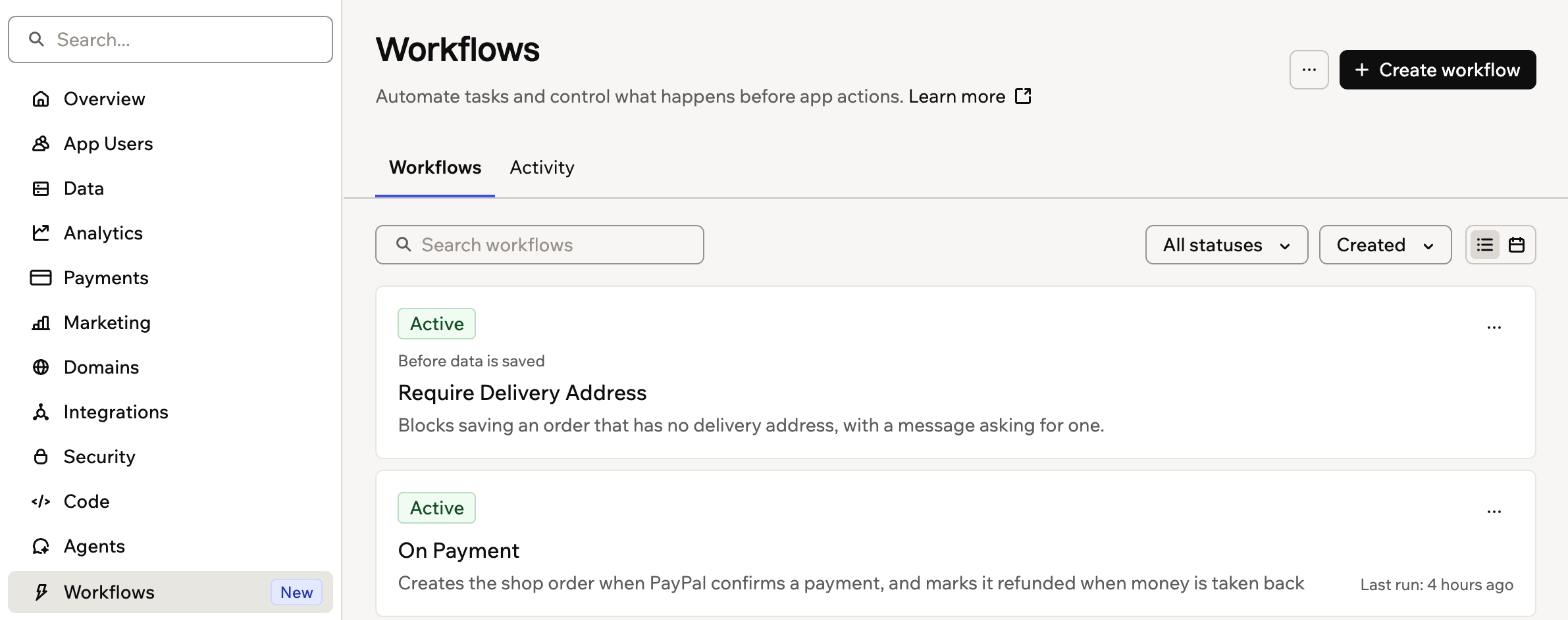
A hook on the Workflows page
What can I use hooks for?
Some examples of rules you can build with hooks:
- Protect data changes: Only let managers change an approved amount, or don’t let anyone complete a task that has no owner.
- Control who joins: Only let people with your company email sign up, and give them the right role as they join.
- Control integration use: Only let paying members use built-in integrations, such as AI actions.
- Give agents context: Check the first message of a conversation with an in-app agent, and add details the agent uses in its replies.
How hooks work
A hook is a type of workflow that runs just before an action in your app. Your app waits for its answer, then lets the action go ahead or stops it.- Its answer: Every hook returns Allowed or Blocked. Some also return extra details, such as a new person’s role or context for an in-app agent.
- When it blocks: The person sees the message you set in your rule, or a general message if you didn’t set one.
- Outside information: Most hooks can call a backend function, for example to check an internal directory. The Before data is saved hook can only check conditions and calculations, so saving stays fast.
- Changes from code: The Before data is saved hook also runs when a backend function changes data, not only your app’s pages.
Choosing a hook
Each hook runs before a different action in your app. When you describe a rule to the AI chat, it picks the right one for you, but knowing them helps you describe what you want.
The signup and first access hooks can also set the person’s role or other details. The conversation hook adds information the agent uses for the whole conversation, and the message hook adds information for that reply only.
Some hooks only appear when your app needs them. You see the signup and first access hooks only if your app requires login, and the conversation and message hooks only if your app has an in-app agent.
Creating a hook
You create a hook the same way as any workflow, by describing what you want in the AI chat. The AI builds the hook, asks any questions it needs and adds it to your Workflows list.Describing your rule
Describe your rule in plain words, and the AI picks the right hook for you. For example:- Go to your app editor.
- Describe the rule in the AI chat, then send it.
- Answer any follow-up questions the AI asks.
Choosing the action first
Start on the Workflows page when you know which action you want to check, such as saving a record. When you choose the action, the AI chat opens with a prompt started for you to finish. To create a hook from the Workflows page:- Go to your app editor.
- Click Dashboard.
- Click Workflows.
- Click Create workflow.
- Click Add starting point.
- Under Hooks, choose the action to check, such as Before data is saved.
- Add your rule to the prompt in the AI chat, then send it.
- Answer any follow-up questions the AI asks.
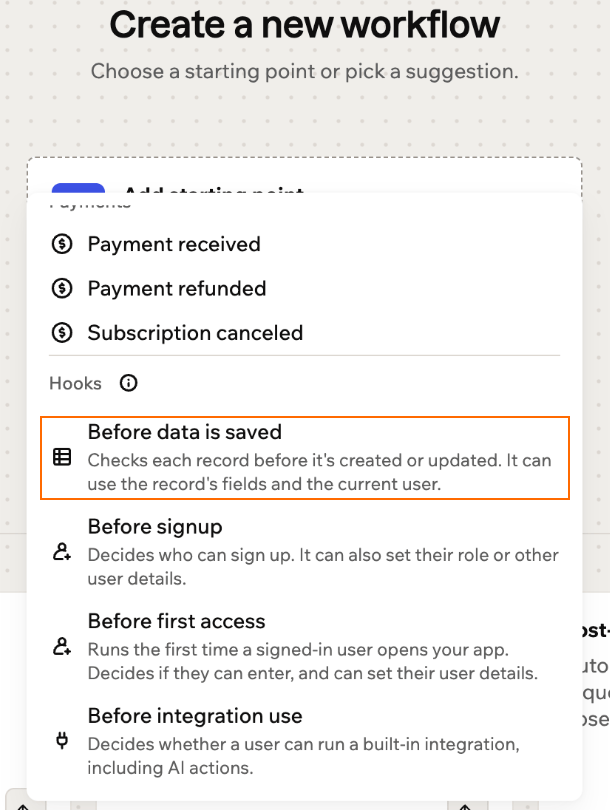
Choosing a hook as the starting point
Checking a hook
Before you rely on a hook, check that it does what you meant. You can read its logic and test it with real data. To review its runs, see monitoring runs. To turn it off or archive it, see managing workflows.Reading a hook’s logic
Open a hook from your list of workflows to see it as a diagram, from the action it checks through each condition to the result. Click a step to see its details. A condition step shows what it checks, and a result step shows its decision, Allowed or Blocked, and the message people see.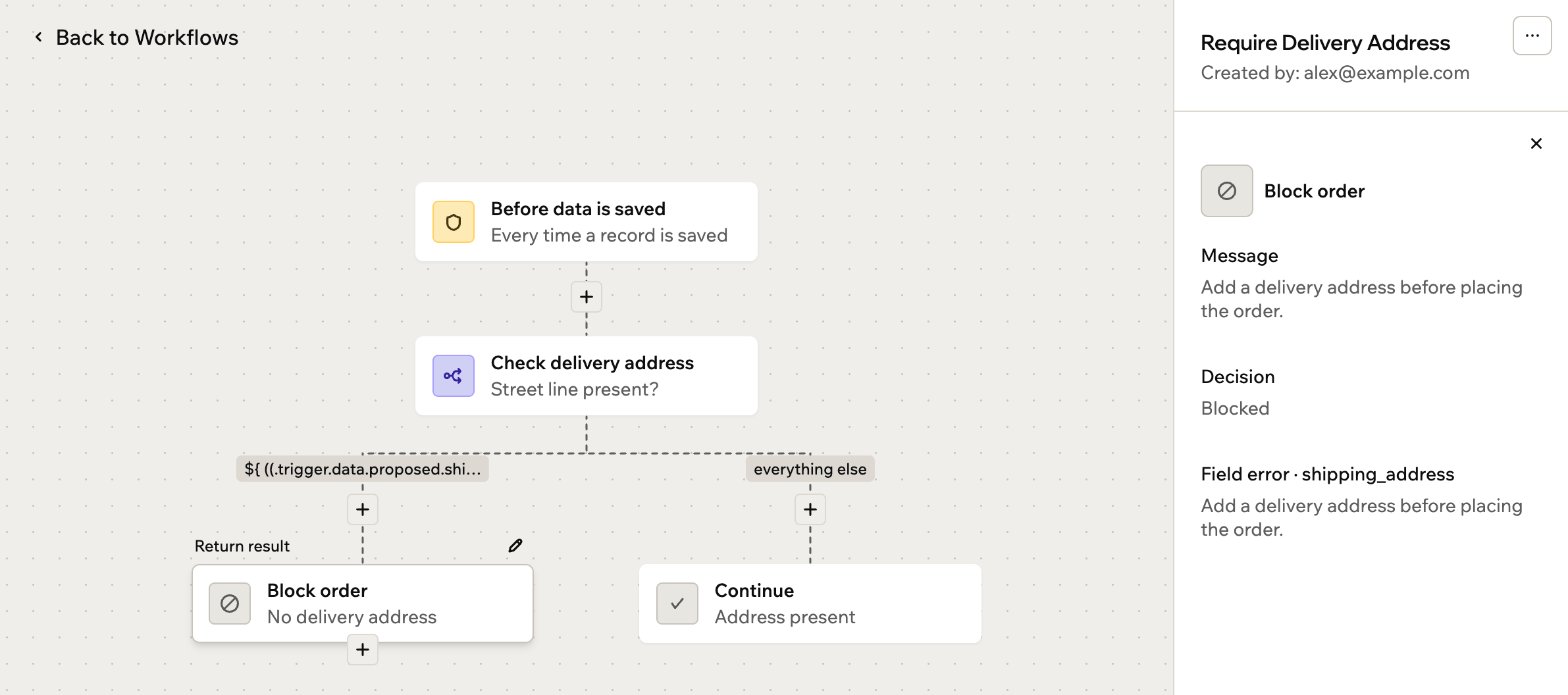
Reading a hook's logic
Testing a hook
Test a hook to see how it responds to data from one of its previous runs, using its current rules. The hook needs to run at least once before you can test it. When the test starts, the hook’s diagram opens on the test run, so you can see whether it allowed or blocked the action. On the Activity tab, test runs are labeled Test. To test a hook:- Go to your app editor.
- Click Dashboard.
- Click Workflows.
- Click the hook to open it.
- Click Run now in the details panel.
- In the dialog, choose a previous run to use as the test data.
- Click Run test.
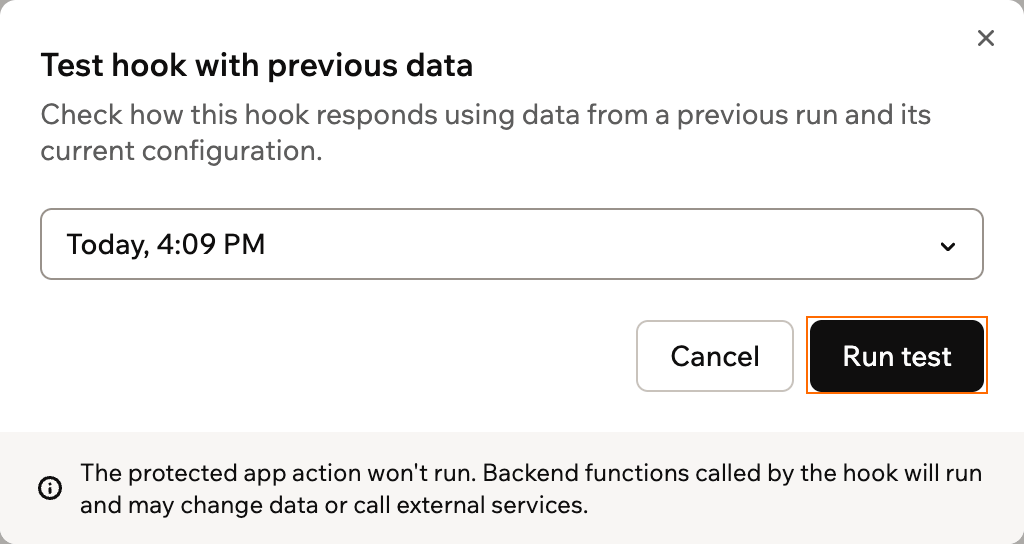
Testing a hook with previous data