Set up and test Stripe payments on your app before going live with real customers.
Base44 lets you set up Stripe payments directly from the AI chat in your app editor. You can ask the chat to install Stripe and create a checkout flow for your app. Everything starts in a safe Stripe test environment, so you can run test payments before you connect your live Stripe account and add your API keys.
This flow was released in January 2026 and replaces the old Stripe flow.
Start by asking the Base44 chat to install Stripe for your app. Base44 sets everything up in a test environment so you can experiment without real charges.
Note: Stripe is available on the Builder plan and above.
To install Stripe:
Go to your app editor.
Ask the AI chat to set up payments on your app. For example, you can ask:
Connect a payment method so I can take payments from customers.
Review the reply from Base44 describing that it will set up Stripe payments for your app in a test environment and click Install Stripe.
When you have installed Stripe, go to Dashboard → Integrations → Stripe to see the setup guide.
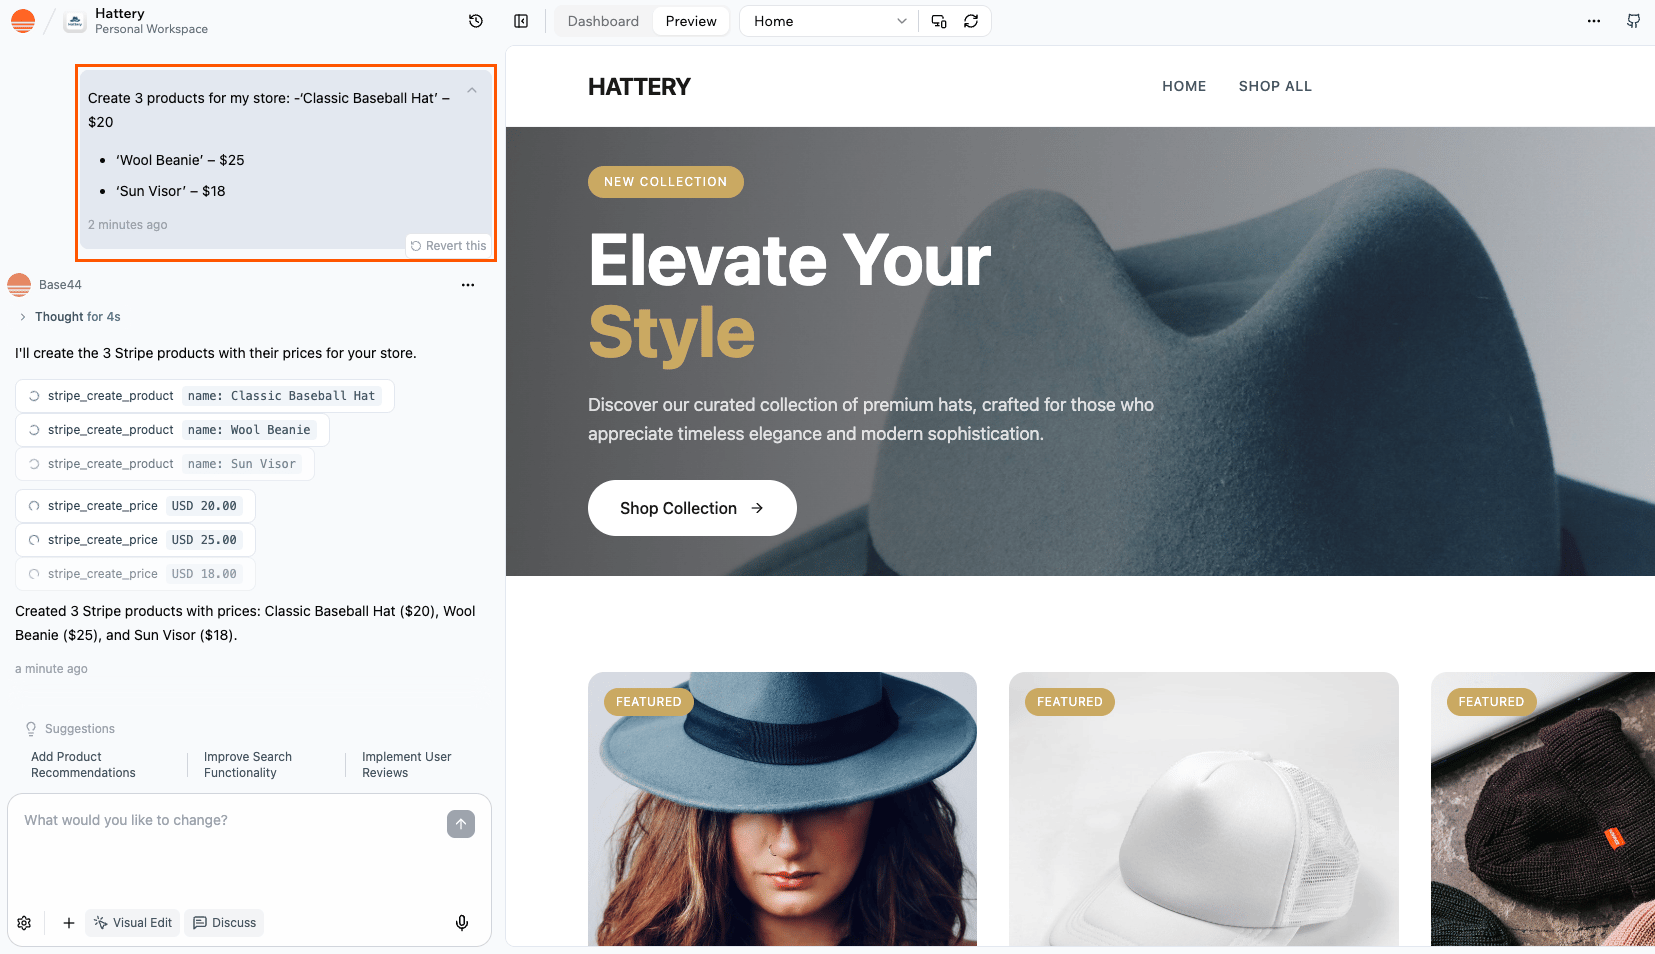
Ask the AI chat to create your products. For example, you can ask the chat:Create 3 products for my store:
Classic Baseball Hat’ – $20
Wool Beanie – $25
Sun Visor – $18
The products and prices are created directly in Stripe, and you’ll see and manage them from your Stripe Dashboard. If you want to change or add products later, you can ask the AI chat to do it for you.Base44 then uses those Stripe products and prices when it builds your checkout flows. It doesn’t create a separate product database for you automatically.
After Stripe is installed, you can test your checkout flow using Stripe’s test card. This helps you confirm that the customer journey, from product selection to payment, behaves as expected.
Note: The checkout flow only runs on your published app, not in the editor preview. Make sure you publish your app first, then open the live site to run your test payment.
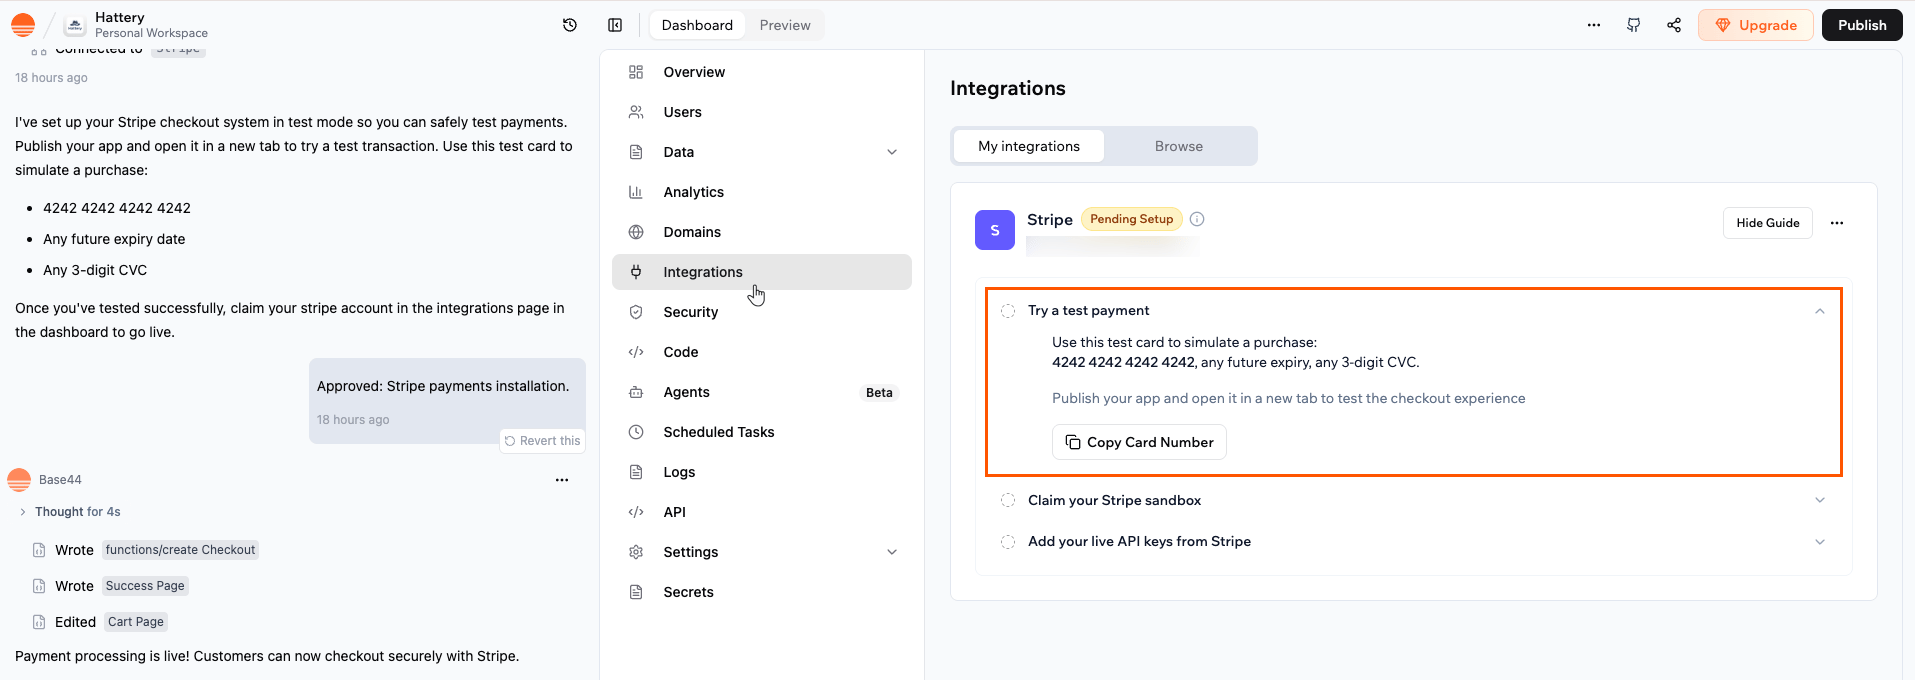
To run a test payment:
Click Dashboard in your app editor.
Click Integrations.
Click Stripe.
Click Try a test payment and then Copy Card Number so you can paste it during checkout
Publish your app.
Go through the checkout flow and at the payment step, enter:
When you are happy with how the test flow works, claim your sandbox by connecting your own Stripe account or creating a new one. This step links the test environment in Base44 to your Stripe account so you can move toward a live setup.You can ask the AI chat to claim your Stripe sandbox, or you can do it yourself from your app’s dashboard.
Important:
You have 60 days to claim your Stripe sandbox.
Make sure you connect the correct Stripe account for your business. This is the account that receives your payouts when you go live.
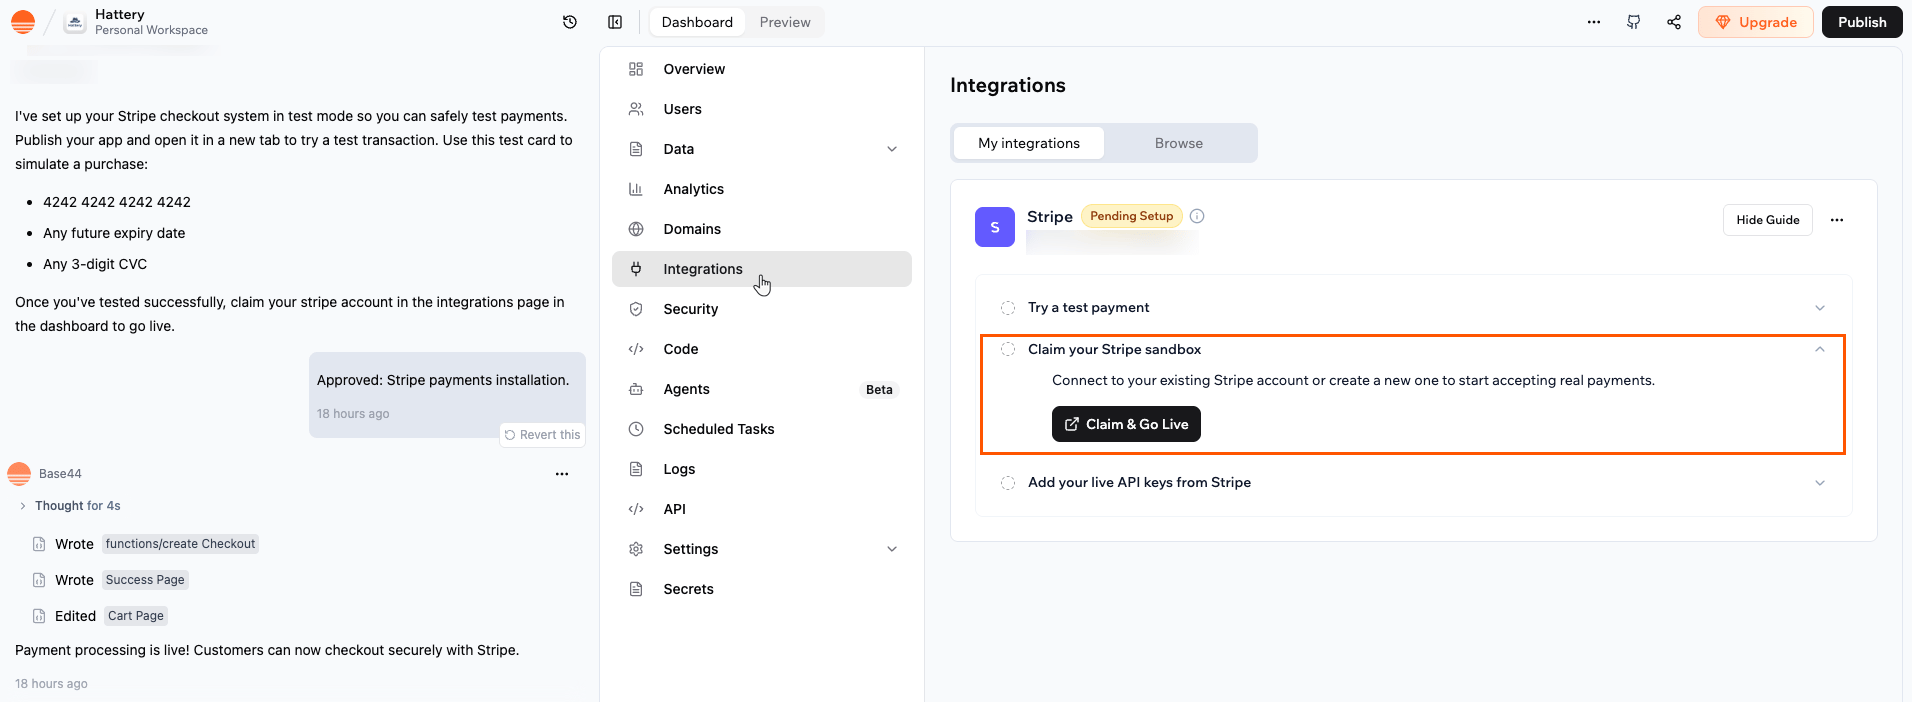
To claim your Stripe sandbox:
Click Dashboard in your app editor.
Click Integrations.
Click Stripe.
Click Claim your Stripe sandbox.
Click Claim & Go Live.
Follow the prompts to sign in to your existing Stripe account, or create a new Stripe account if you do not have one yet.
Complete any onboarding details that Stripe asks for, such as business and bank information.
When you return to Base44, check in Setup to confirm that the Claim your Stripe sandbox step shows as complete.
After you claim your sandbox, add your live Stripe API keys in Base44. This turns Stripe from test mode to a live setup that can accept real payments from your customers.Once your live keys are saved, your app uses Stripe in live mode and real charges are created when customers complete checkout.To find your live API keys in Stripe:
Sign in to your Stripe dashboard.
Go to the page that lists your API keys. Make sure you are viewing your live keys, not your test keys.
Copy your live publishable key.
Copy your live secret key.
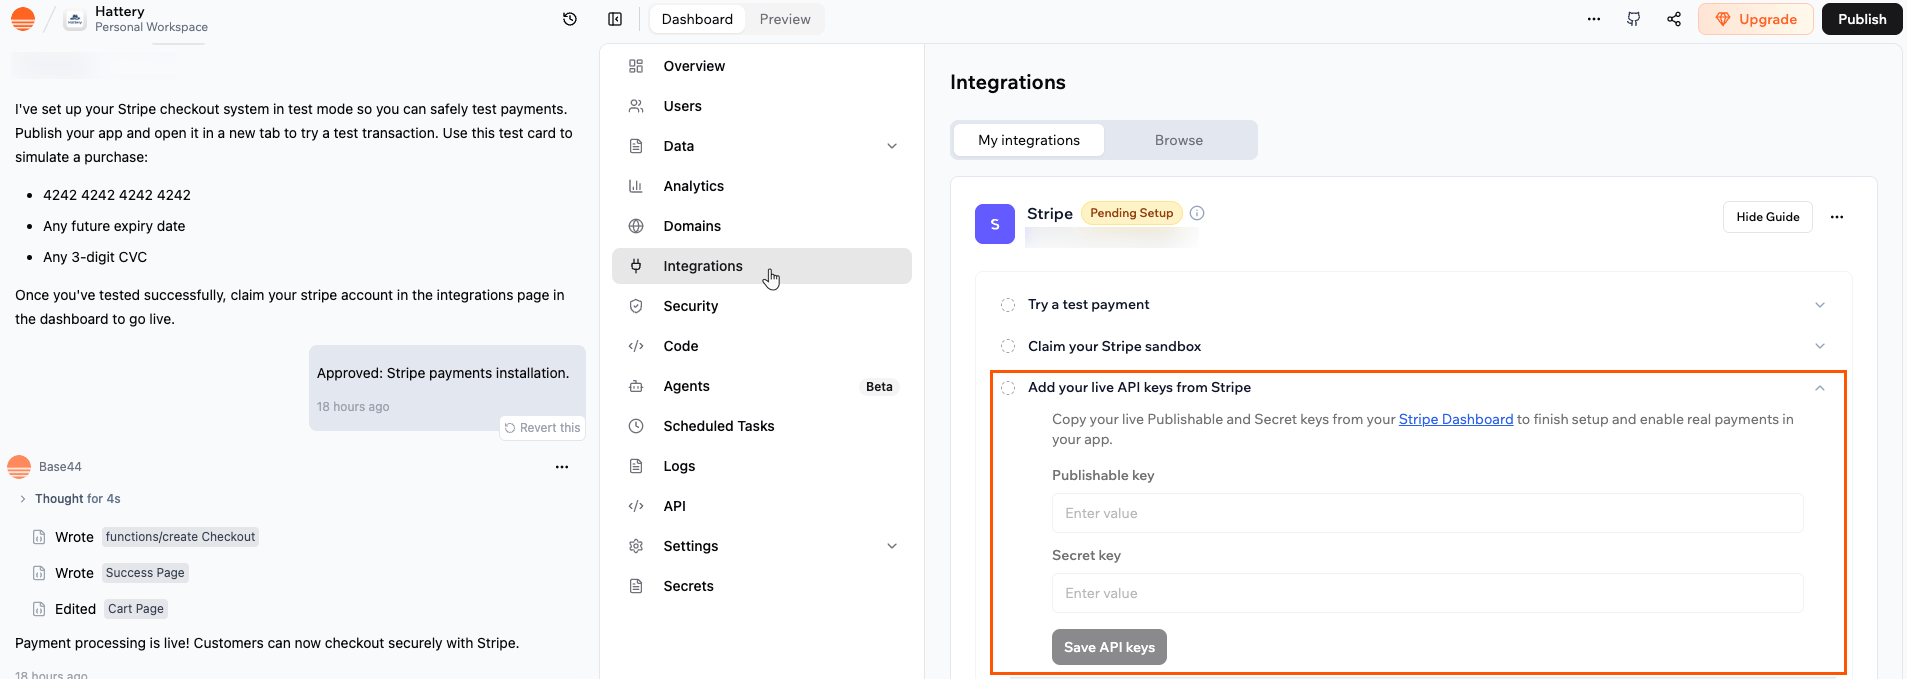
To add your live API keys in Base44:
Tip: If you used the AI chat to claim your Stripe sandbox, you can also add your API keys when prompted by the chat.
Click Dashboard in your app editor.
Click Integrations.
Click Stripe.
Click Add your live API keys from Stripe.
Paste your live publishable key in the relevant field.
After connecting Stripe in the AI chat and adding your live API keys, you are ready to set up real payment flows in your app. Each flow should send a logged in person to Stripe Checkout and, on the success page, confirm the payment and update their account while they are still logged in, instead of relying on webhooks alone.Use the example prompts below in the AI chat and adjust the details so they match what you want to sell and how your app should change someone’s access after they pay. You can copy them as-is or tweak them to describe exactly what you want your app to do.
One-time payment for credits
Let your users buy credits (e.g., “Buy 10 credits for $10”) and automatically update their account after payment.
What to type in the chat:
I want to let my users buy credits in my app using Stripe.
After a successful payment, the user should be returned to my app and their credits should be added to their account.
Verify the payment securely before adding credits.
Add the correct number of credits to the user’s account.
Make sure credits are only added once, even if the page is refreshed.
Optional follow-up:
Add a “Buy 10 Credits” button to my homepage.
Sell a digital product (eBooks, online courses, digital art, etc.)
Let your users purchase a downloadable item and unlock access after payment.
What to type in the chat:
I want to sell a digital product in my app using Stripe (for example, an eBook or course).
After a successful payment, the user should be returned to my app and get access to the download or content.
Record the purchase in my app.
Unlock the user’s access to the product.
Make sure the same payment can’t be used to unlock the product multiple times.
Book a service (yoga, coaching, etc.)
Let your users pay to book a time slot and save the appointment to their account.
What to type in the chat:
I want to let my users book a paid service in my app using Stripe (for example, a yoga session or coaching call).
Let my users choose a service and time slot.
Handle the payment with Stripe.
After a successful payment, save the booking (service, time, user) to a bookings collection.
Show a clear confirmation in the app.
Prevent double‑booking, even if the user refreshes the page or retries the confirmation.
Start a subscription
Let your users sign up for a recurring plan and tag them as subscribed.
What to type in the chat:
Build a Stripe subscription flow where my users can sign up for a recurring plan.
Let my users choose a subscription plan in my app.
Handle the recurring payment with Stripe.
After a successful signup, mark the user as “Pro” (or subscribed) in their account.
Store the subscription details so I can manage cancellations or billing updates later.
Cancel a subscription
Allow your users to cancel their plan and downgrade their access level.
What to type in the chat:Create a cancellation flow for subscriptions.
Let my users cancel their subscription, either from a page in my app or via the Stripe customer portal.
After a cancellation, update the user’s account so they lose their “Pro” / subscribed status.
Optionally, show a clear message or redirect them to a downgraded page or plan.
Issue a refund and revoke access
If a refund is processed, remove credits or block content access.
What to type in the chat:
Set up a secure flow to handle Stripe refunds.
When a refund is processed, let an admin trigger a check from inside the app.
Verify that the refunded payment belongs to the correct user.
Revoke access or subtract credits from that user’s account.
Prevent the same refund from being processed more than once.
Optional follow-up:
Create an admin page where I can enter a Stripe payment or session ID, review the details, and apply the refund-related changes (like removing access or credits) manually.
Sell tickets for an event
Let your users buy a ticket for a one-time event and save their registration.
What to type in the chat:
I want to sell tickets for an event in my app using Stripe.
Let my users buy a ticket for a specific event.
After a successful payment, save the attendee’s details (name, email, event) in an attendees list or collection.
Show a clear confirmation or thank-you page after purchase.
Optionally, generate a simple ticket or confirmation code the attendee can use at the event.
Accept tips or donations
Let your users support your work or project with a one-time or monthly payment.
What to type in the chat:
Create a flow to accept donations or tips in my app using Stripe.
Let my users choose a suggested amount (for example, $5, $10, $25) or enter a custom amount.
Handle the payment with Stripe.
After a successful payment, show a thank-you page or message.
Optionally, save each donation in a Donations collection linked to the user’s account.
Optional follow-up:
Add a “Support Me” button to my About page that takes users into this donation flow.
Accept international payments
Let your users pay from other countries using local currency or methods.
What to type in the chat:
Set up my Stripe payments so they work well for international users.
Enable common international payment methods (for example, iDEAL, Bancontact, Apple Pay, Google Pay).
Use Stripe’s automatic currency conversion so my users can pay in their local currency.
Show prices in USD in my app, but let Stripe handle local pricing at checkout.
Make sure the checkout flow works smoothly for users in different countries.
Send branded invoices
Let your users receive a professional invoice and pay later using a Stripe-hosted page.
What to type in the chat:
Set up a Stripe invoicing flow in my app.
Let me generate and send an invoice to a user from my app.
Include a description, amount, and due date on each invoice.
Email the user a secure payment link they can use to pay the invoice.
After the invoice is paid, update the user’s record in my app (for example, mark the invoice as paid or unlock access).
Optional follow-up:
Add an “Invoice a Client” button to my admin dashboard that starts this flow.
Build a simple marketplace (Advanced - Stripe Connect)
Let your users sell their own products or services and receive direct payouts.
What to type in the chat:
Create a basic marketplace in my app using Stripe Connect.
Let my users register as sellers and connect their own Stripe accounts.
When a customer buys something, route the payment to the correct seller.
Optionally, take a small platform fee from each transaction.
Track transactions and show each seller their earnings and payout history.
Stripe Connect is more advanced and may require additional setup or approval from Stripe.
Click a question below to learn more about setting up payments
Do test payments use real money?
No. When you follow step 2, payments are created in Stripe test mode. You use the test credit card number, and no real money moves between accounts.
Where can I see my transactions and refunds?
You can track all payments and refunds directly in your Stripe Dashboard.
Go to Payments to see individual charges and their status.
Go to Customers to see a history of payments and refunds per customer.
Go to Balance →Transactions for a ledger-style view of payouts, fees, and adjustments.
Any payment activity that happens through your Base44 app is recorded there in real time.
Can I change products or pricing after I connect Stripe?
Yes. You can update products and pricing in your Stripe Dashboard at any time.Those changes will apply to checkouts and subscriptions created through your Base44 app. If your app stores specific product or price IDs (for example, in your product data), make sure you update those references if you create new prices in Stripe rather than editing existing ones.
Do I need a business to use Stripe?
You don’t need to have a registered business to test things out. You can use Stripe’s sandbox (test) mode without entering real business details. But to accept real payments, Stripe requires verified business and banking information.
What kinds of payments can I accept in my Base44 app?
Once connected, your app can accept:
Credit and debit cards
Apple Pay and Google Pay
Local payment methods (like iDEAL, Bancontact, etc.)
Multiple currencies with automatic conversion
Can I charge users in my app on a recurring basis?
Yes. You can offer subscriptions or memberships in your Base44 app using Stripe. Stripe will automatically handle recurring payments and renewals.
Can users manage their own billing in my app?
Yes. Once Stripe is connected, your users can update their card details, view invoices, and manage subscriptions through Stripe’s secure billing portal.
How can I troubleshoot Stripe issues in my Base44 app?
If Stripe isn’t working as expected in your app, for example, nothing happens when a user clicks a “Pay” or “Checkout” button, you can view Function Logs in your Base44 dashboard to find out what’s going wrong. This works for any payment-related feature, whether you’re selling products, accepting bookings, or offering subscriptions. Here’s how to check the logs:
Click Dashboard in your app editor.
Go to Code → Functions.
Find the function related to your payment flow (e.g., createCheckout for a store).
Click on the function, then scroll to the Logs section.
The Logs will show messages about what happened when the function ran. Look for red error messages — these can help pinpoint what went wrong
Example:
If your app is a store and the createCheckout function fails, the logs might show:
“Product not found” → one of the items in the cart is missing or has an incorrect ID
“Invalid price” → a product is missing a price or set to 0
“Missing success_url” → Stripe doesn’t know where to send users after they pay
Once you find the error message, you can copy it and paste it into the AI chat to ask your Base44 app for help fixing it.
Why is my payment flow not working or showing a blank page after payment?
If your payment flow does not complete or you see a blank page after payment, it is usually caused by the app environment or redirect settings. If you are using Stripe, test your flow by following step 3 above. If you built a custom payment flow or use another provider, check the following: Common issues:
Preview vs published: Custom payment flows usually do not work correctly in preview. Always test payments on your published app, using the live URL.
Redirect URL problems: If you see redirect loops or a blank page after payment, check that your success and cancel URLs point to your published app domain, and that you are not mixing preview URLs with live payment callbacks.
Login requirements: If you require login to access your app or payment pages, make sure the success page after payment is still reachable for signed in people. Misconfigured auth can lead to blank pages after checkout.
Pop up vs same window: On mobile, some providers work better in a separate payment tab or pop-up. If you see issues when replacing the current page, consider opening the payment page in a new window if your provider supports it.
To fix the issue:
Check your browser console for errors.
In your Base44 dashboard, go to Code → Functions and review the logs for any payment related backend functions.
If you use webhooks, verify that your webhook URL is correct and that the endpoint is deployed and responding.
If you still cannot find the cause, copy any error messages from your console or function logs and paste them into the Base44 AI chat. Ask it to “help troubleshoot this payment flow step by step” and include details about your provider and setup.
Does using Stripe use Base44 integration credits?
Calling Stripe itself does not use Base44 integration credits. When your app calls Stripe using your own API keys through backend functions, the request goes directly from your backend function to Stripe. Base44’s built-in services are not involved.Integration credits are only used when your app uses Base44’s own built-in services.If your Stripe payment flow also triggers any of these built-in services, for example, sending a confirmation email via Base44’s SendEmail, those specific actions consume integration credits as normal. Stripe itself does not.