How to use Base44

Base44 is an AI-powered website and app builder. You do not need any coding or tech skills. Just describe what you want to build, and Base44 will bring your idea to life.
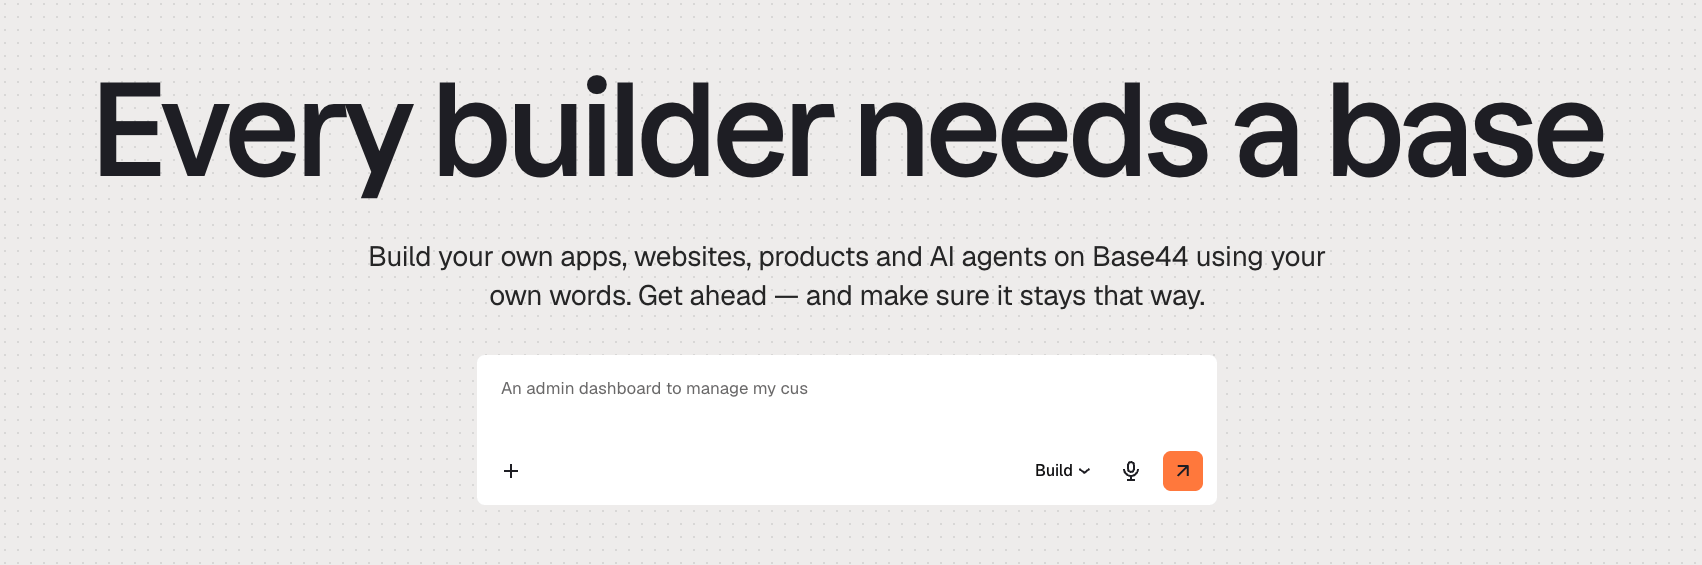
Getting started with a prompt in Base44

Getting started building your app on Base44

You can build something simple for yourself or create a full product for your business. Base44 takes care of everything behind the scenes, including design, databases, signups, user permissions, and hosting.

Examples of what you can build on Base44

  • Prototype a new business idea
  • Create a personal to-do list
  • Set up an event signup page with reminders
  • Build a survey and see answers instantly
  • Track projects or sales on a dashboard
  • Create a secure booking system or CRM
  • Share files privately with clients
  • Launch a community site with chat and analytics

Ready to bring your idea to life?

Build my app now

Step 1 | Describe your idea

Start by going to Base44 and telling it what you want to build in your own words. When you begin, you will be asked to sign up. This makes sure your work is saved, so you can return to your app anytime. There are a few ways to start, depending on what you already have. Pick the one that fits, then follow the full walkthrough in Starting from your first prompt.
Describe your app in plain language and let Base44 build it. See Using a prompt.
Shape your app with the AI first, then turn the plan into a build. See Using plan mode.
Begin from a website you already own and refine it in the app editor. See Starting from an existing URL.
Turn a Figma frame into a working app. See Starting from a Figma design.
Bring in tools like Google Workspace, Slack, and GitHub from your first prompt. See Connecting your tools.

Step 2 | See your app come to life

Once you share your idea, Base44’s AI handles the rest. It automatically designs your app’s appearance, choosing colors, arranging buttons, and organizing menus to make everything look clean and function smoothly. If you need special pages or features like a calendar, forms, or a task list, Base44 adds those right away so your app is ready to use. All the complex parts are also taken care of for you in the background. Base44 securely stores all your app’s data, manages account and login systems if you need them, and keeps the technology that powers your app running smoothly. You do not need to set up or manage anything yourself; Base44 handles every detail so you can focus on your ideas.
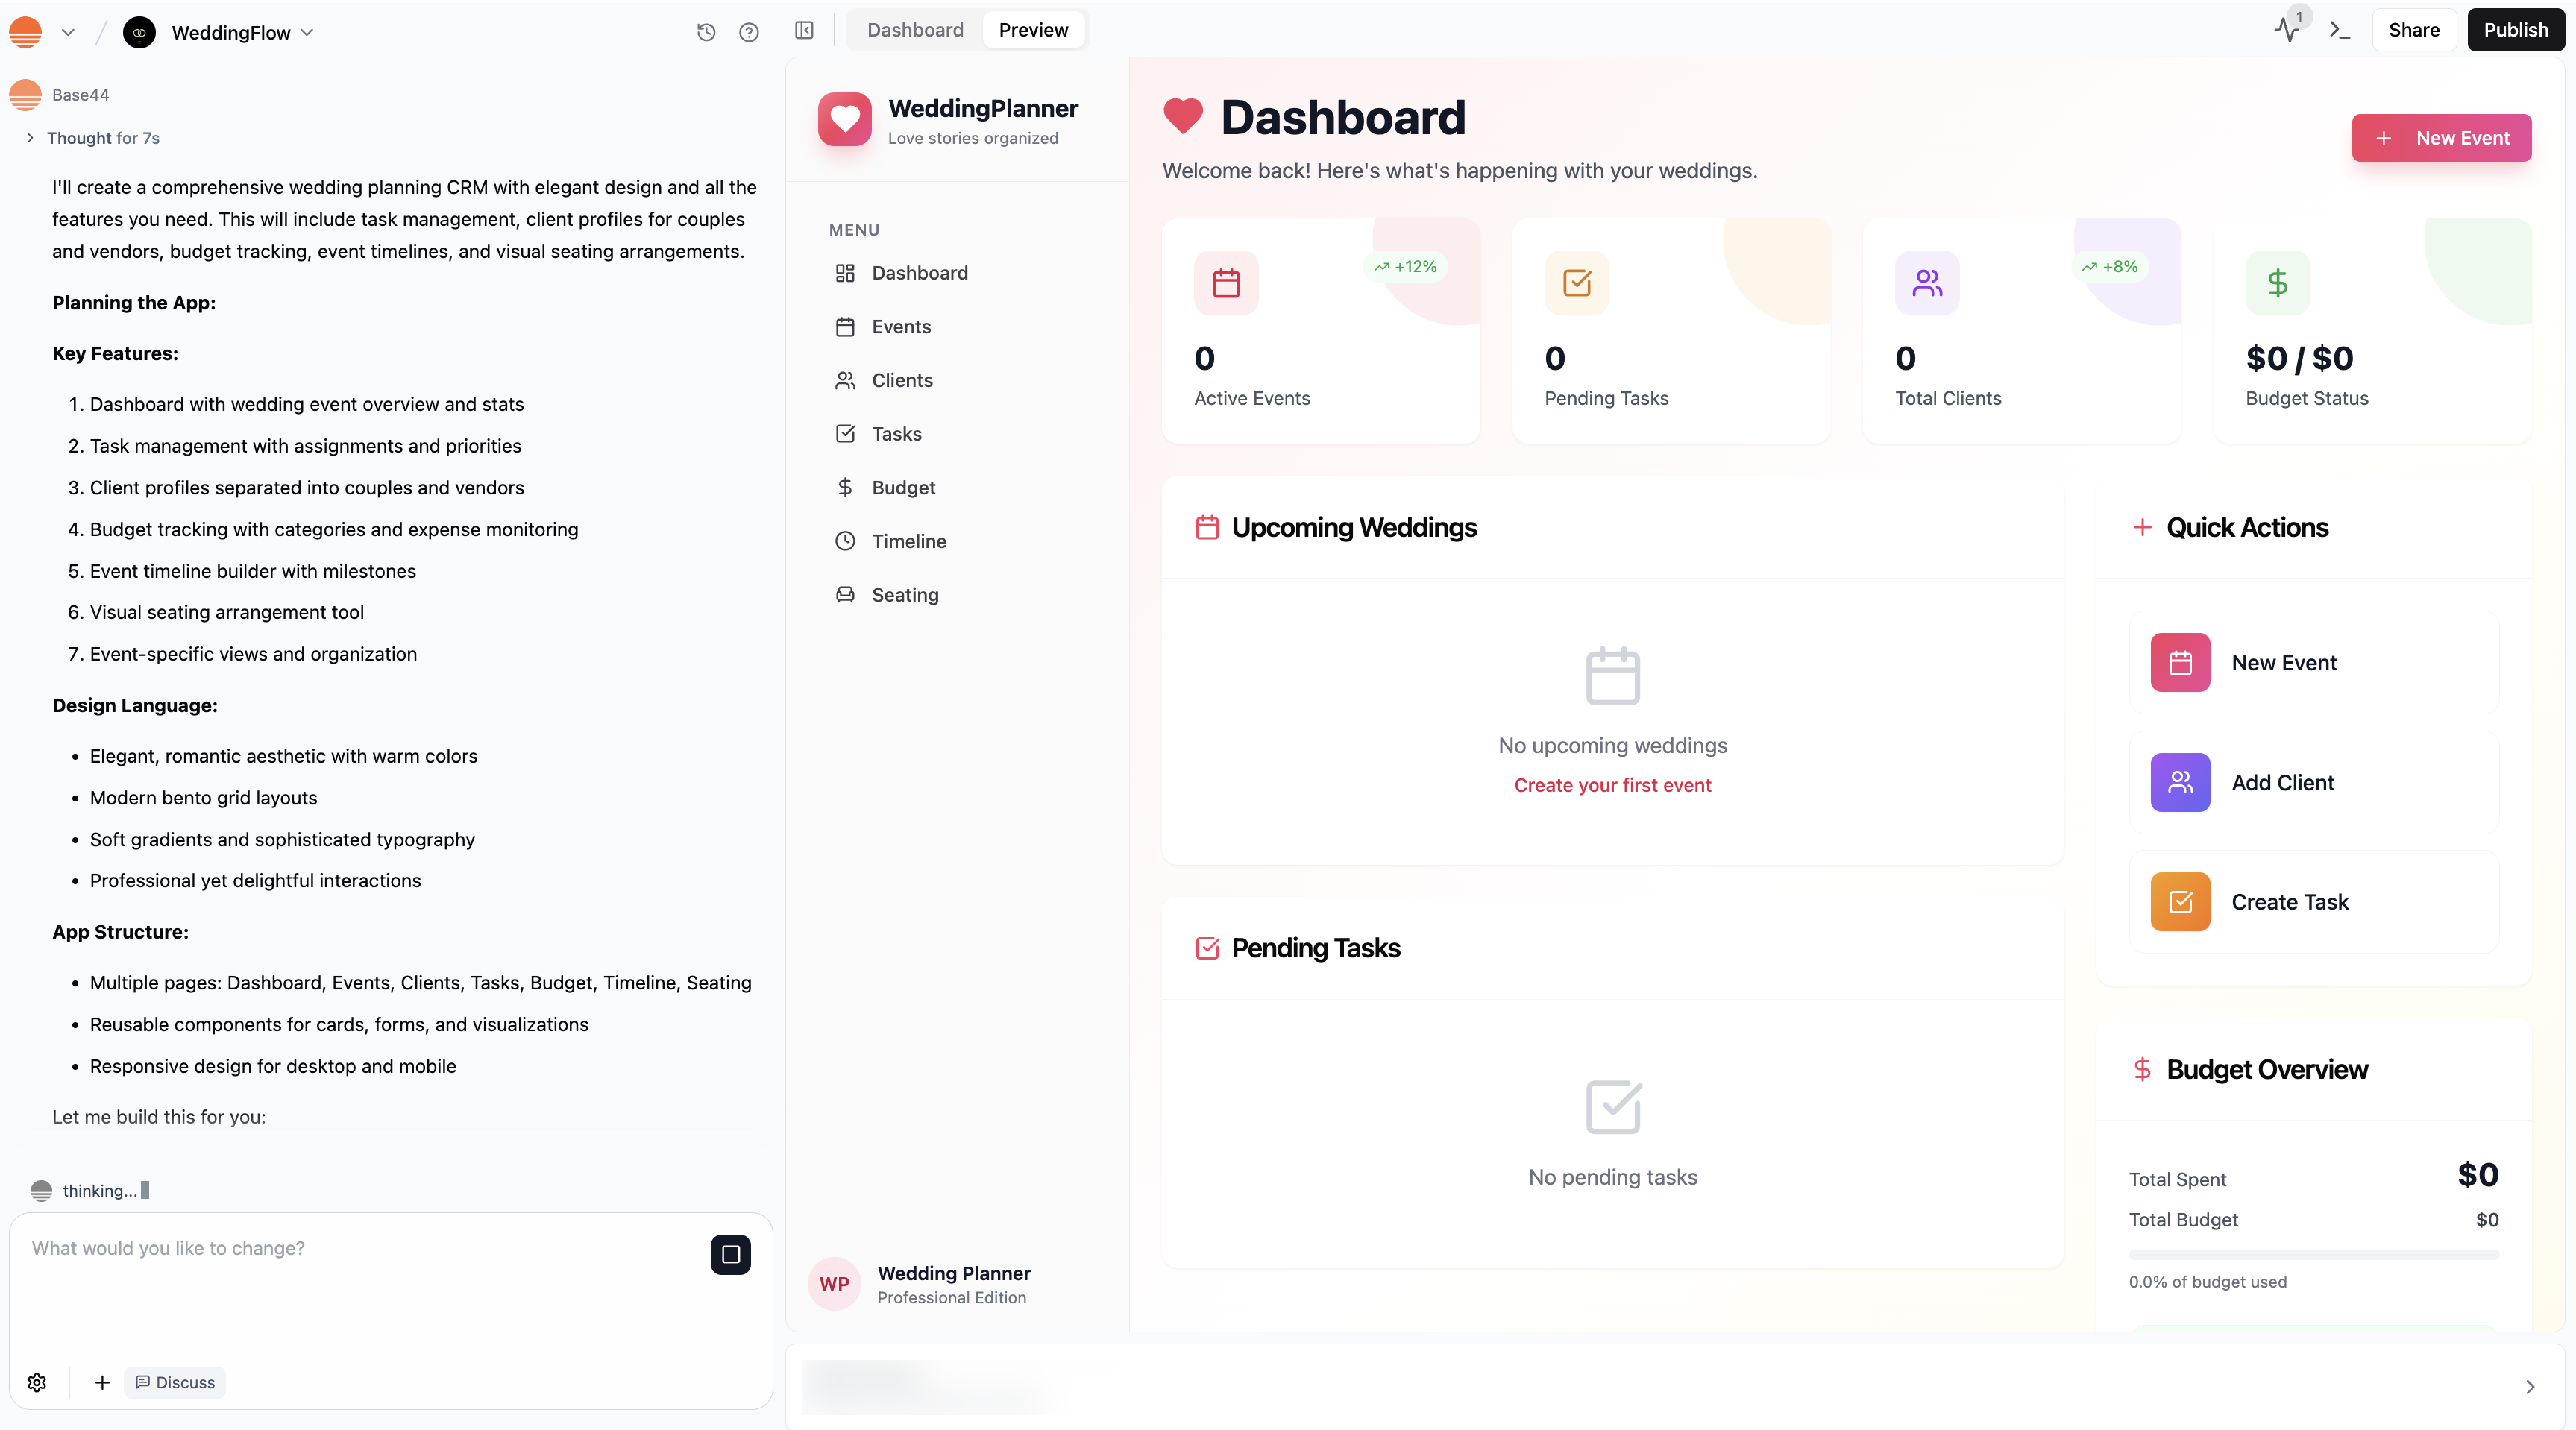
An app being built on Base44

Base44 building a CRM app for a wedding planner

Watch your app appear in the preview window as Base44 works. You can explore your app right away and try out any features by clicking the preview.

Step 3 | Customize your app

Once your app is built, you can make it truly your own. The easiest way is with the AI chat. Just type what you want to change or add, and Base44 updates your app for you. For example, you can say “Change the main color to green,” or “Add a signup page that collects full name and company.”
If you want to brainstorm or ask questions first, use Discuss mode in the AI chat. Discuss mode lets you talk about your ideas without making changes until you are ready. This mode also uses less credits. Learn more about the different AI chat modes.
There are lots of ways you can change and improve your app to fit your needs. You can:
Add new features or change how your app works. With the AI chat, you can:
  • Add buttons or forms for users to interact with
  • Create automated workflows, like sending a welcome email when someone signs up
  • Set up notifications, reminders, or automated messages
  • Ask the AI to add or update pages (for example, “Add a calendar page for events”)
  • Adjust the logic behind how your app responds to users or manages different tasks
Customize the colors, layout, and style of your app just by chatting with the AI. You can:
  • Change the background color, text color, or font style
  • Rearrange sections, move buttons, or update images and icons
  • Apply changes globally or on just one page (for example, “Apply this new font to every screen,” or “Change only the login page background”)
You can also use Edit mode to manually make changes to specific elements of your app.
Decide what information your app uses and collects.
  • Use the AI chat to build or change data flows (for example, “Add a field to the signup form for company name”).
  • Create or update forms to collect details from users, like signups, feedback, or orders.
  • From Data in your app’s dashboard, you can organize the data that your app collects, set rules for who can add, edit, or see information, and export your data to use elsewhere.
Learn more about managing your app’s data
Control who can access your app and what they can do. From Settings in your app’s dashboard, you can:
  • Set permissions so only certain people or roles can see or edit information (like making some pages visible only to admins)
  • Decide if your app is public, invite-only, or restricted to specific users or workspace members
  • Set up secure login and registration, including social logins like Google
  • Add custom user roles and specify exactly what each role can do (for example, “Create a role called Event Organizer who can add and edit events, but not change app settings”)
  • Adjust privacy and security rules to keep sensitive data safe
You can review and update settings at any time to match your needs as your app grows.

Step 4 | Test your app

Before you share your app, test how everything works from different perspectives.

Testing checklist

Interact with the preview like an end user. Click, fill out forms, and check every feature. Click the More Actions icon in the top bar and select Act as a user to view the app as a specific person or role. Ask the AI chat to help you test key flows or edge cases, such as “Test as a guest” or “See what an admin can do.” Create test user profiles with different roles or permissions to review what each can access. Use an incognito or private browser window to see what a first-time visitor would experience. Check your app on both desktop and mobile to catch layout or navigation issues.

Step 5 | Share and publish your app

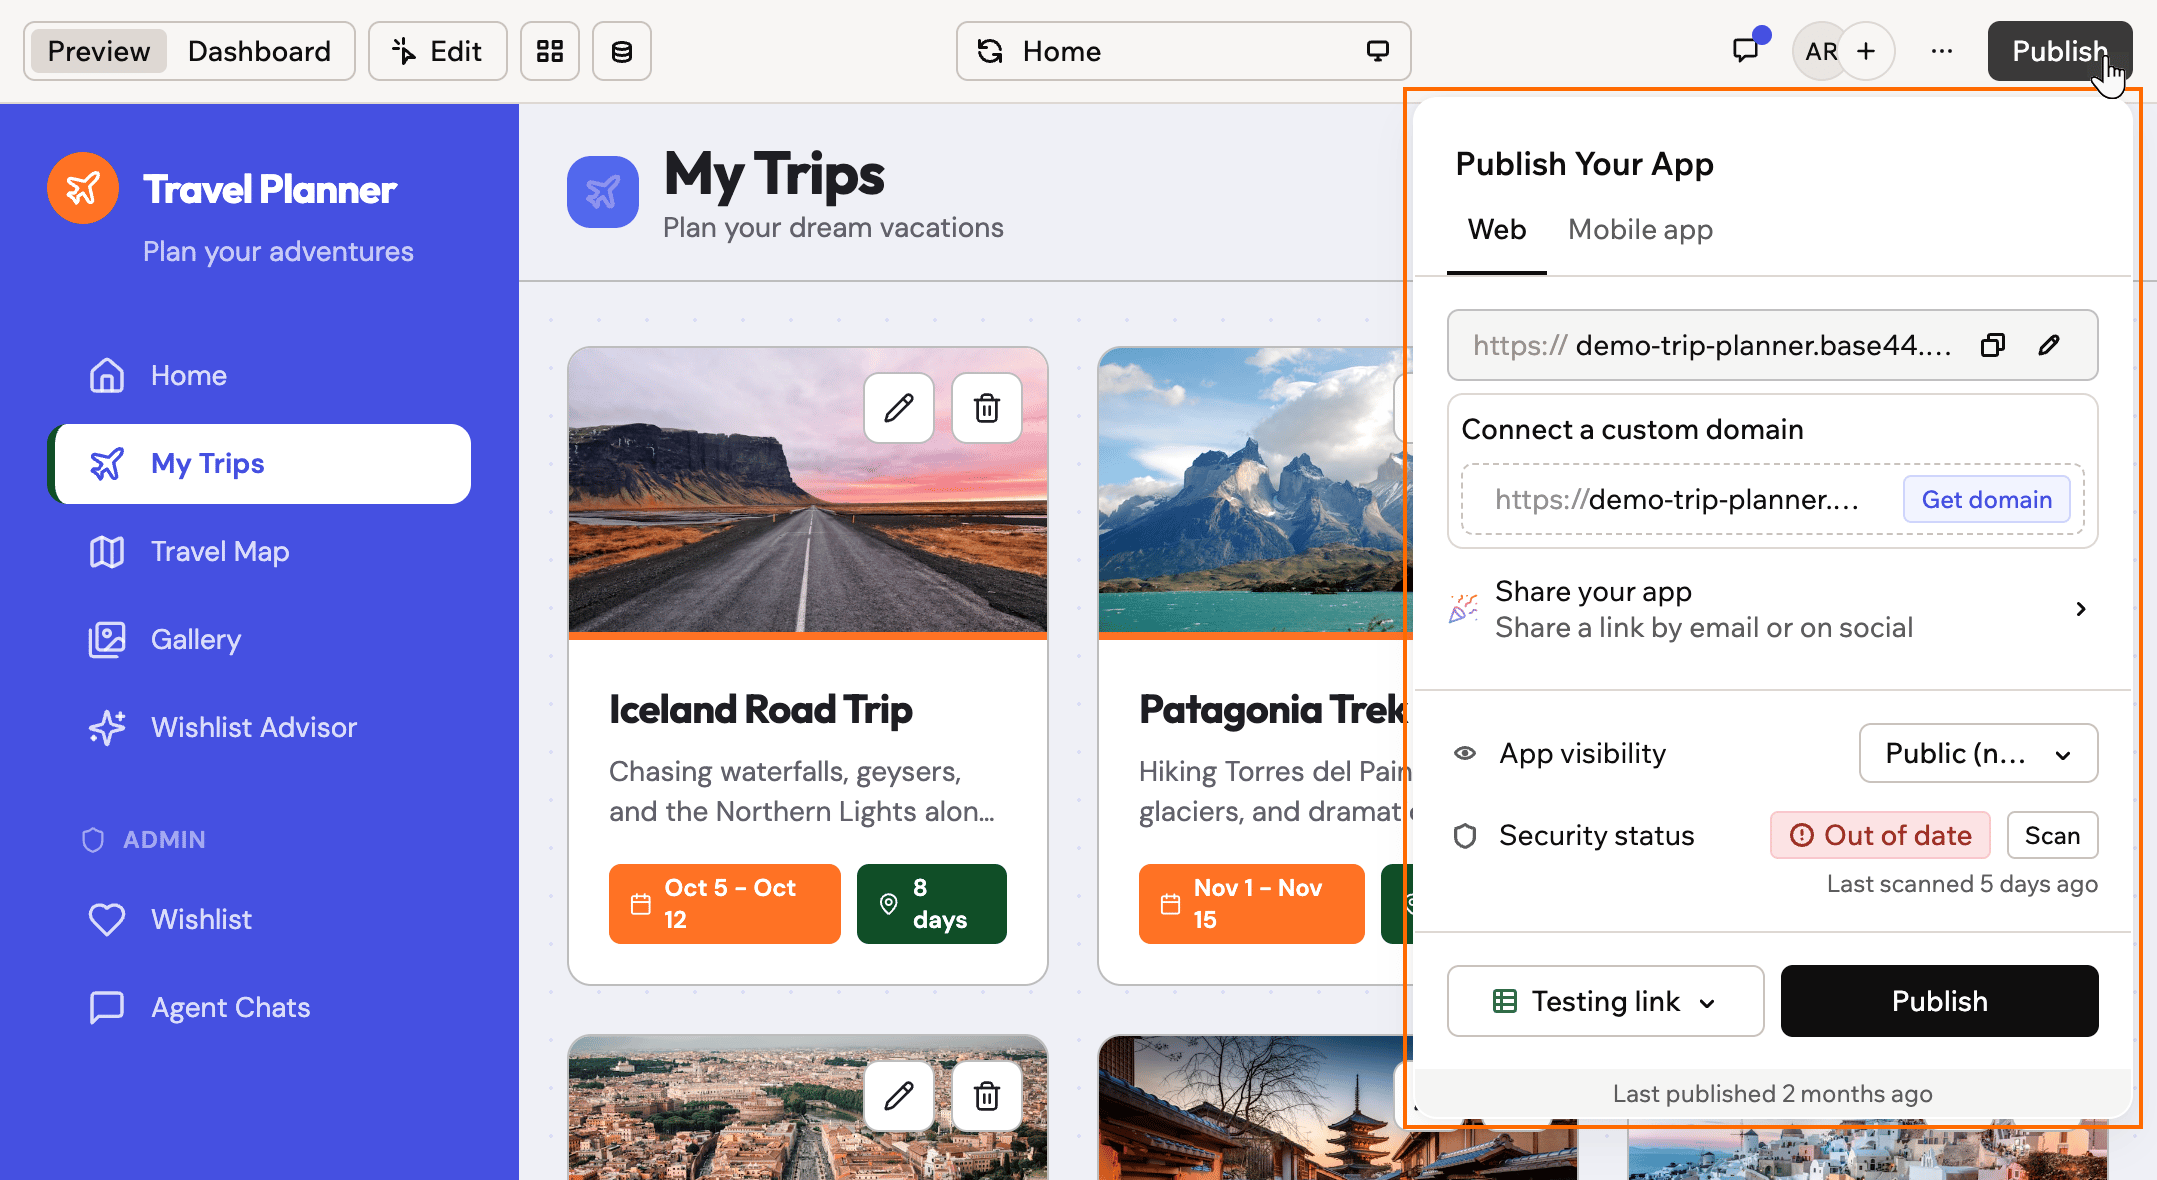
When you are ready to share your app, click Publish in the top bar. From there you can, you can:
  • Copy your app’s web URL.
  • Click Connect a custom domain or Get Domain to connect your own address.
  • Click Share your app to get a link you can share by email or on social.
  • Use App Visibility to choose who can access your app.
  • Click Publish App to push your latest changes live.
Sharing and publishing your Base44 app

Sharing and publishing your Base44 app


Guided tour of the app editor

There are 3 main working areas inside the app editor: the AI chat, the preview, and your app’s dashboard. The top bar sits above them and gives you quick access to preview, dashboard, code, testing tools, and publishing.

AI chat

This is where you chat to Base44. Simply type what you want into the chat on the left side of the app editor, and Base44 turns your ideas into reality.
The AI chat inside the Base44 app editor.

The AI chat inside the Base44 app editor.

You can use different AI chat modes, including Discuss and Visual Edit, depending on how you want to work and use credits. Learn more about the AI chat modes
If you ever need to undo a prompt, find that message in the chat and click the Revert icon under it to take your app back to just before that step. You can also click the Edit icon on an earlier message and resend it. When you resend, Base44 reverts any changes made after that message and applies your updated request.

Preview

On the right side of your screen, you see a preview version of your app as it updates in real time. You can use the preview to interact with your app exactly as your users will. Click the different parts of your app to see how it works, or make design changes using Visual Edit.
Preview in the Base44 app editor

Preview in the Base44 app editor

App dashboard

Go to your app’s dashboard whenever you want to manage your app. In the dashboard, you can invite teammates, track analytics and user activity, control access, set your app to public or private, add a custom domain, and more.
Accessing your app's dashboard in the Base44 app editor

Accessing your app's dashboard in the Base44 app editor

Use the sidebar search in your app’s dashboard to quickly find pages, sections, entities, and connectors. Results update as you type and support dynamic keywords, including entity and connector names.

FAQs

Click a question below to learn more.
Your first build uses a small, fixed amount, about 1 credit, no matter how detailed your prompt is or which AI model you choose. After that, each change you ask for costs credits based on how much work it involves and the model you use.Credits are used only when the AI builds or updates something for you, so previewing your app and clicking through it are always free. Learn more about credits and plans.
Yes. Base44 automatically adapts your app for mobile devices. Use the device menu in the top bar to switch to the mobile view, check how everything appears, and make sure your layout, buttons, and text are easy to use on any screen size.
Mobile
If you want to make any changes to the mobile layout, simply ask the AI chat to do it for you.
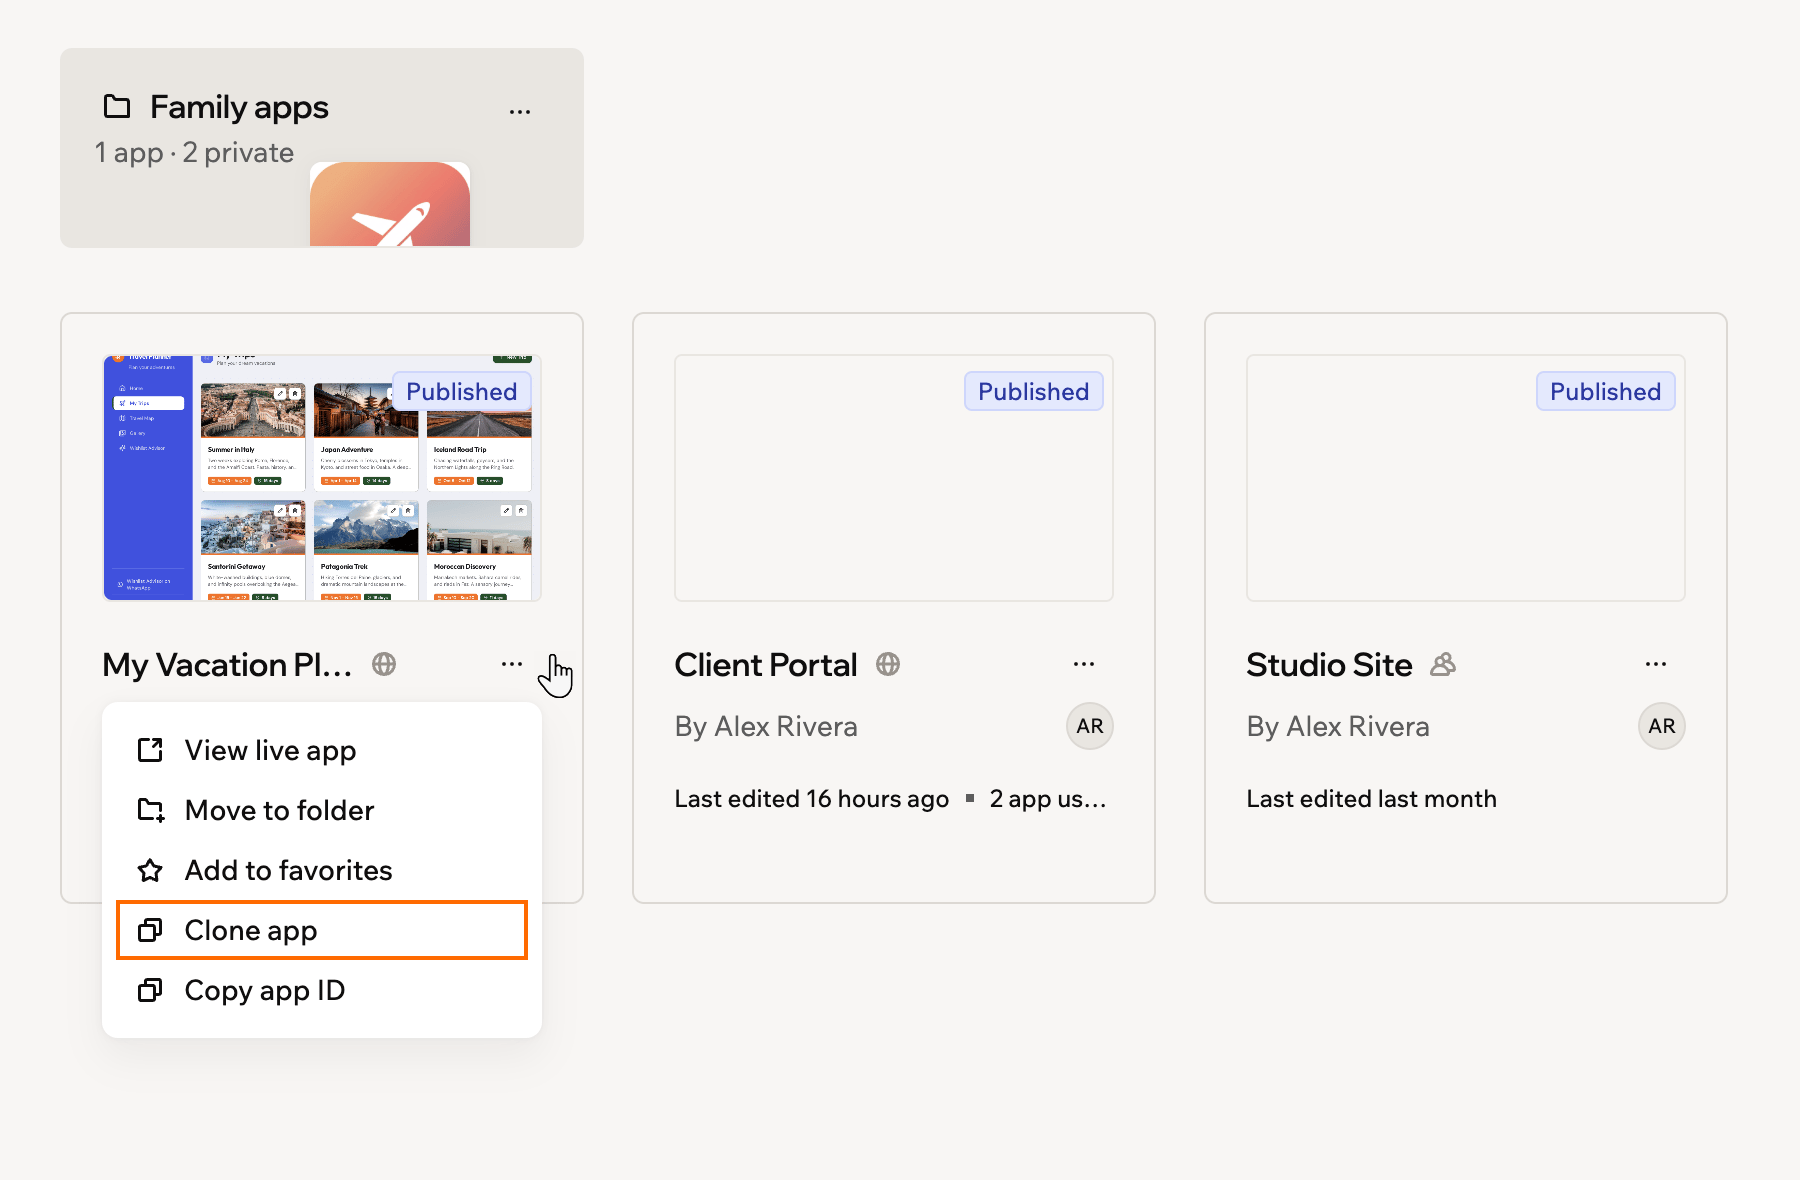
Yes. You can clone your app at any time. This is useful if you want to test major changes without affecting your live app, or use an existing app as the starting point for a new project.To clone from your Apps page:
  1. Go to your Apps page.
  2. Click the More actions icon on the app card.
  3. Click Clone App.
Cloneapp 1
To clone from the app dashboard:
  1. Click Dashboard in your app editor.
  2. Click Settings.
  3. Click App Settings.
  4. Click Create Copy next to Clone App.
The cloned app opens automatically and includes the suffix (Copy).
We take care of it automatically. Base44 comes with built-in hosting, so there is no deployment process. When your app is created, it is instantly live and shareable.
Yes, you can export your app’s code as a ZIP file or to GitHub on a Builder plan or higher.
  • Export as a ZIP file: Click Code in the top bar and then click the Export project as ZIP icon at the top right of the code view.
  • Export to GitHub: Click the GitHub icon in the top bar and follow the setup flow.
For self-serve guidance while you work, click your avatar in your workspace and select Help Center to open our docs, or go to https://docs.base44.com/.If you need more hands-on help, you have a few options to get expert help with your Base44 app.You can work with a Base44 Partner for tailored, one-on-one support on larger or ongoing projects. Partners can help you plan and build full apps, handle complex integrations, and provide long-term strategic guidance. Choose your partnerIf you would like feedback from other people building with Base44, you can also join our Discord community. It is a great space to connect with others who can share advice, help, and tips from their own projects.
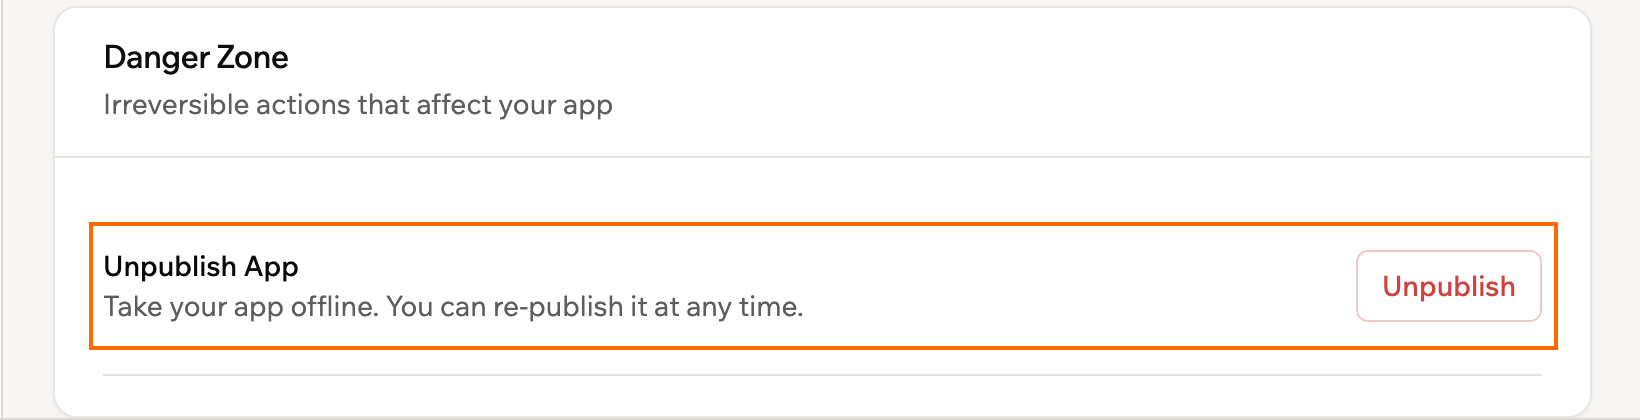
Yes. You can unpublish your app at any time. When the app is unpublished, people cannot access it until you publish it again. All your data and settings is saved when you unpublish.To unpublish your app:
  1. Go to your app dashboard.
  2. Click Settings, then App Settings.
  3. Scroll to Danger Zone, and click Unpublish App, then Unpublish in the dialog.
    Unpublish
Base44 is built to work smoothly on all major modern browsers that support ES6+ JavaScript, CSS Grid, Flexbox, and modern DOM APIs. You can use Base44 with current and recent versions of the following browsers:
  • Google Chrome (version 51 and above for ES6, 57+ for CSS Grid, 29+ for Flexbox)
  • Mozilla Firefox (version 54 and above for ES6, 52+ for CSS Grid, 28+ for Flexbox)
  • Microsoft Edge (Chromium-based) (full support since launch)
  • Safari (version 10.1+ for CSS Grid, 9+ for Flexbox, 10+ for ES6)
  • Opera (version 38+ for ES6, 44+ for CSS Grid, 12.1+ for Flexbox)
There is limited or no support for Internet Explorer 11 and earlier, and some older Android WebView or legacy browsers may not display content correctly.As a general guideline, you are covered if you use a modern, auto-updating browser. Internet Explorer 11 is outdated and not recommended for Base44.
Yes, you can charge people to use your app if you are on the Builder plan or higher. You can connect a payment provider, such as Stripe or another service that supports APIs, to accept payments from your app users. Use the Secrets tab to securely store your API keys.See how to set up payments for your app.
The platform badge is a label that appears at the bottom right of your live app with the text ‘Edit with Base44’. It lets people know that you built your app with Base44, and allows anyone to create a copy of your app into their own account so that they can edit their own version.
Notes:
  • Removing the platform badge is not available on the free plan. You need to upgrade to a paid plan to hide it.
  • If your app is set to private, the badge is not displayed.
  • If your app is set to public, everyone can see the badge. If somebody clicks it, it creates a copy of your app into their own account so that they can edit their own version of the app.
Base44badge PnTo show or hide the badge:
  1. Go to your app’s dashboard and click Settings.
  2. Click App Settings.
  3. Enable or disable the Platform Badge toggle.
Yes. Press Cmd+K (Mac) or Ctrl+K (Windows) to open the command palette. From there, you can navigate between views, switch pages, open files, jump to entities, trigger quick actions like publishing or inviting collaborators, and search Base44 documentation without leaving the app. The command palette is available from both the workspace home screen and the app editor.
Keyboardcommands
Need more help or inspiration?Explore Base44’s templates to get ideas or start with a base for your app.