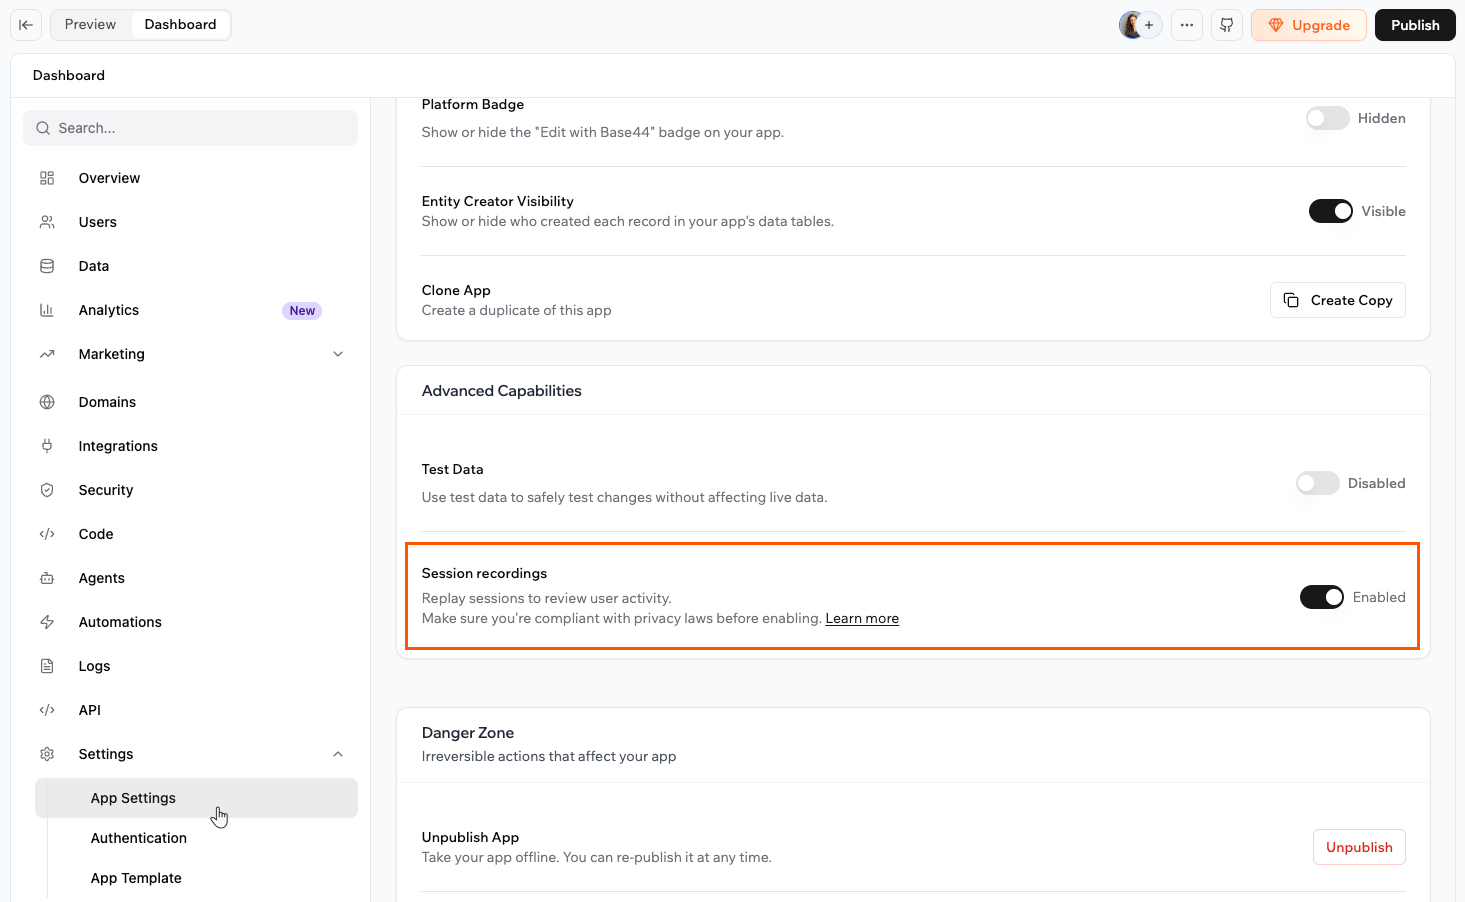
Turning on session recordings
Recordings capture real visitors on your published app, so nothing is recorded until you turn the feature on and publish your app. To turn on session recordings:- Click Dashboard in your app editor.
- Click App Settings.
- Scroll to the Advanced Capabilities section.
- Turn on the Session recordings toggle.
- Publish your app so recordings begin as people use it.
What to know about limits and storage:
- You can record up to 500 sessions every 30 days. When you reach the limit, your existing recordings stay available and new recordings resume on the date shown in your dashboard.
- You can generate up to 50 AI summaries each month.
- Recordings are stored for 90 days, then removed automatically.
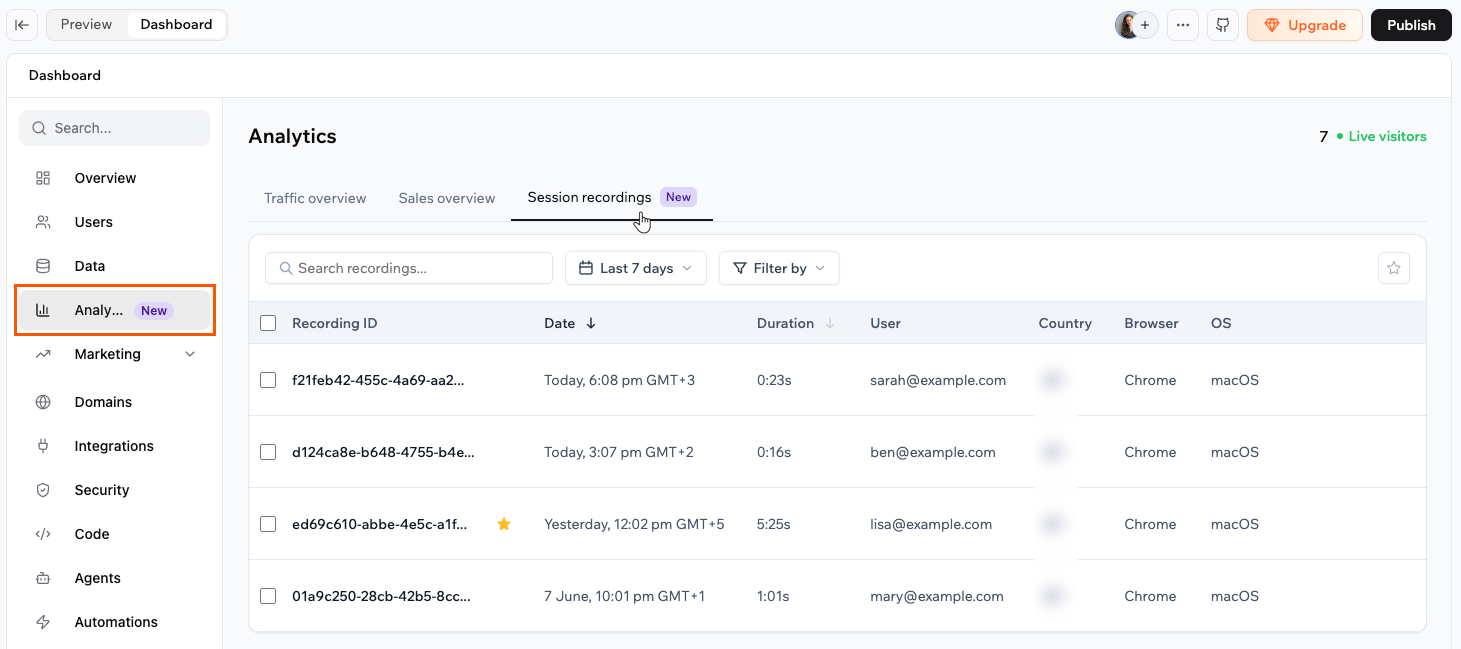
Viewing your session recordings
View your recordings any time from your app analytics to see how people are moving through your app. Each recording shows the recording ID, date, duration, user, country, browser, operating system, and device. To view your session recordings:- Click Dashboard in your app editor.
- Click Analytics.
- Click the Session recordings tab.
- Click a recording to open it and replay the session.
Replaying a session
When you open a recording, you can replay the session and move straight to the moments that matter. Each recording has the Summary, Details, and Events tabs. Use Events to step through everything that happened, such as page views, clicks, and form submissions.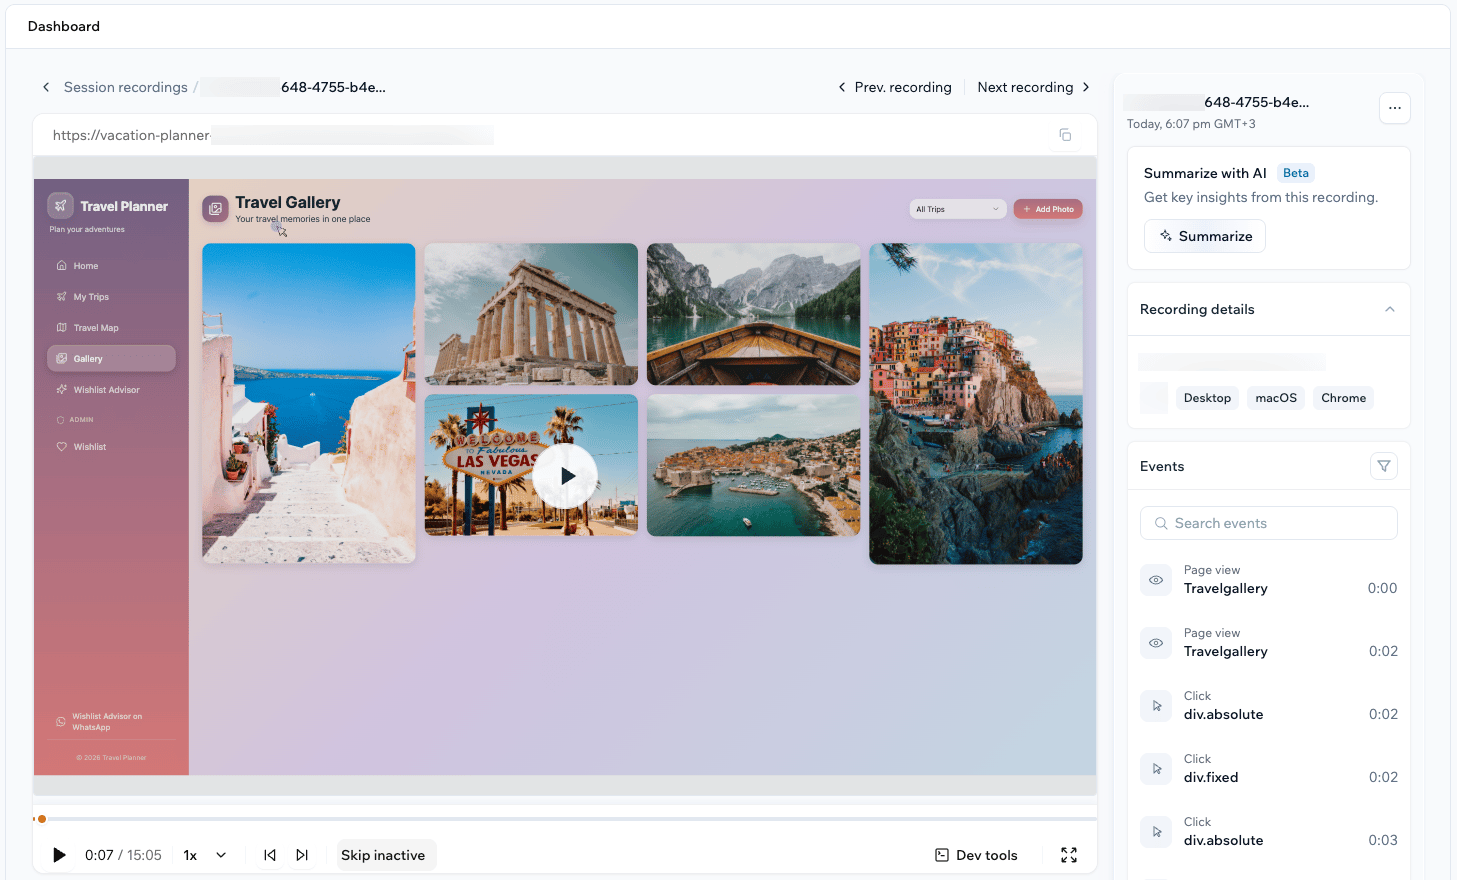
- Play, pause, and change the playback speed: Control the replay like a video, and slow it down or speed it up as needed.
- Skip inactive periods: Jump past idle time so you only watch moments of activity.
- Jump to friction points: Move straight to the errors and rage clicks marked on the timeline.
- Open dev tools: Click Dev tools to review the console, network requests, errors, and performance captured during the session.
Summarizing a session with AI
The AI summary turns a recording into key insights so you can understand a session without watching all of it. The summary gives you a short overview of what happened, Friction points flagged by severity such as warnings and information, and Suggested next steps to improve the experience. To summarize a recording with AI:- Click Dashboard in your app editor.
- Click Analytics.
- Click Session recordings.
- Click View on a recording.
- In the Summarize with AI panel, click Summarize.
- Review the AI summary when it finishes.
Finding specific sessions
Narrow the list down to the sessions you care about using search, filters, and date ranges.- Search: Find a recording by its ID or name.
- Filter: Focus on a device, country, browser, operating system, page, or issue type such as errors, rage clicks, dead clicks, a refreshed URL, or a crash.
- Choose a date range: View recordings from a preset period or your own custom dates.
- Show favorites: Star the recordings you want to revisit, then filter to show only those.
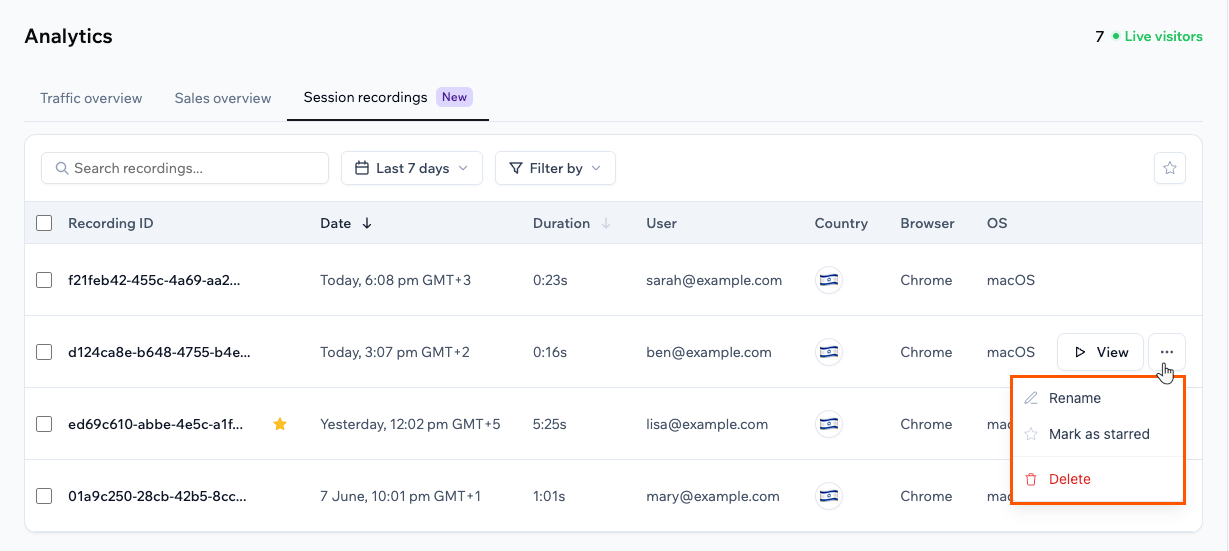
Managing your recordings
Rename a recording to make it easy to find later, or delete recordings you no longer need. To rename or delete a recording:- Click Dashboard in your app editor.
- Click Analytics.
- Click Session recordings.
- Hover over a recording and click the More Actions icon .
- Click Rename or Delete.
FAQs
Find answers to common questions about session recordings in Base44.Do session recordings capture preview sessions or only my published app?
Do session recordings capture preview sessions or only my published app?
Session recordings capture real visitors on your published app. Sessions in preview are not recorded, so publish your app to start collecting recordings.
Does turning off session recordings delete the recordings I already have?
Does turning off session recordings delete the recordings I already have?
No. Turning off the toggle stops new sessions from being recorded. Your existing recordings stay available until you delete them or they reach the 90-day storage limit.
What happens when I reach my recording limit?
What happens when I reach my recording limit?
New sessions stop being recorded for the rest of the period, and your dashboard shows the date when recording resumes. The recordings you already have stay available.
Who on my team can view session recordings?
Who on my team can view session recordings?
Session recordings follow your app dashboard permissions. Anyone who can open your app dashboard can view the recordings.
Can I choose which visitors or pages get recorded?
Can I choose which visitors or pages get recorded?
Recording captures sessions across your whole app. To focus on a specific page, country, device, or issue, use the filters in the Session recordings tab after the sessions are recorded.