myapp.base44.app) from the moment you create it. You can personalize that URL anytime, or connect your own custom domain to make your app easier to find, remember, and share.
Changing your Base44 app URL
Every Base44 app comes with a free built-in domain (myapp.base44.app) that you can personalize anytime. No DNS setup or payment required.
To change your URL:
- Click Dashboard in your app editor.
- Click Domains.
- Click Edit URL under your app’s Built-in URL.
- Enter a new name for your link. For example:
best-business→best-business.base44.app. - Click Change to save.
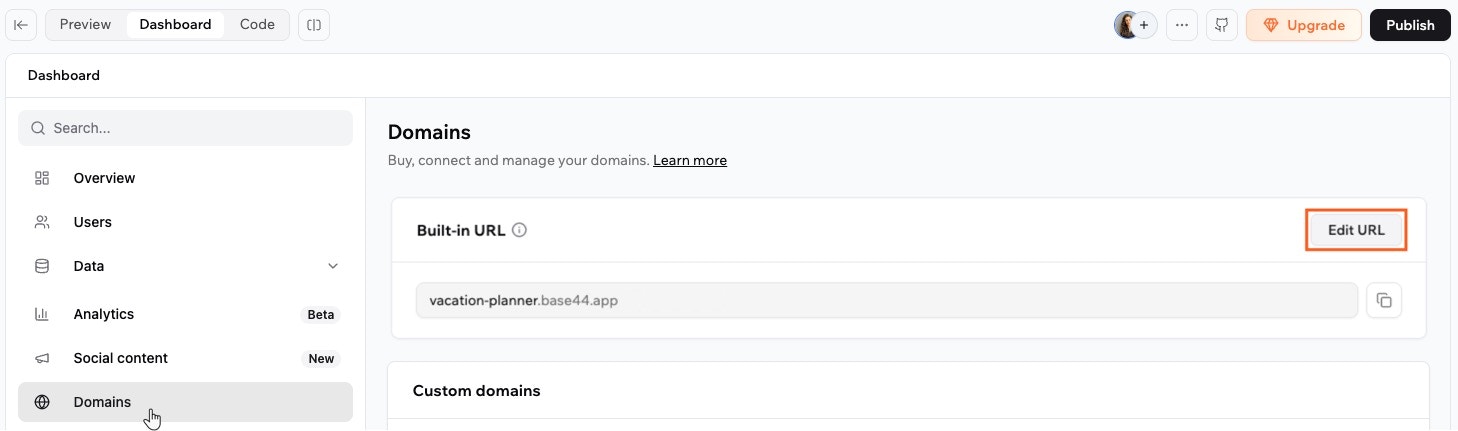
Editing the URL of your app in Base44
Setting up a custom domain
A custom domain is your own web address, such asmybusiness.com, that people use to reach your app instead of the built-in Base44 link. For example, instead of sharing my-app-948908fb.base44.app, you can share mybusiness.com. A custom domain looks more professional and reinforces your brand every time someone visits.
There are 2 ways to set one up: buy a domain, or connect one you already own. Whichever you choose, Base44 issues and renews your SSL certificate automatically once your domain is connected, so your app is always served securely over HTTPS.
When you buy a domain, Base44 works with two providers, Wix and IONOS. Depending on your account, you may see one or both when you click Buy Domain. Use whichever you see, and follow the matching guide below.
Buy a domain with Wix
Buy a new domain through Wix. DNS and SSL are set up for you automatically.
Buy a domain with IONOS
Buy a new domain through IONOS. DNS and SSL are set up for you automatically.
Connect an external domain
Already own a domain? Point it to Base44 by updating your DNS records.
Setting up 301 redirects
A 301 redirect permanently sends visitors from an old address to a new one. Old links keep working, and search engines move your existing ranking over to the new address. For example, if you rename your/pricing page to /plans, a redirect sends anyone who opens the old /pricing link straight to /plans instead of a missing page.
Base44 supports 2 types of 301 redirect:
- Path-level redirect: Sends one page on your app to another, such as
/old-pricingto/pricing. - Whole-domain redirect: Sends all traffic from one connected domain to another domain on the same app.
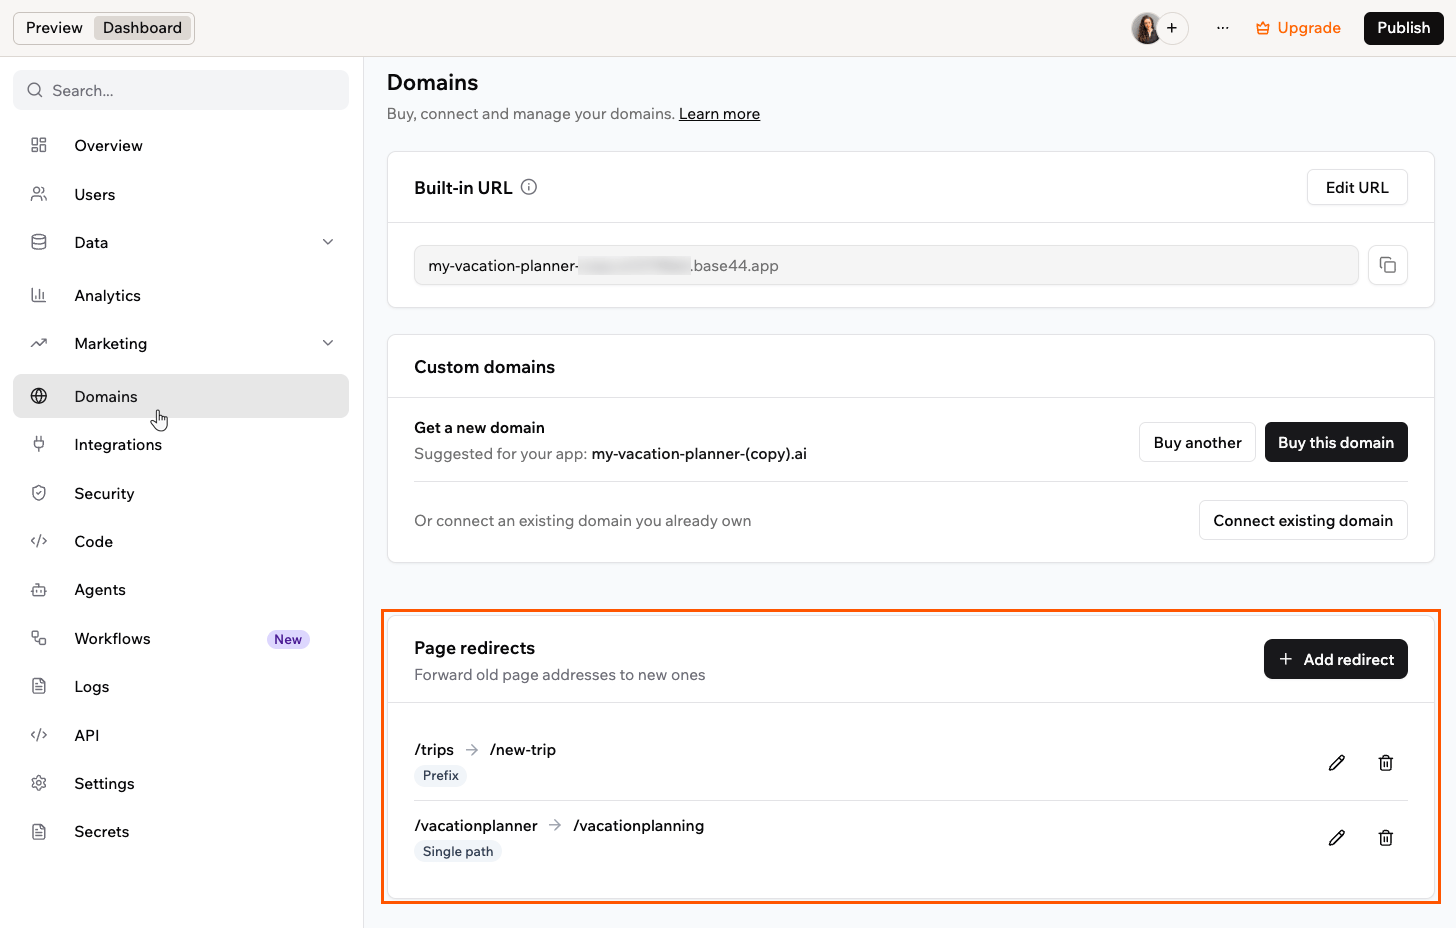
Managing page redirects in the Domains dashboard
Redirecting one page to another
Path-level redirects send visitors from one page on your app to another. A path is the part of a web address that comes after your domain, such as/pricing, and usually points to a specific page. Use these redirects when you rename or move a page and want the old links to keep working.
Path redirect rules:
- You can add up to 50 redirects per app.
- Source and target paths must be different and both start with
/. - The target is a path within your app. You can’t redirect to an external website.
- Prefix redirects can’t start at the root (
/). - You can’t redirect sign-in paths (such as login and password reset) or reserved system paths such as
/sitemap.xml,/robots.txt, and/favicon.ico.
- Click Dashboard in your app editor.
- Click Domains.
- In the Page redirects section, click Add redirect.
- In Source path, enter the old path, starting with
/. For example,/old-page. - In Target path, enter the new path, starting with
/. For example,/new-page. - Under Match type, choose how the redirect matches:
- Single path: Redirects only the exact source path.
- Prefix: Redirects the source path and everything under it, keeping the rest of the address.
- Click Save redirect.
Redirecting a whole domain
A whole-domain redirect sends all traffic from one connected domain to another domain on the same app. The full path and query string are preserved, soold-domain.com/pricing goes to new-domain.com/pricing. Use it when you move your app to a new domain and want the old one to keep sending visitors to the right place.
A whole-domain redirect needs at least 2 verified domains on the same app: the one you redirect from and the one you send traffic to. The Redirect domain option appears only once your app has another verified domain to redirect to.
- Click Dashboard in your app editor.
- Click Domains.
- In the Custom domains section, find the domain you want to redirect.
- Click the More Actions icon next to it and select Redirect domain.
- Under Target domain, select the domain you want to send traffic to.
- Click Save redirect.
Sending emails from your domain
Once your custom domain is connected, you can send your app’s emails from it, such assupport@your-domain.com, so they match your brand. See Sending emails from a custom domain to set it up.
FAQs
Click a question below to learn more about domains.How do I remove a domain?
How do I remove a domain?
To completely remove a domain from an app and free it up for use elsewhere:
- Click Dashboard in your app editor.
- Click Domains.
- Click the custom domain you want to remove.
- Click Unlink Domain to disconnect it from the app.
- Click the red Delete icon (trash) to remove the domain from the app’s domain list.
Can I connect multiple domains to one Base44 app?
Can I connect multiple domains to one Base44 app?
Yes. You can connect up to 150 domains and subdomains to a single app, and up to 350 domains in total across your account.
How long do redirects take to take effect?
How long do redirects take to take effect?
Redirects usually start working within a few minutes of saving them.
Can I chain redirects?
Can I chain redirects?
No. Redirects are one hop only. If you redirect one domain to a second domain, you can’t then redirect that second domain somewhere else in a chain, and loops are not allowed.