The testing agent in the app editor
Creating your tests
You can let AI generate tests from your app’s context and chat history, or write them yourself.
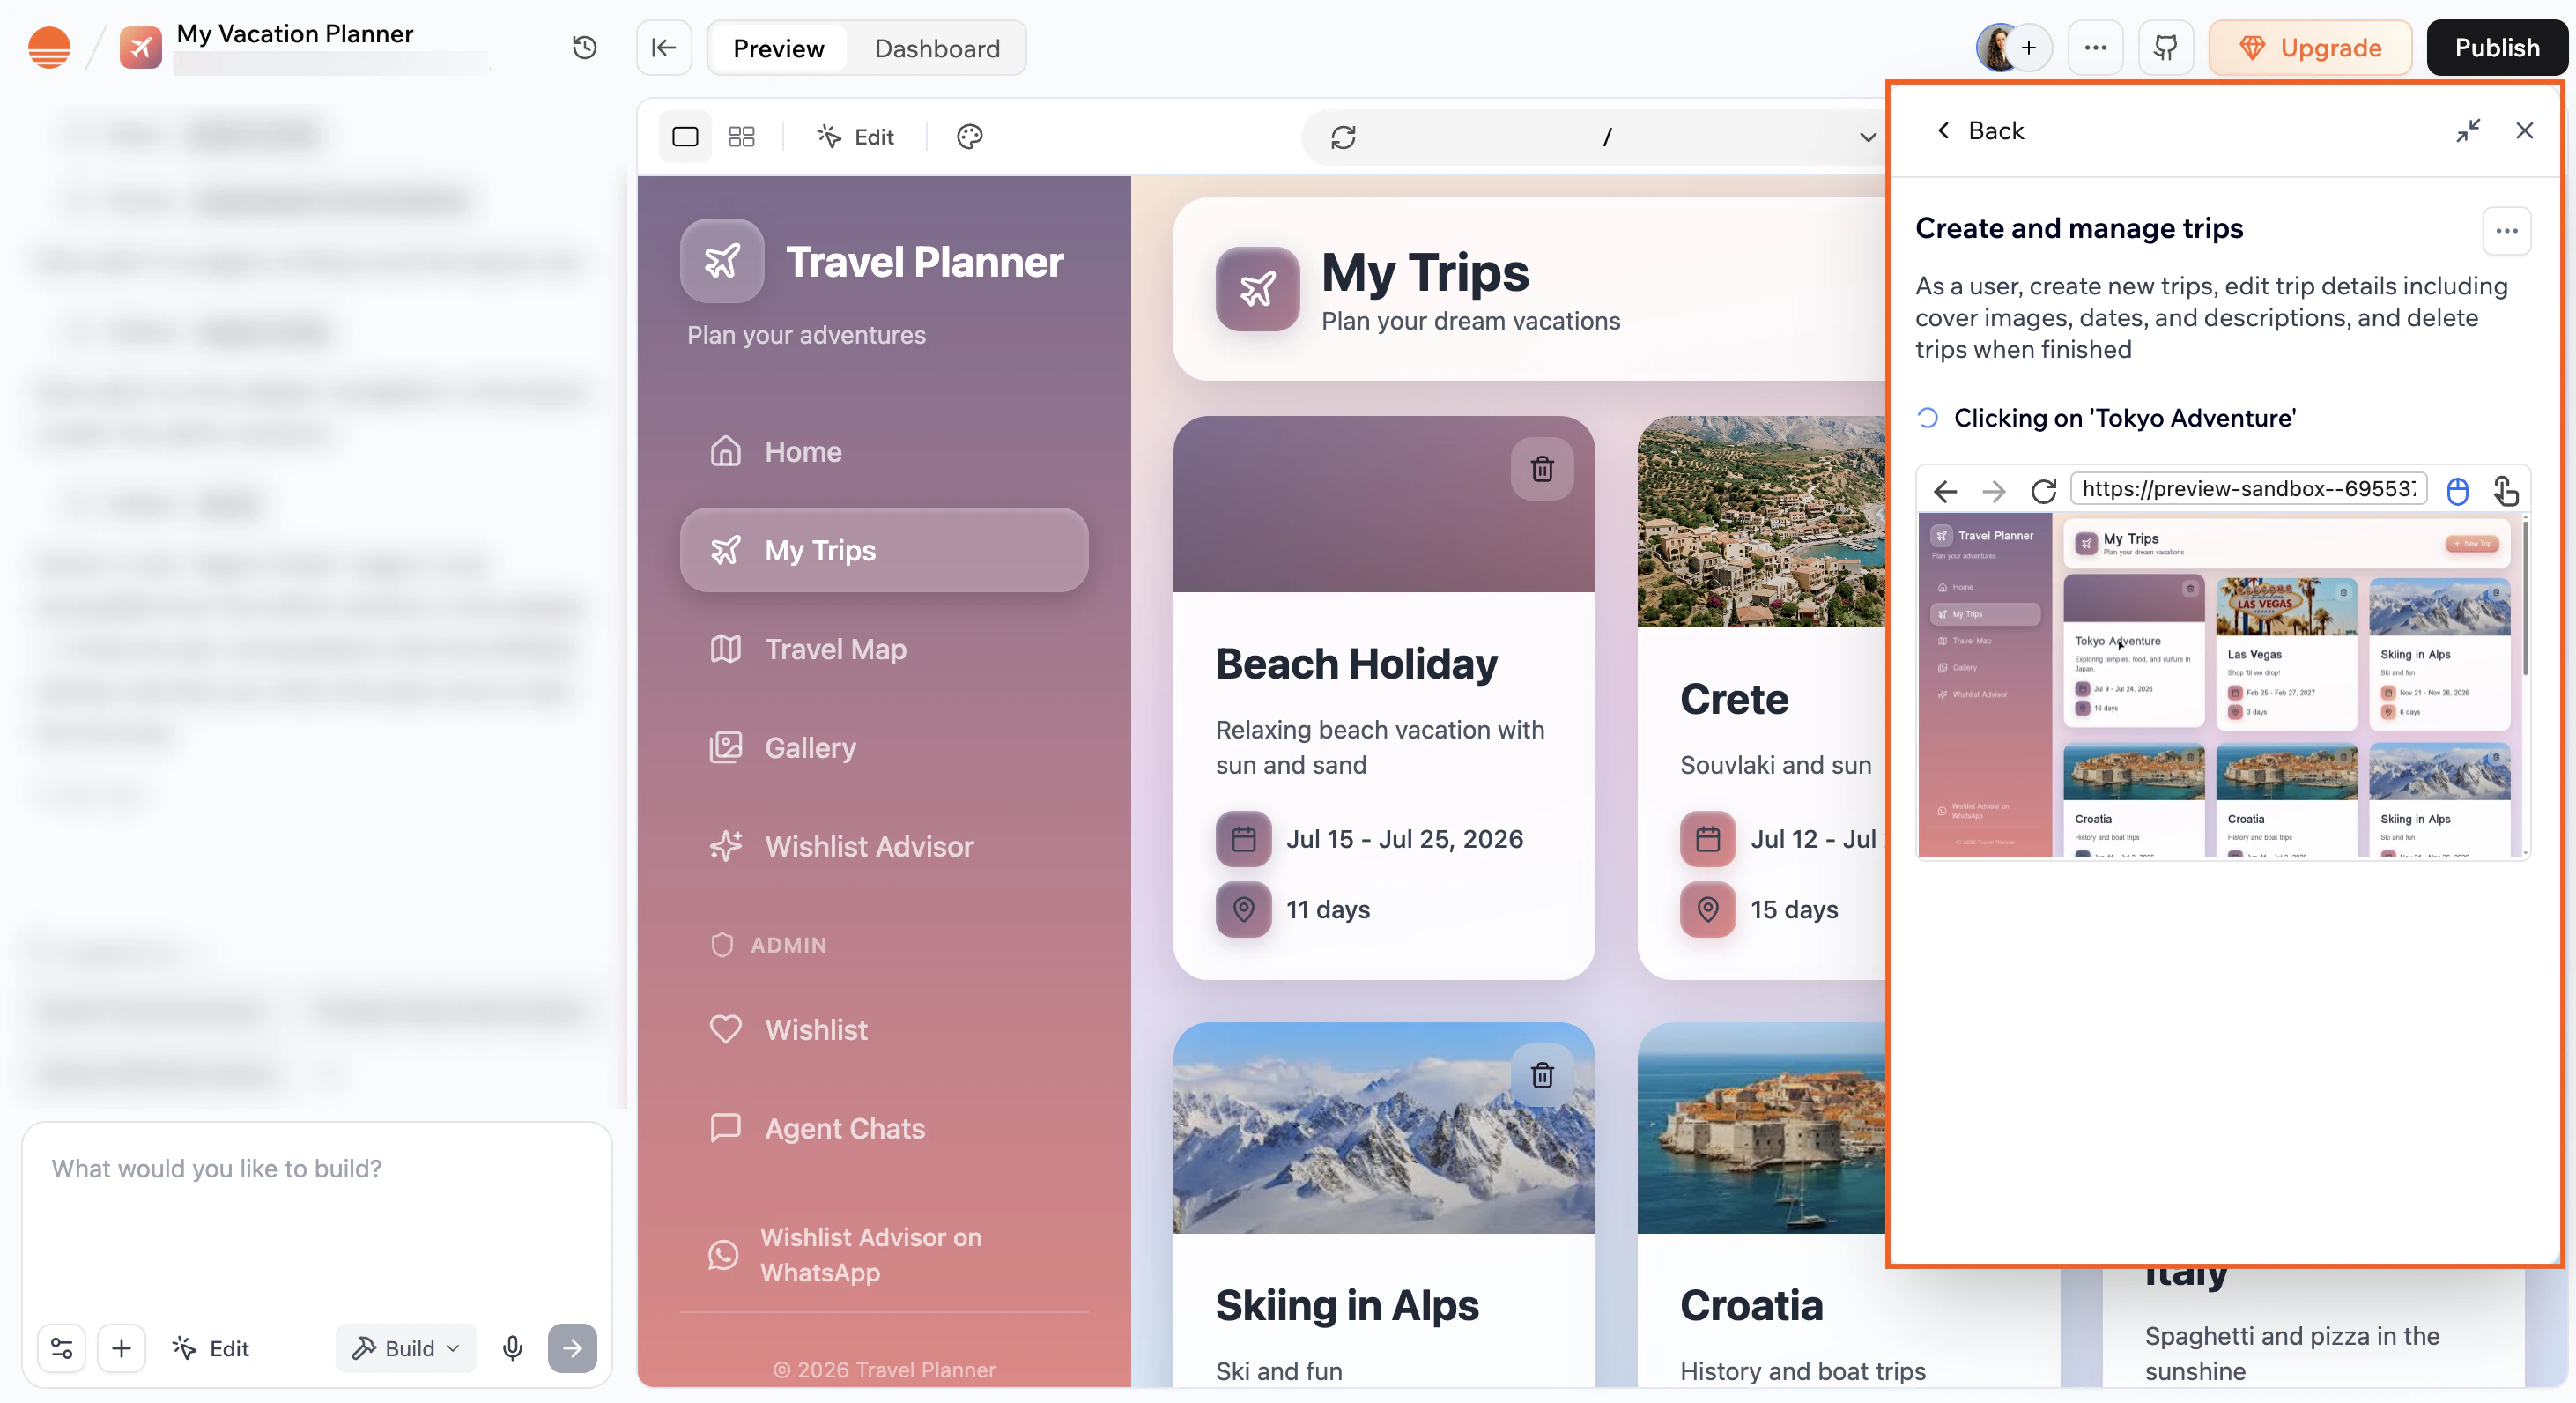
The testing agent panel showing your tests
Generating tests with AI
Let AI suggest tests based on your app’s flows and chat history, then pick the ones you want to add.- Click the More Actions icon at the top of the app editor.
- Select Testing Agent.
- Click Generate tests with AI if you have no tests yet, or click Add Test and select Generate with AI if you already have tests.
- Review the suggested tests, uncheck any you don’t want, and click Add Tests to confirm.
Generating tests with AI uses credits, even if you don’t add the suggested tests.
Adding a test manually
Write your own test by giving it a name and describing the flow you want the agent to run.- Click the More Actions icon at the top of the app editor.
- Select Testing Agent.
- Click Add test manually if you have no tests yet, or click Add Test and select Add manually if you already have tests.
- Enter a Test name.
- Enter a Prompt scenario describing the flow you want to test (for example, “Browse products, add one to cart, and complete checkout”).
- Click Save.
Running your tests
All your tests are listed in the testing agent panel. Each test shows its current status and the last time it ran. To run one or more tests:- Click the More Actions icon at the top of the app editor.
- Select Testing Agent.
- Select the checkboxes next to the tests you want to run.
- Click Run test at the bottom of the panel.

Selecting and running tests
Notes:
- Running tests uses credits. The amount depends on how long and complex the test is. You can see the credits used for each run in the test results.
- If you run out of credits while a test is running, the test is automatically paused. To continue testing, upgrade your plan.
Viewing test results
Once a test finishes, click the test card to open its results. From there you have a few options: See the issues Click the Issues tab to view any problems the agent found, labelled as Critical or Warning. Select the ones you want to fix using the checkboxes, then click Fix with AI. This automatically sends a prompt to the AI chat so the AI can get straight to work on a fix. See what the agent did Click the Activity tab to see every step the agent took in the browser, in order. Click the arrow on any step to expand it and see more detail about what the agent did at that point. Re-run the test After applying a fix, click Test Again at the bottom of the panel to re-run the test and confirm the issue is resolved.If a test was paused because you ran out of credits, you’ll see a Test paused status on the test card.
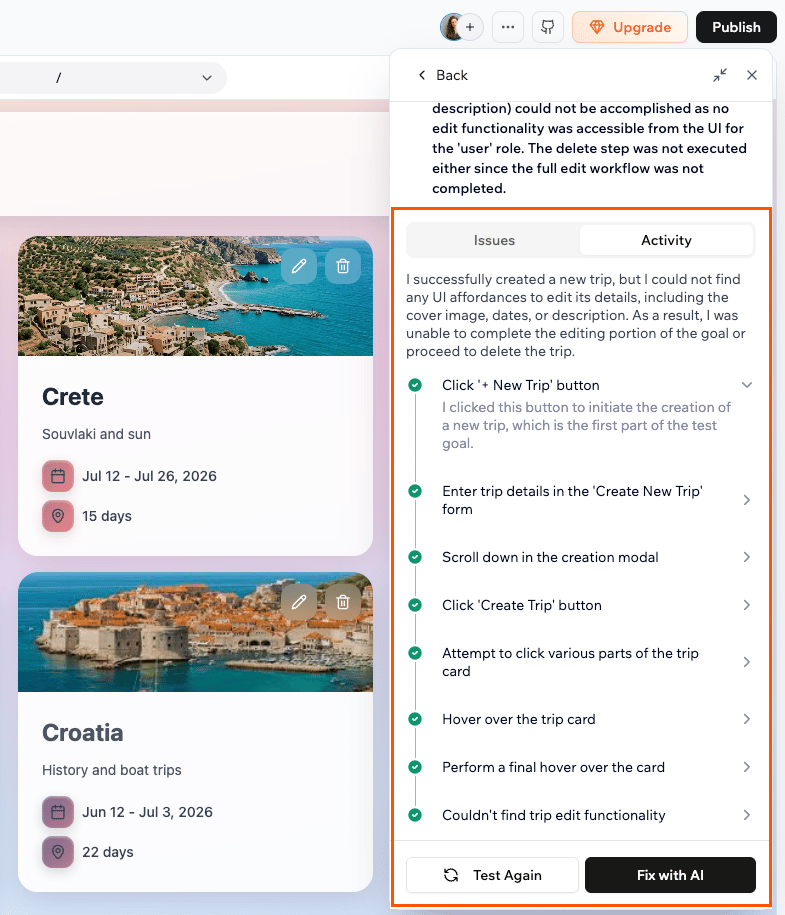
Test results showing Issues and Activity tabs
Managing your tests
You can edit or delete a test from inside its detail view. To edit or delete a test:- Click the More Actions icon at the top of the app editor.
- Select Testing Agent.
- Click the test card to open it.
- Click the More Actions icon at the top right of the detail view.
- Do one of the following:
- Edit: Update the test name or scenario.
- Delete: Remove the test and all its results permanently.
Use the sort icon at the top of the panel to change how your tests are ordered. You can sort by alphabetical (A to Z), date created (newest to oldest), last tested (most recently run first), or priority (tests that need attention shown first).
FAQs
Click a question below to learn more about the testing agent.Which plan do I need to use the testing agent?
Which plan do I need to use the testing agent?
The testing agent is available on all plans, including the free plan.
What is the difference between the testing agent and test data?
What is the difference between the testing agent and test data?
These are 2 separate features. The testing agent runs automated browser tests that simulate real user interactions, so you can check that your key flows work correctly.Test data is a separate database environment that lets you add and modify records without affecting your live production data. Read more about testing your app with test data.
Does running a test affect my live app data?
Does running a test affect my live app data?
No. The testing agent runs against a separate environment, so your production data is never affected when you run tests.
Why does my test show "App changed since last run"?
Why does my test show "App changed since last run"?
This status appears when your app’s code has changed since the test last ran. Re-run the test to get an up-to-date result.
Can the testing agent log in to my app?
Can the testing agent log in to my app?
Yes. The testing agent signs in to your app automatically before each run, so any flow that requires a logged-in user will work. What it can’t do is test the login process itself. Flows that involve filling in a login form, entering an OTP code, or clicking an email verification link are not supported yet.
How many credits does a test run use?
How many credits does a test run use?
Each test run uses around 1 to 4 credits, depending on how complex the flow is. Simpler tests use fewer credits, while longer multi-step flows use more. Generating tests with AI uses credits too, at roughly half the rate of a test run.
What happens if I run out of credits?
What happens if I run out of credits?
If you run out of credits mid-test, the test is automatically paused. To continue testing, upgrade your plan directly from the testing agent panel. Re-running a paused test starts fresh from the beginning.
Does the testing agent test as a new user?
Does the testing agent test as a new user?
Yes. Each time you run a test, the agent starts fresh, just like a brand new visitor to your app, with no existing data or history. This means every test gives you a clean, consistent result no matter how many times you run it, and nothing the agent does during the test affects your real users.
Can I run tests on a schedule?
Can I run tests on a schedule?
Not yet. Scheduled and automated test runs are planned for a future update.
Why is my test taking a long time?
Why is my test taking a long time?
The testing agent opens a real browser session and simulates user interactions step by step, so duration depends on how complex the flow is. Tests on simple flows are faster, while multi-step flows with more actions take longer.