Viewing your members
View everyone in your workspace from Settings → Members. The Members page lists each member with their role, credit usage, and activity, and summary cards give you a quick overview.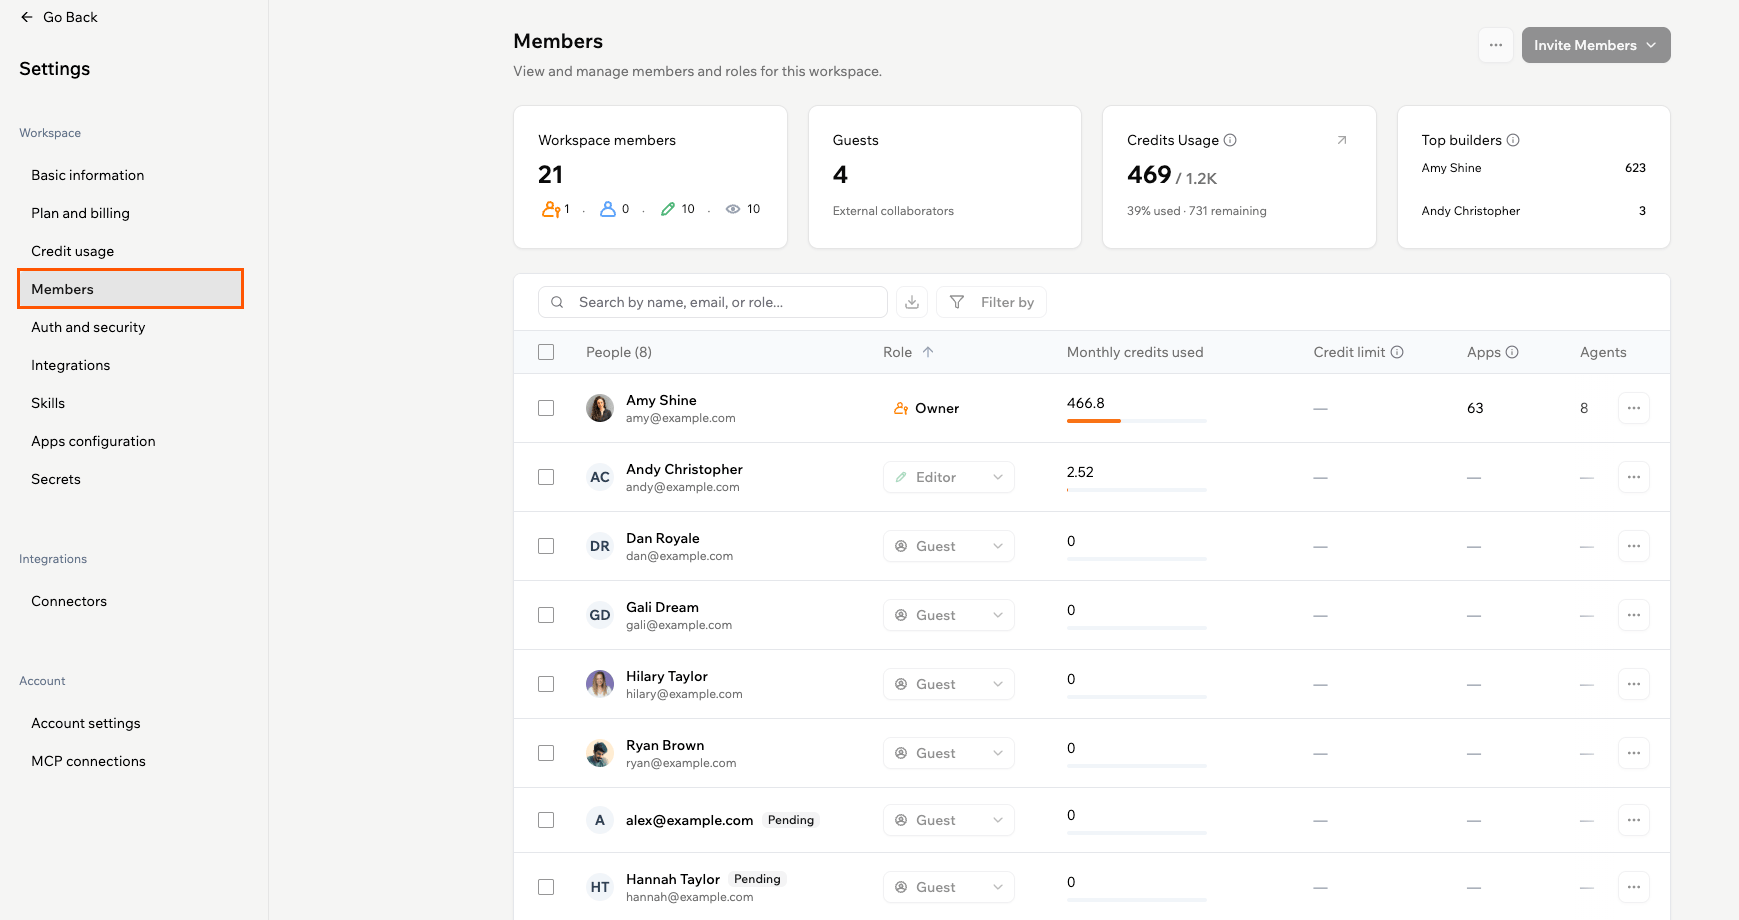
The Members page
- Members: Total number of workspace members, with a breakdown by role.
- Guests: Number of guest collaborators invited to specific apps.
- Credits usage: Credits the workspace has used in the current billing cycle, and how many remain. Click the arrow to open the full Credit usage page.
- Top builders: The members who used the most credits this billing cycle. Visible to workspace owners and admins.
The Credit limit column in the members table is only available on Enterprise workspaces. See Managing enterprise workspace members for details.
- People: The member’s name and email, with a count of everyone in the list.
- Role: The member’s workspace role. Click it to assign a different role.
- Monthly credits used: Credits the member has used in the current billing cycle.
- Credit limit: The member’s monthly credit cap. Shown on Enterprise workspaces only.
- Apps: Number of apps the member owns in the workspace.
- Agents: Number of agents the member owns in the workspace.
- Last active: When the member was last active in the workspace.
Inviting members to your workspace
Bring people into your workspace to collaborate and work together on building your apps. You can invite members by email, in bulk via CSV, or by sharing an invite link. To invite someone to a single app without giving them full workspace access, see Inviting collaborators to your app.Sending an individual invite
Invite a teammate directly by entering their email address and assigning them a role. To send an individual invite:- Click your workspace name at the top left of your account.
- Click Settings.
- Click Members under Workspace.
- Click Invite Members and select Invite by email.
- Enter their details and choose a role: Admin, Editor, or Viewer.
- Click Send invite.
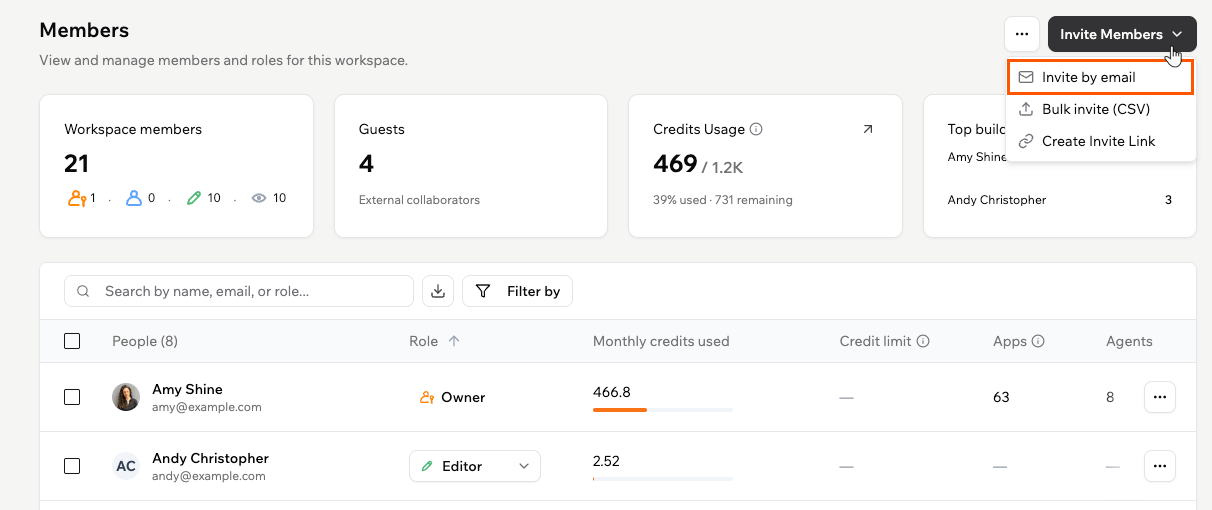
Inviting a member by email
Inviting members in bulk
Save time by uploading a CSV file to invite multiple teammates at once. To invite members in bulk:- Click your workspace name at the top left of your account.
- Click Settings.
- Click Members under Workspace.
- Click Invite Members and select Bulk invite (CSV).
- (Optional) Click Download Template to get a sample CSV to fill out.
- Prepare your CSV with the following columns:
- email (required)
- role (optional)
- Drag and drop your CSV file, or click Choose file.
- Click Send Invitations.
If role is empty, the default role is Viewer.
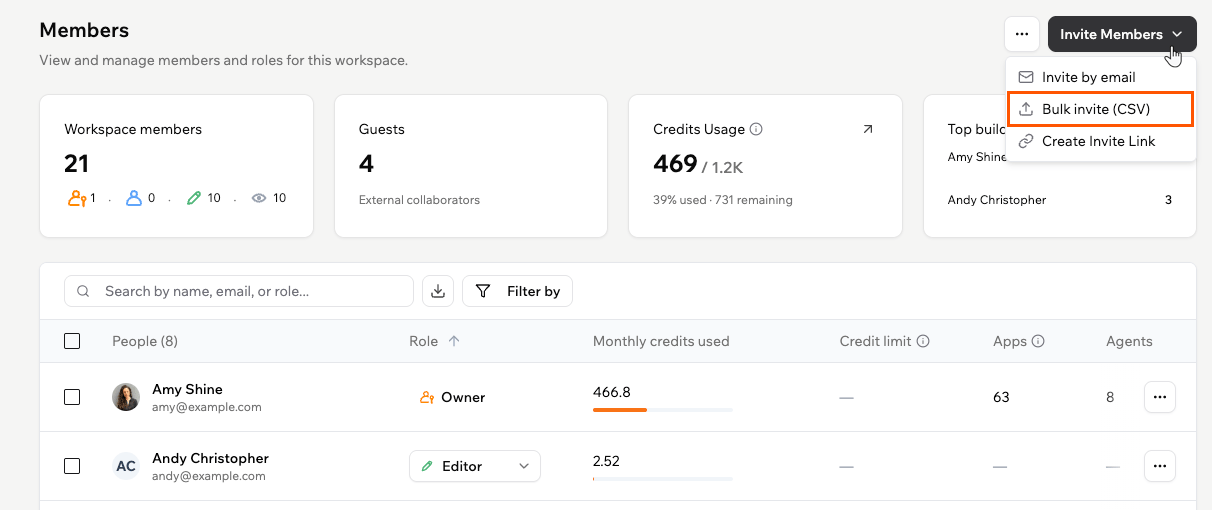
Inviting members in bulk with a CSV
Creating an invite link
Generate a shareable link that anyone can use to join your workspace without needing an individual email invite. Only workspace owners and admins can create and manage invite links. To create an invite link:- Click your workspace name at the top left of your account.
- Click Settings.
- Click Members under Workspace.
- Click the More Actions icon and select Manage Invite Links.
- Click Create Invite Link.
- Choose a Role for people who join using this link: Viewer or Editor.
- Set a Maximum uses limit (default: 10 uses).
- (Optional) Expand Advanced options to set an expiry date, add a link name, or restrict sign-ups to specific email domains.
- Click Create, then copy the link and share it.
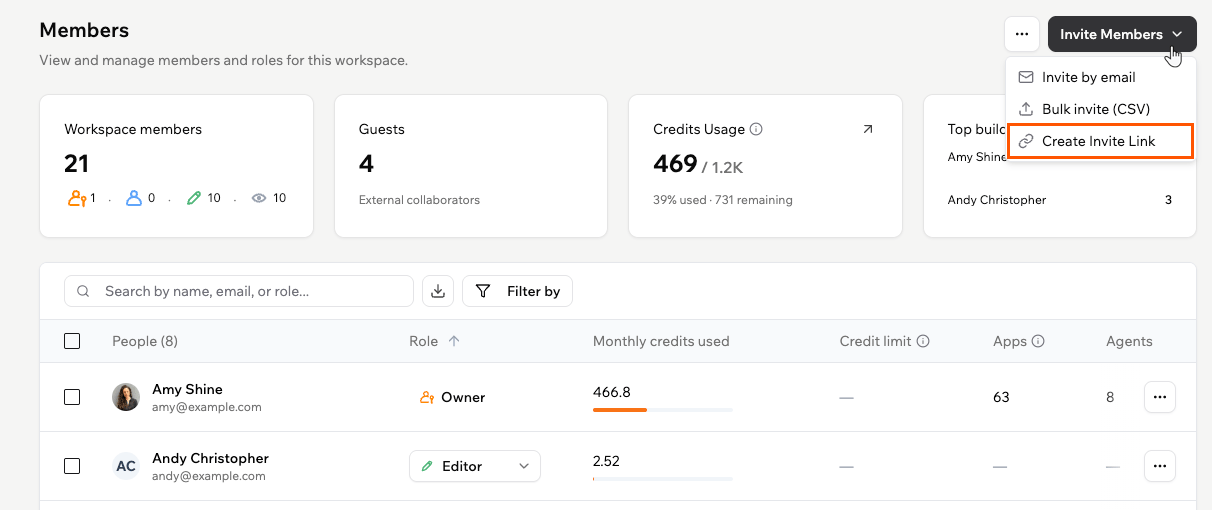
Creating an invite link
Controlling guest invitations
The External Collaborators setting controls who in your workspace can invite people from outside the workspace to collaborate on apps. When enabled, only workspace owners and admins can invite external guests. When disabled, any workspace member can send guest invitations.Only workspace owners and admins can change this setting.
- Click your workspace name at the top left.
- Click Settings.
- Click Auth and security.
- Toggle External Collaborators on or off.

The External Collaborators toggle in Auth and security settings
Managing your members
Manage members directly from the Members page. Change roles, set credit limits, remove people, or act on several members at once.Roles and their limits
Each role grants a different level of access. Expand a role to see what it can do and the rules that apply when you assign it. For how roles, plans, and credits fit together, see About workspaces.You cannot change your own role, even as an owner or admin. Ask another workspace owner or admin to update it for you.
Owner
Owner
- Has full control over the whole workspace, including billing, members, settings, apps, and credits.
- Each workspace has one owner.
Admin
Admin
- Manages members and workspace settings.
- Does not handle billing.
- Available on Enterprise workspaces only. On other plans, the Admin option is locked in the role dropdown with an upgrade prompt.
Editor
Editor
- Creates and edits the apps they are invited to.
- Invited as a collaborator on each app individually, so they do not automatically see every app in the workspace.
Viewer
Viewer
- Views only the specific apps they are invited to.
- Cannot edit apps, use the AI chat, or access most of the app dashboard.
- Does not consume credits, so you cannot set a credit limit for them.
Guest
Guest
- A collaborator invited to specific apps, not the whole workspace.
- Can be promoted to Editor or Viewer from the Role column, but not directly to Admin.
Changing a member’s role
Change a member’s role at any time from the Members page. To change a member’s role:- Click your workspace name at the top left of your account.
- Click Settings.
- Click Members under Workspace.
- Find the member you want to update.
- Click their current role and select a new one.
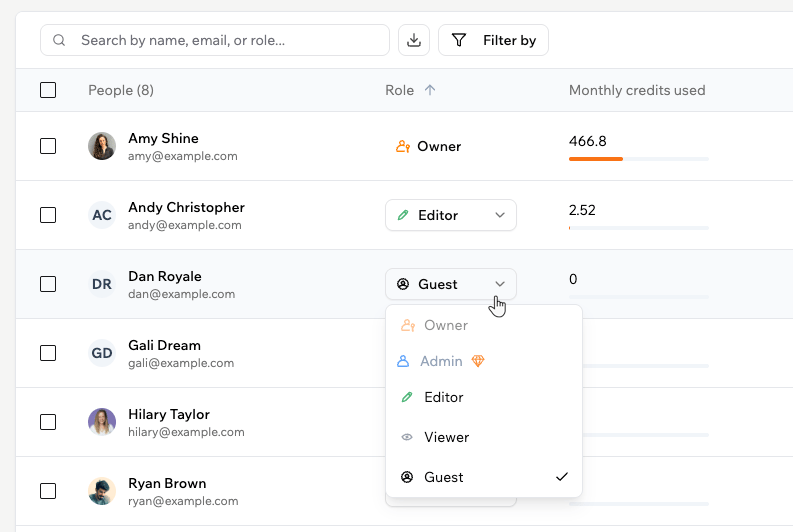
Changing a member's role
Removing a member
Remove a member to revoke their access to the workspace and all its apps. To remove a member:- Click your workspace name at the top left of your account.
- Click Settings.
- Click Members under Workspace.
- Find the member you want to remove.
- Click the More Actions icon next to their name.
- Click Remove member and confirm.
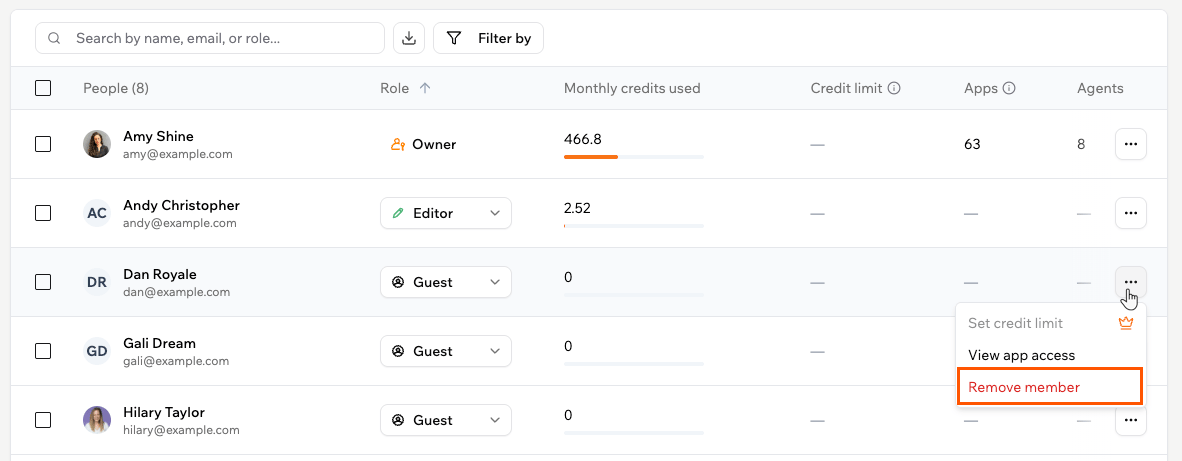
Removing a member
Selecting multiple members
Select several members at once to update them together instead of one at a time, up to 200 at once. Use the checkboxes in the first column to select individual members, or the checkbox in the header row to select everyone in the list. When you select one or more members, a toolbar appears above the table with the actions you can apply to your selection:- Change role: Update the role for all selected members at once.
- Remove from workspace: Remove the selected members and revoke their access to all apps.
- Export: Click the download icon and choose Only selected to download a CSV of the selected members.
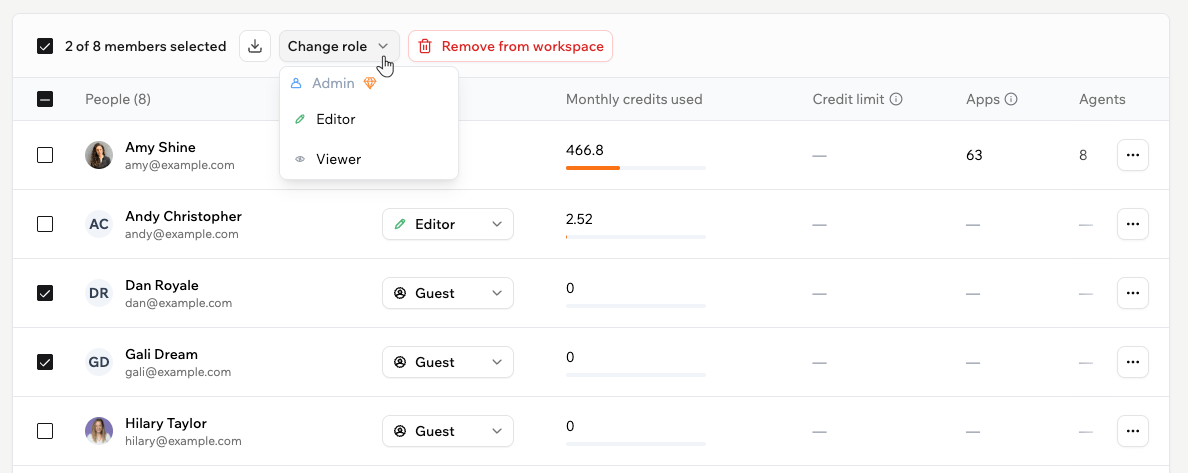
Selecting multiple members for bulk actions
On Enterprise workspaces, the toolbar also includes Set credit limit, which sets a monthly credit cap for the selected members. Leave it empty to remove an existing limit. This action does not appear on non-Enterprise workspaces.
Exporting members
To export the member list, click the download icon next to the search box and choose what to export:- All people: Every member in the workspace.
- Current filter: Only the members that match the filters you have applied.
- Only selected: Only the members you selected with the checkboxes.
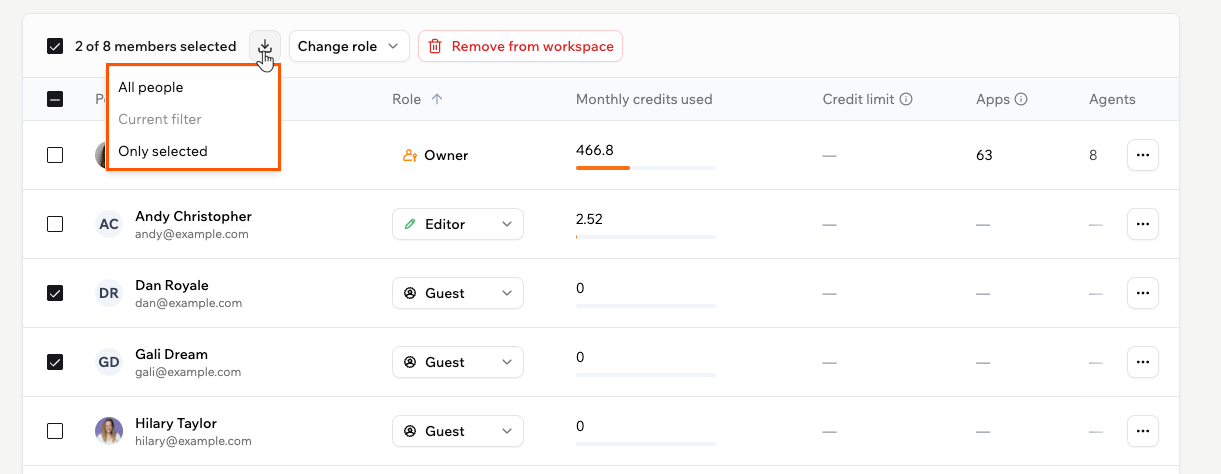
Exporting the member list
Managing guests
Guests are added to your workspace when you invite someone to a specific app who is not already a workspace member. You can manage guests from Settings → Members. A guest can open only the apps they were invited to. In workspace settings, they can view only Basic information and their own Account settings, and they cannot create apps, see other workspace apps, or invite collaborators. To promote a guest to a full member, click their role in the Role column and choose Editor or Viewer. To see which apps a guest can open, click the More Actions icon next to their name and select View app access.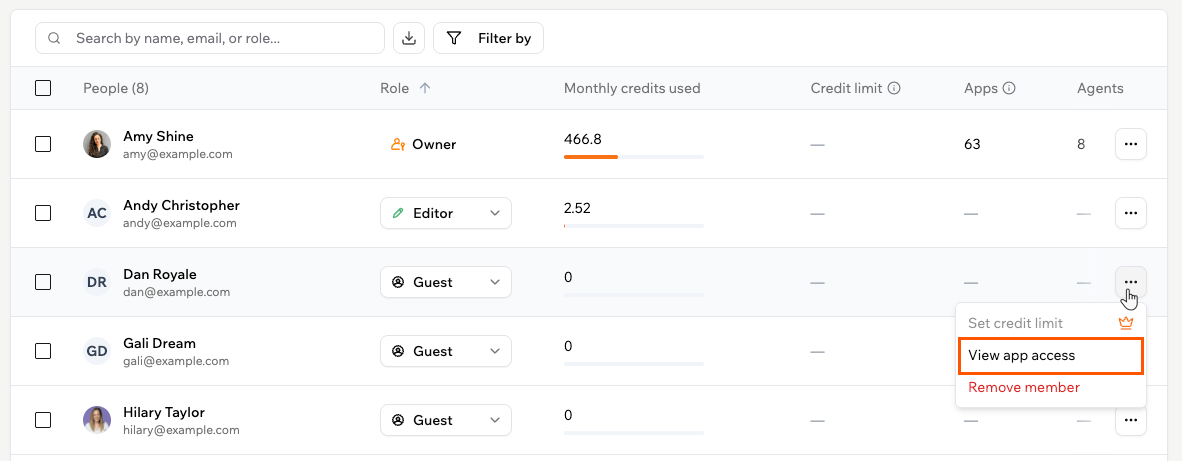
Viewing a guest's app access