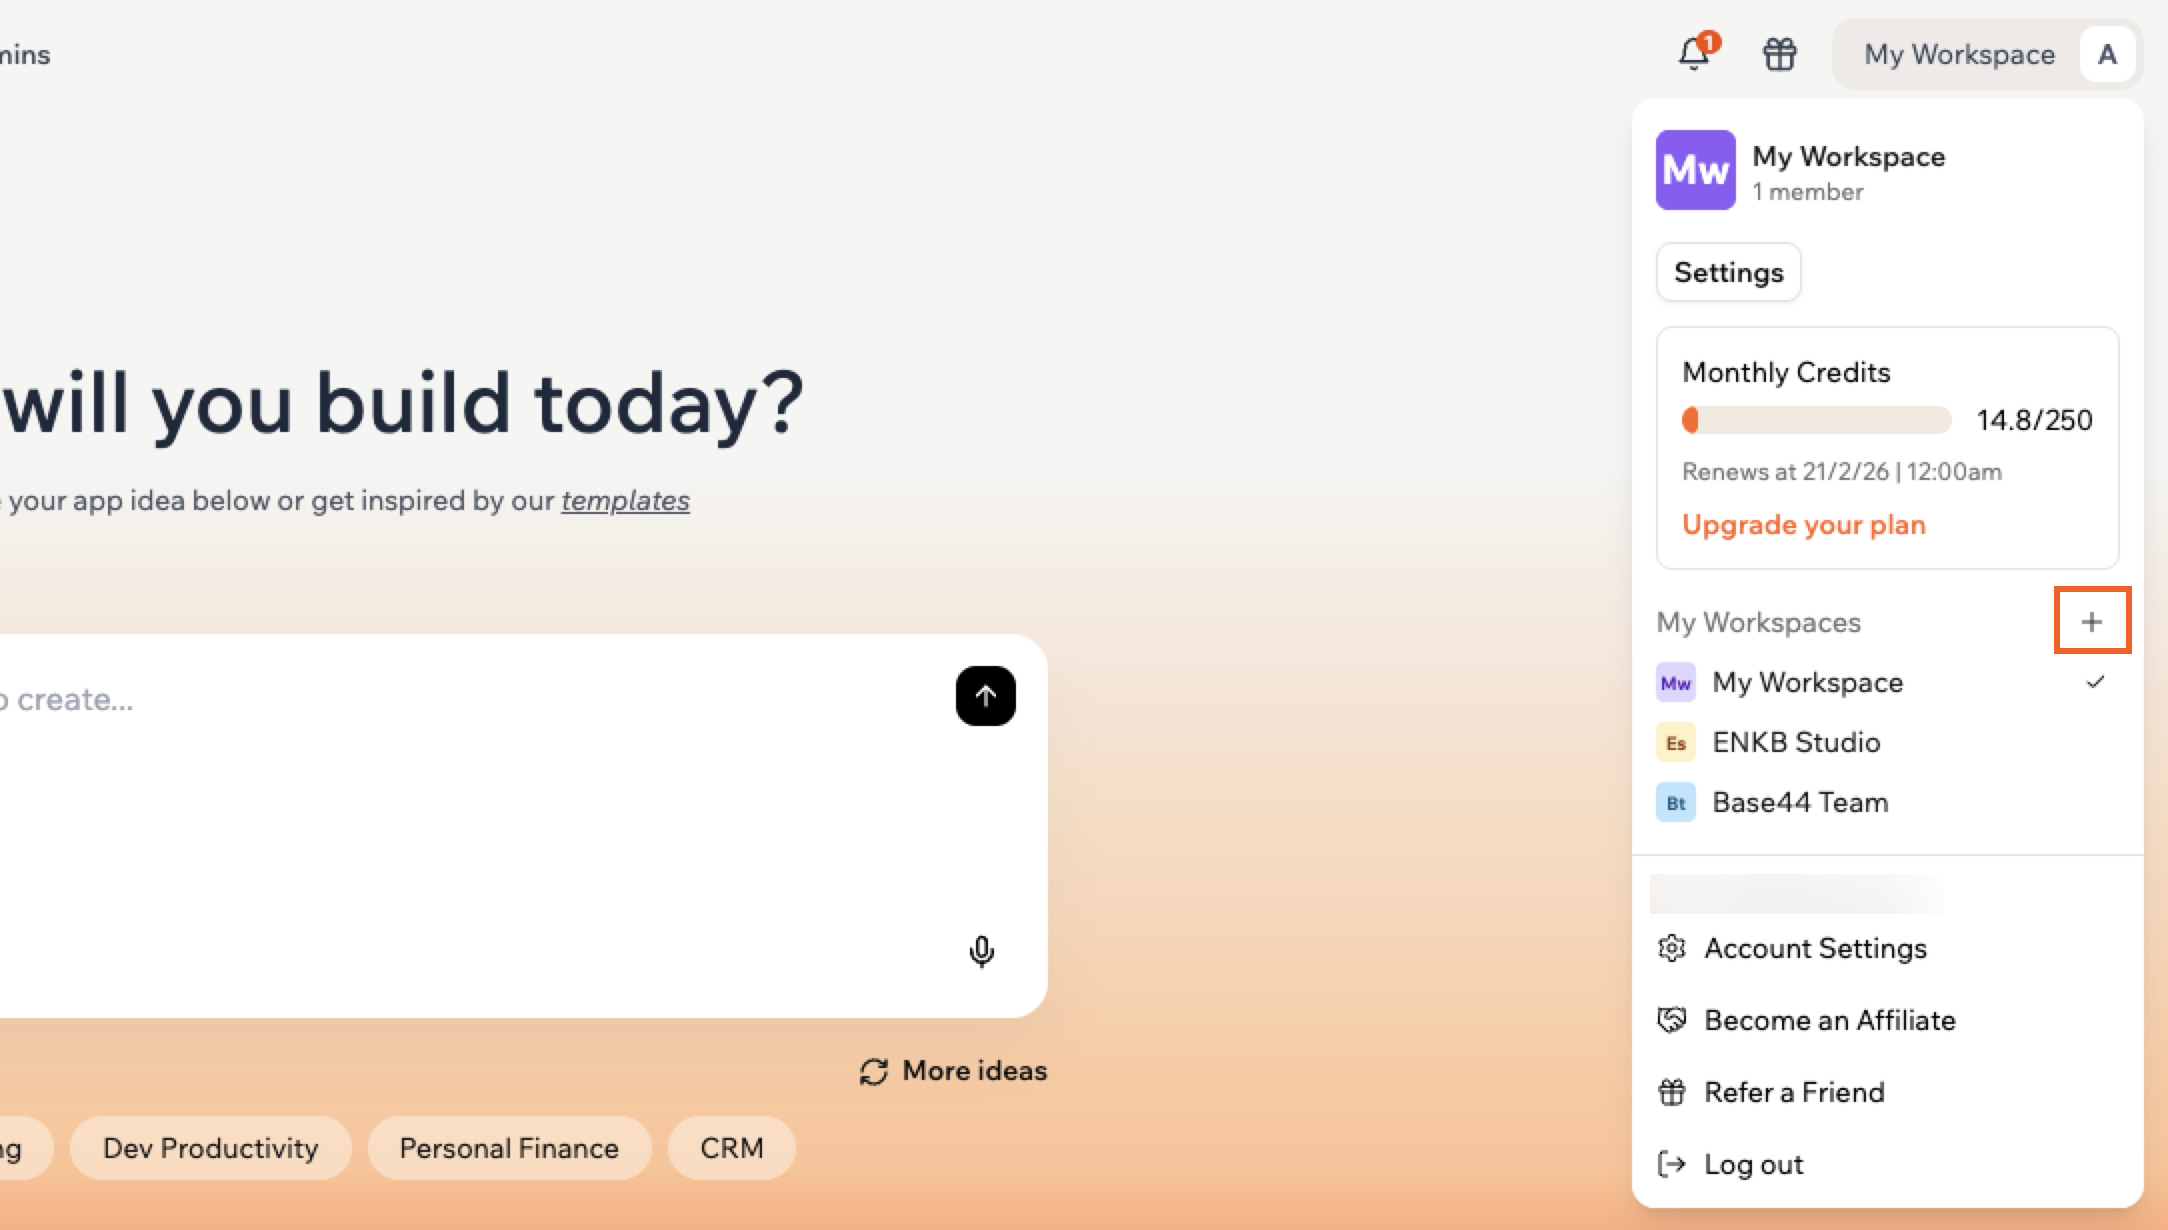
Creating a new workspace
When you create a new workspace, you are automatically the workspace owner and only you can manage it until you invite others.You can create up to 2 additional workspaces per Base44 account.
- Click your workspace name at the top left of your account.
- Click Create new workspace at the bottom of the dropdown.
- Enter a name for your workspace.
- Click Create Workspace.
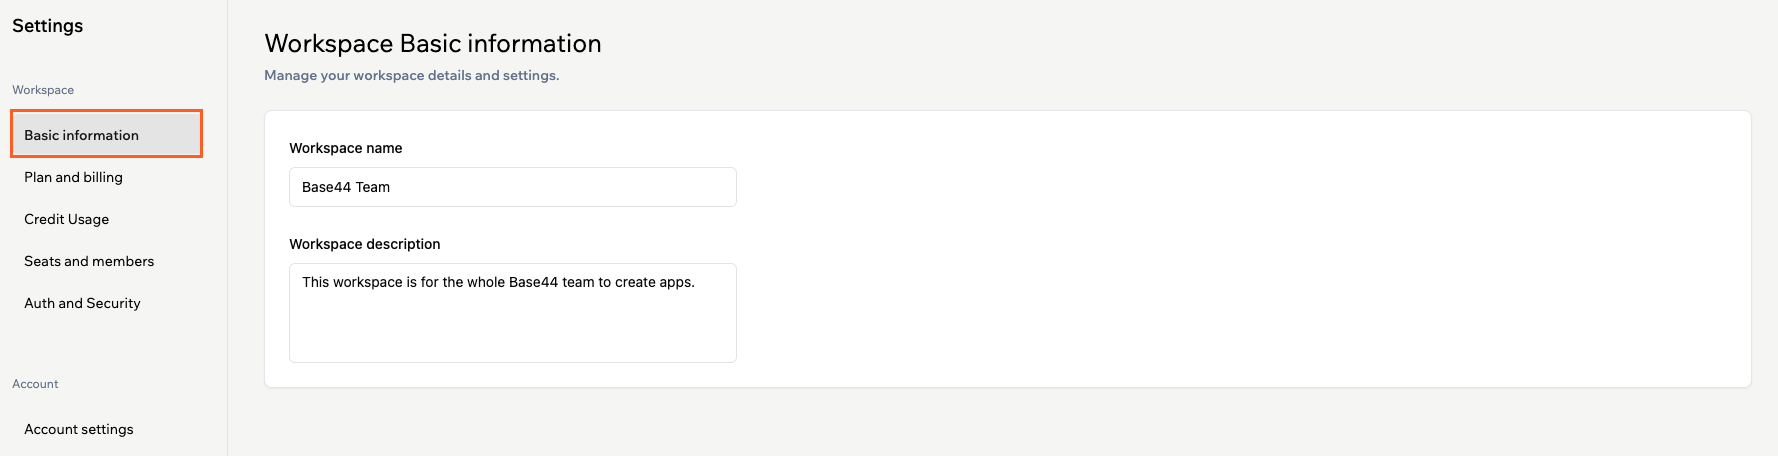
Setting up a workspace
As an owner or admin of a workspace, you can customize your workspace settings to match your team’s needs. From workspace settings, you can manage your workspace name and description, plan and billing, credit usage, members, and authentication and security. In enterprise workspaces, you can also configure app-level options from Apps configuration. To set up your workspace:- Click your workspace name at the top left of your account.
- Click Settings.
- Under Workspace, click Basic information.
- Update your settings, including your Workspace name and Workspace description.
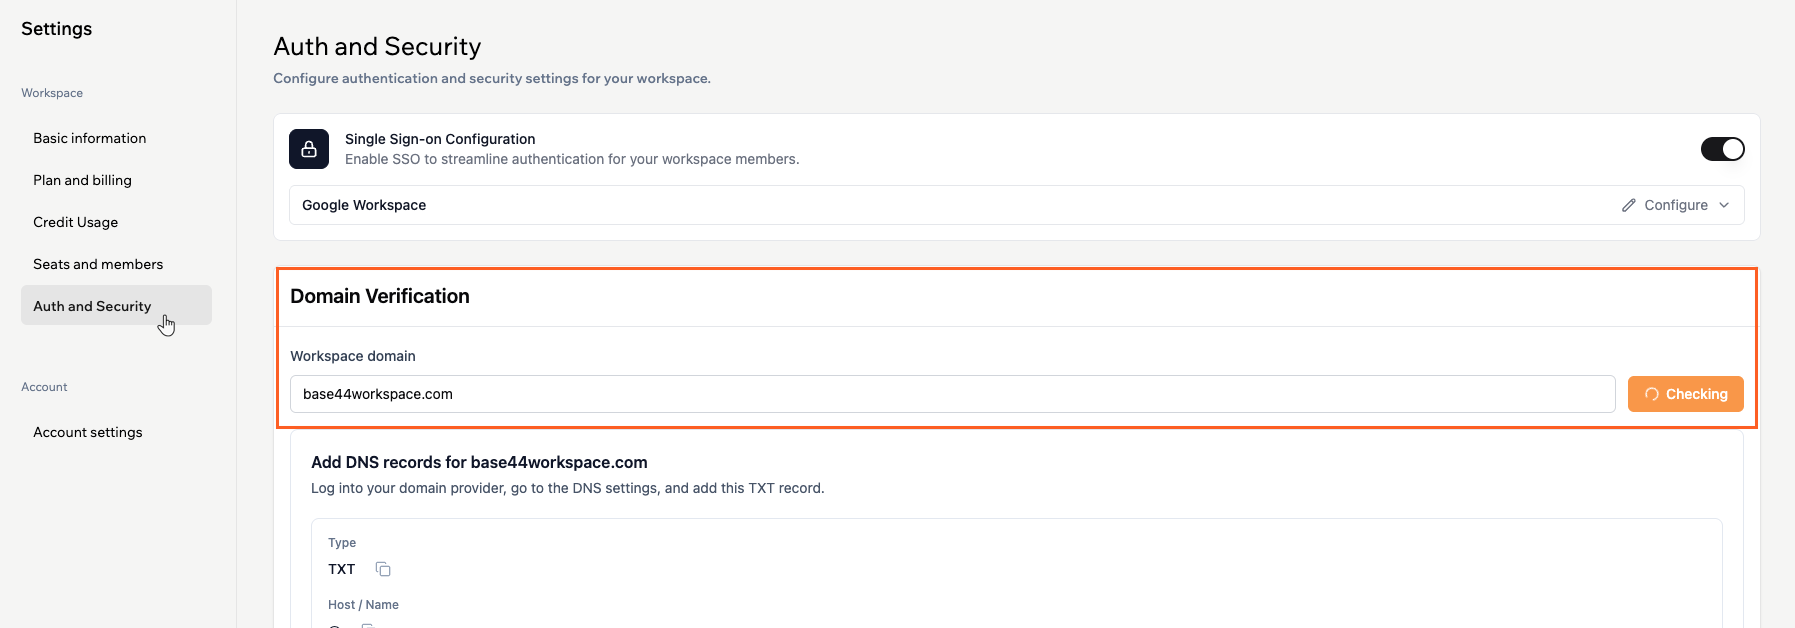
Setting up SSO for your workspace
Single Sign-On (SSO) lets everyone in your organization access Base44 with your company login instead of separate passwords. When you enable SSO for your workspace, your identity provider (such as Google or Microsoft) controls who can sign in, which helps keep access secure and onboarding simple. To connect your workspace to your identity provider and turn on SSO, follow the steps in Setting up SSO.Verifying your workspace domain
Verifying your workspace domain confirms that you control the domain you entered and lets you safely use it with SSO and email-based access rules in your workspace.DNS verification can take a few minutes, depending on your domain provider. Once your DNS records are updated, Base44 automatically verifies your domain. If verification does not complete after some time, click Reset in the Domain Verification section to generate a new TXT record and try again.
- Click your workspace name at the top left of your account.
- Click Settings.
- Click Auth and security under Workspace.
- Update the Workspace domain field.
- Click Check.
- In the Add DNS records for [your-domain] panel, copy the Host / Name and Value details for the TXT record.
- In a new tab, sign in to your domain provider.
- Go to the DNS settings for your domain.
- Add a new TXT record using the exact Host / Name and Value shown in your workspace.
- Save your DNS changes with your domain provider.
- Return to your workspace and wait while Base44 checks your DNS records. You see the status update under Domain Verification.
FAQs
Can I delete a workspace?
Can I delete a workspace?
No, you cannot delete a workspace directly. You can remove all members and apps from it, but the workspace itself stays active.However, if you delete your Base44 account, any workspaces you own are permanently deleted as part of that process. Learn more about deleting your account.
Can I leave a workspace?
Can I leave a workspace?
Yes. If you are a member of a workspace, you can leave it at any time from Basic information in your workspace settings. When you leave, you lose access to all associated apps, and ownership of any apps you own transfers to the workspace owner.If you are the only owner of a workspace, you cannot leave it.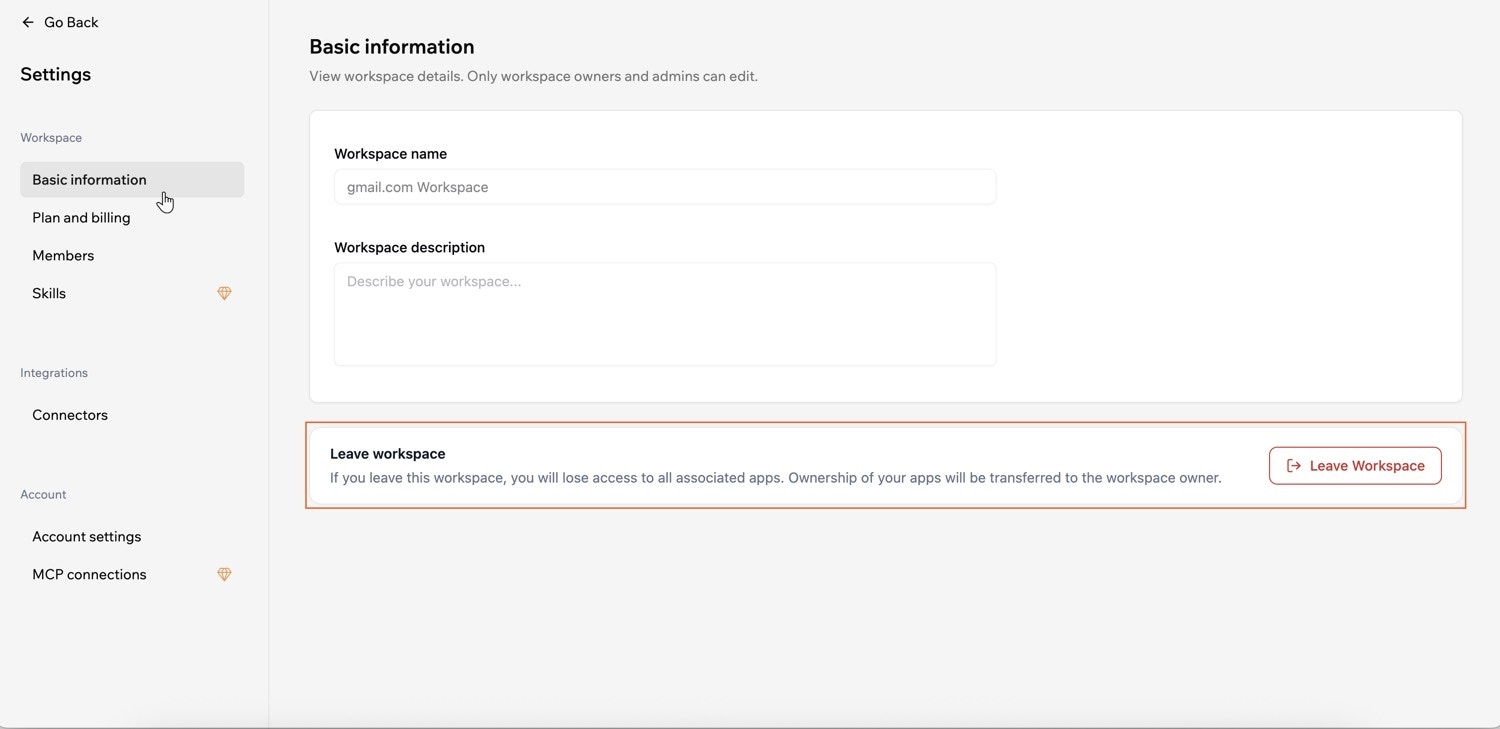
How do I rename a workspace?
How do I rename a workspace?
Only workspace owners and admins can rename a workspace.To rename a workspace: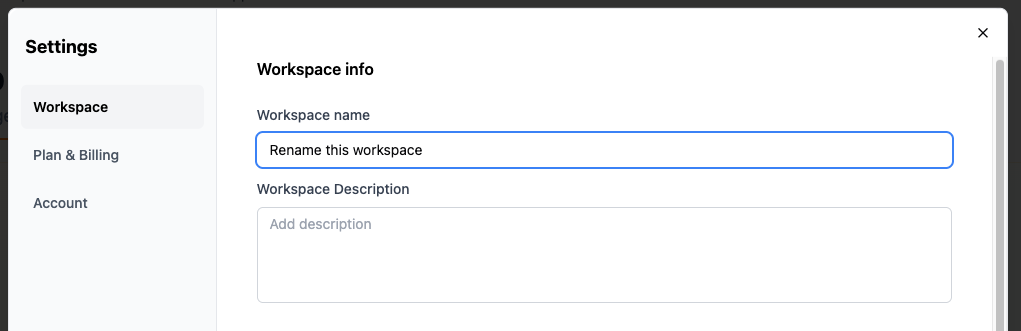
- Click your workspace name at the top left of your account.
- Click Settings.
- Under Workspace, click Basic information.
- Enter a new name under Workspace name.