base44.integrations.custom.call(), instead of setting up its own connection. This works for both internal APIs and partner APIs that your team depends on.
Understanding workspace integrations
A workspace integration is a shared connection from your workspace to an external or internal API, such as a CRM, support system or custom backend. You define it once in your workspace from an OpenAPI or Swagger specification, choose which operations are allowed, and any compatible app in that workspace can call those operations. This keeps configuration in one place and makes it easier to manage the external systems your team relies on. Workspace integrations are useful when you want to:- Use the same external or internal API across multiple apps in the same workspace.
- Keep sensitive details such as API keys and tokens in one secure place, managed as workspace secrets.
- Limit which endpoints are available so apps only call approved, spec-defined operations.
- Keep a clear separation from one-click OAuth connectors, as workspace integrations are workspace-managed and spec-driven.
- Make it clear which external systems your workspace relies on.
Creating an integration
Create a custom workspace integration when you want to expose a new external API to your apps and that API has an OpenAPI or Swagger specification. Base44 reads the specification, lets you choose the endpoints you want to expose, and creates a reusable integration for your workspace.Before you begin: Make sure you have access to a valid OpenAPI or Swagger specification for the API you want to use. You can either host it at a public URL or copy the JSON.
Step 1 | Add a new integration
- Click your workspace name at the top left of your account.
- Click Settings.
- Click Integrations.
- Click New Integration.
- Choose how you want to provide your API specification:
- From URL: Enter the public URL of your OpenAPI or Swagger file in the OpenAPI Specification URL field, for example
https://api.example.com/openapi.json. - Paste JSON: Paste the full JSON definition of your OpenAPI or Swagger specification into the editor.
- From URL: Enter the public URL of your OpenAPI or Swagger file in the OpenAPI Specification URL field, for example
- Click Continue.

Step 2 | Select endpoints to expose
Select up to 30 endpoints for your integration. To select endpoints:- Review the list of endpoints that Base44 discovers from your specification. You can use the search box to find specific paths or operations by method or path name.
- Select the checkboxes for the endpoints you want to expose to your workspace.
- Click Continue.

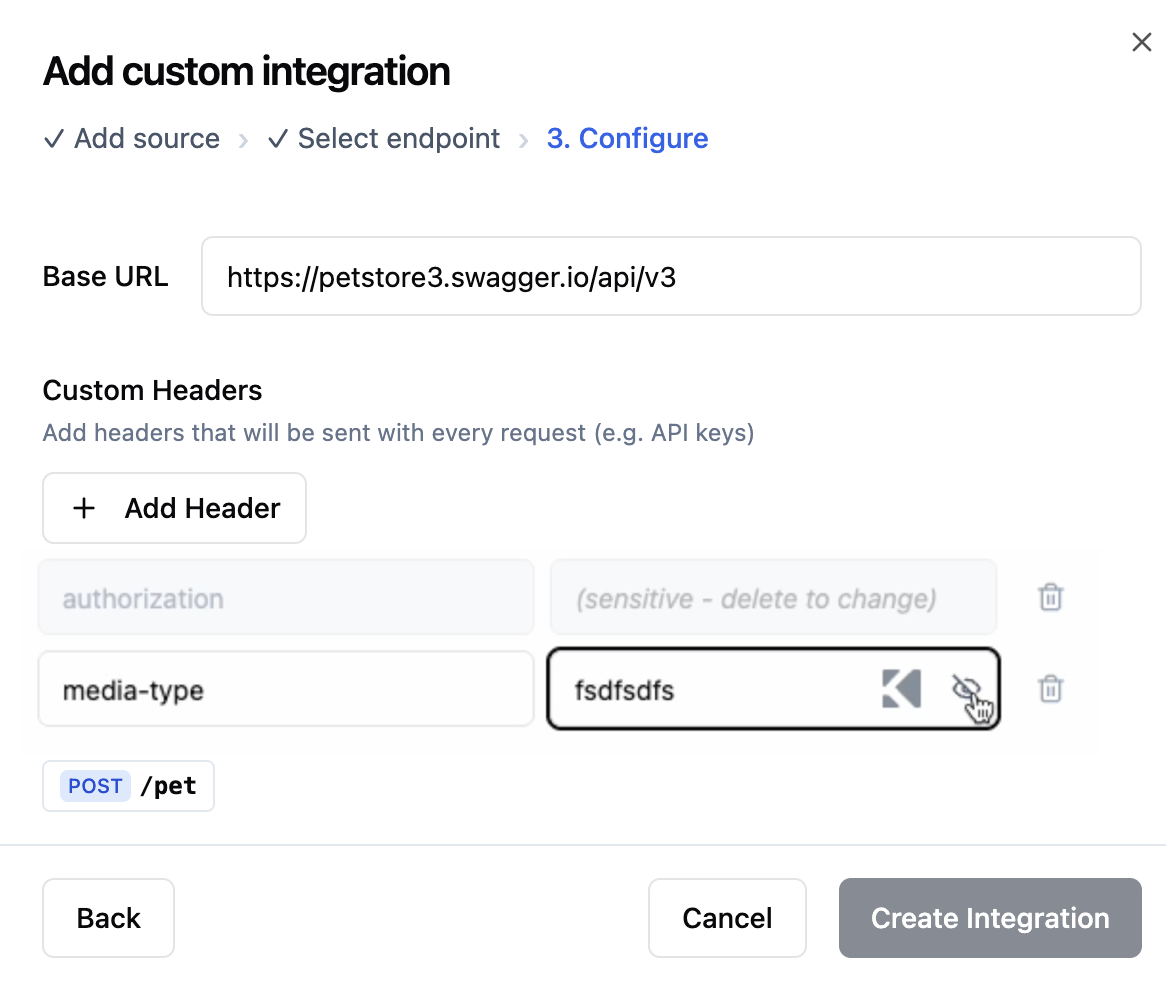
Step 3 | Configure your integration
Configure your integration details, set the base URL, and add any custom headers that your API needs. Sensitive header values stay protected. Common auth headers such asauthorization, x-api-key, api-key, x-auth-token, x-access-token, x-secret-key, bearer, secret, password and credential are always treated as secrets. Their values are stored as encrypted workspace secrets, never sent back to the browser, and show as “sensitive – delete to change” when you edit the integration.
To configure your integration:
- Set the details for your integration:
- Slug: Enter a URL-friendly identifier for the integration, for example
my-api. - Name: Enter the display name that appears in your workspace integrations list.
- Description: Describe what the integration does so teammates know when to use it.
- Base URL: Confirm or update the base URL for your API.
- Slug: Enter a URL-friendly identifier for the integration, for example
- If your API requires headers that must be sent with every request, add them in the Custom Headers section:
- Click Add Header.
- Enter the header name, such as
AuthorizationorX-API-Key. - Enter the header value, such as your API key or token.
- Use the visibility icon to hide or reveal the header value as needed.
- Review the list of selected endpoints at the bottom of the dialog.
- Click Create Integration.
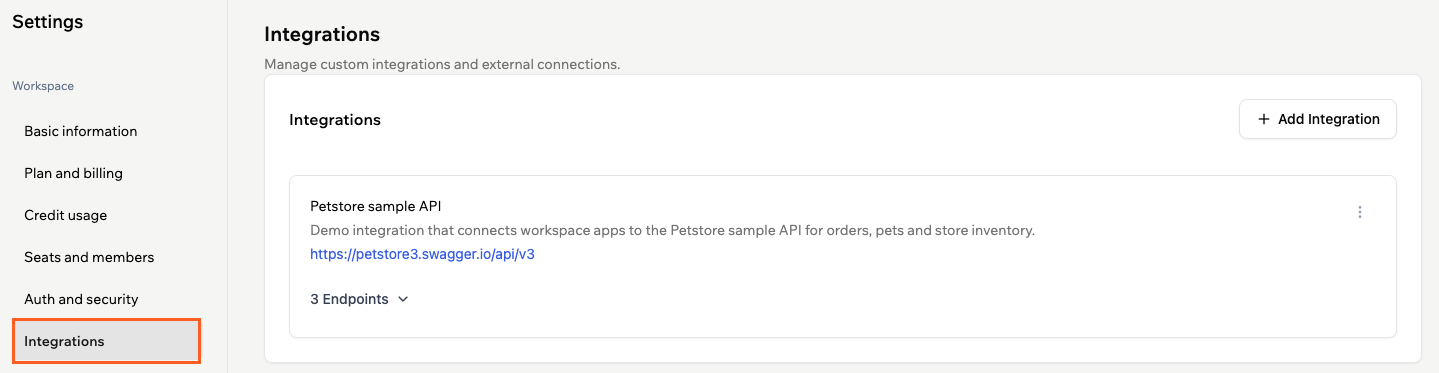
Managing workspace integrations
After you create a workspace integration, it appears in the Integrations tab of your workspace. From there, you can view its details, edit settings, or remove it if you no longer need it.Viewing integration details
- Click your workspace name at the top left of your account.
- Click Settings.
- Click Integrations.
- View the integration you want to inspect and expand the endpoints.
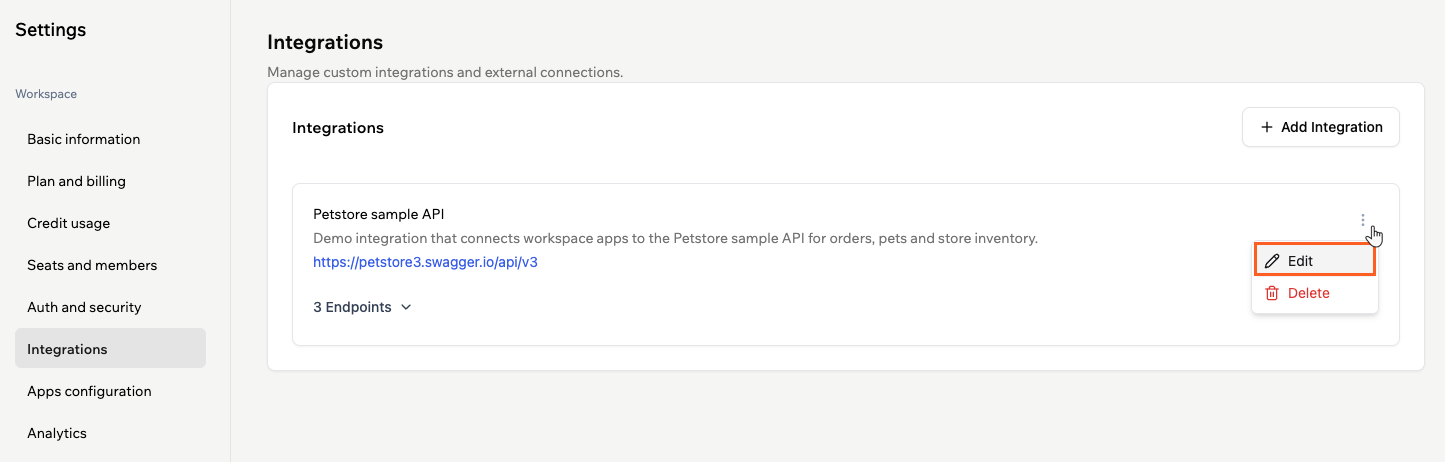
Editing an integration
- Click your workspace name at the top left of your account.
- Click Settings.
- Click Integrations.
- Click the More Actions icon on the integration card.
- Click Edit.
- Update the fields you need and save your changes.
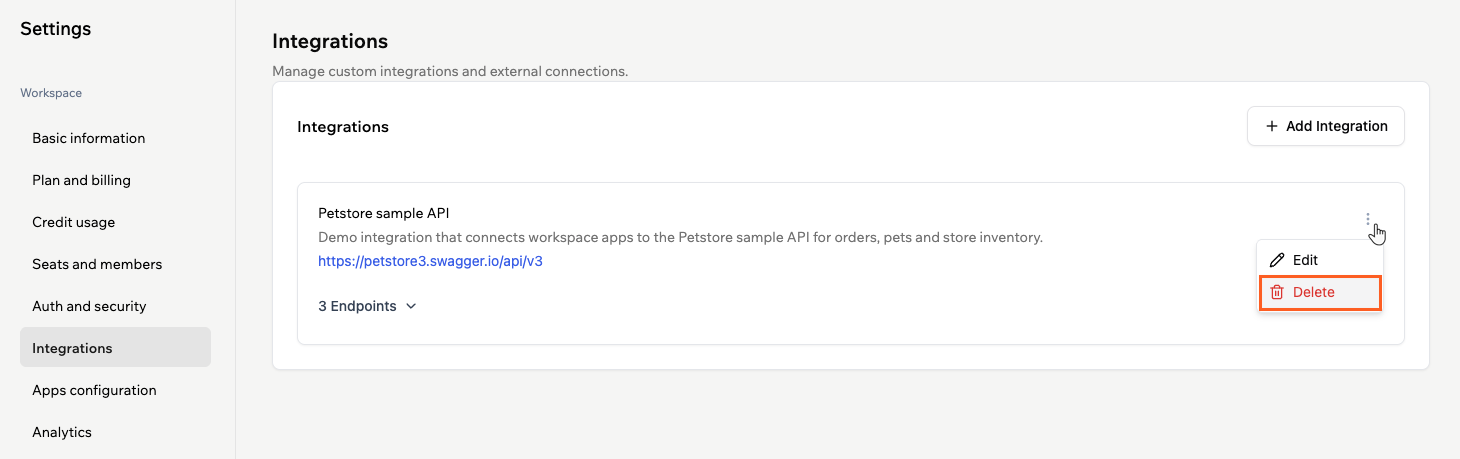
Deleting an integration
- Click your workspace name at the top left of your account.
- Click Settings.
- Click Integrations.
- Click the More Actions icon on the integration card.
- Click Delete.
- Click Delete again to confirm that you want to remove it from the workspace.
FAQs
Click a question below to learn more about workspace integrations.How do I use a workspace integration in my app?
How do I use a workspace integration in my app?
After you create a workspace integration, any new apps you build in that workspace can use it.When you create a new app, Base44 checks your workspace integrations. If you mention one of those systems in your first prompt, it automatically uses the matching workspace integration. For example, if you already added a GitHub API integration and you say “Create an app based on my GitHub issues,” Base44 uses the GitHub integration that is configured for the workspace without you needing to select it.You can then review and adjust how the app uses that integration from the app’s integrations settings.
Who can create and manage workspace integrations?
Who can create and manage workspace integrations?
To create or manage workspace integrations, you need to be a workspace owner or admin on a Builder plan or higher with access to the Integrations tab in your workspace settings. If you do not see the Add Integration button or edit options, contact your workspace admin and ask them to either update your role or create the integration for you.
What happens if the OpenAPI specification changes?
What happens if the OpenAPI specification changes?
If the API owner updates the specification at the URL you used, the details that Base44 reads from it can change the next time you update or recreate the integration. When you know the spec changed, review your workspace integration and check that the exposed endpoints still match what your apps expect.
Are header values stored securely and who can see them?
Are header values stored securely and who can see them?
Header values such as API keys and tokens are stored as part of the workspace integration configuration. Only teammates with permission to manage workspace integrations can view or edit these values. Use the visibility icon in the Configure step to hide values on screen when you work in shared spaces.
Can I have more than one workspace integration for the same API?
Can I have more than one workspace integration for the same API?
Yes. You can create multiple workspace integrations that point to the same external API. For example, you might create separate integrations for sandbox and production environments, or for different sets of endpoints that are used by different apps.
How should I rotate API keys or other secrets used by a workspace integration?
How should I rotate API keys or other secrets used by a workspace integration?
When you need to rotate a key or token, generate the new credential in the external system first. Then edit the workspace integration, update the relevant header value with the new key or token and save your changes. After you update the workspace integration, apps that use it start sending the new value automatically.
What should I do if my OpenAPI specification gives a parsing error?
What should I do if my OpenAPI specification gives a parsing error?
Check that the URL points directly to a valid OpenAPI or Swagger JSON or YAML file and that it is publicly accessible from your browser. If the file is behind authentication or served as HTML, Base44 cannot parse it.If you still see errors, switch to the Paste JSON option, copy the raw JSON of your specification and try again.For a quick test, you can also try a known valid spec such as a public sample API to confirm that the flow works.