Setting your app visibility
App visibility controls who can open your app and whether they need to sign in. You choose the visibility level that matches your app’s purpose. Base44 uses smart app visibility to suggest a starting point for you. Apps that act like public sites, such as landing pages or portfolios, are automatically set to Public without requiring login. You can change this setting at any time.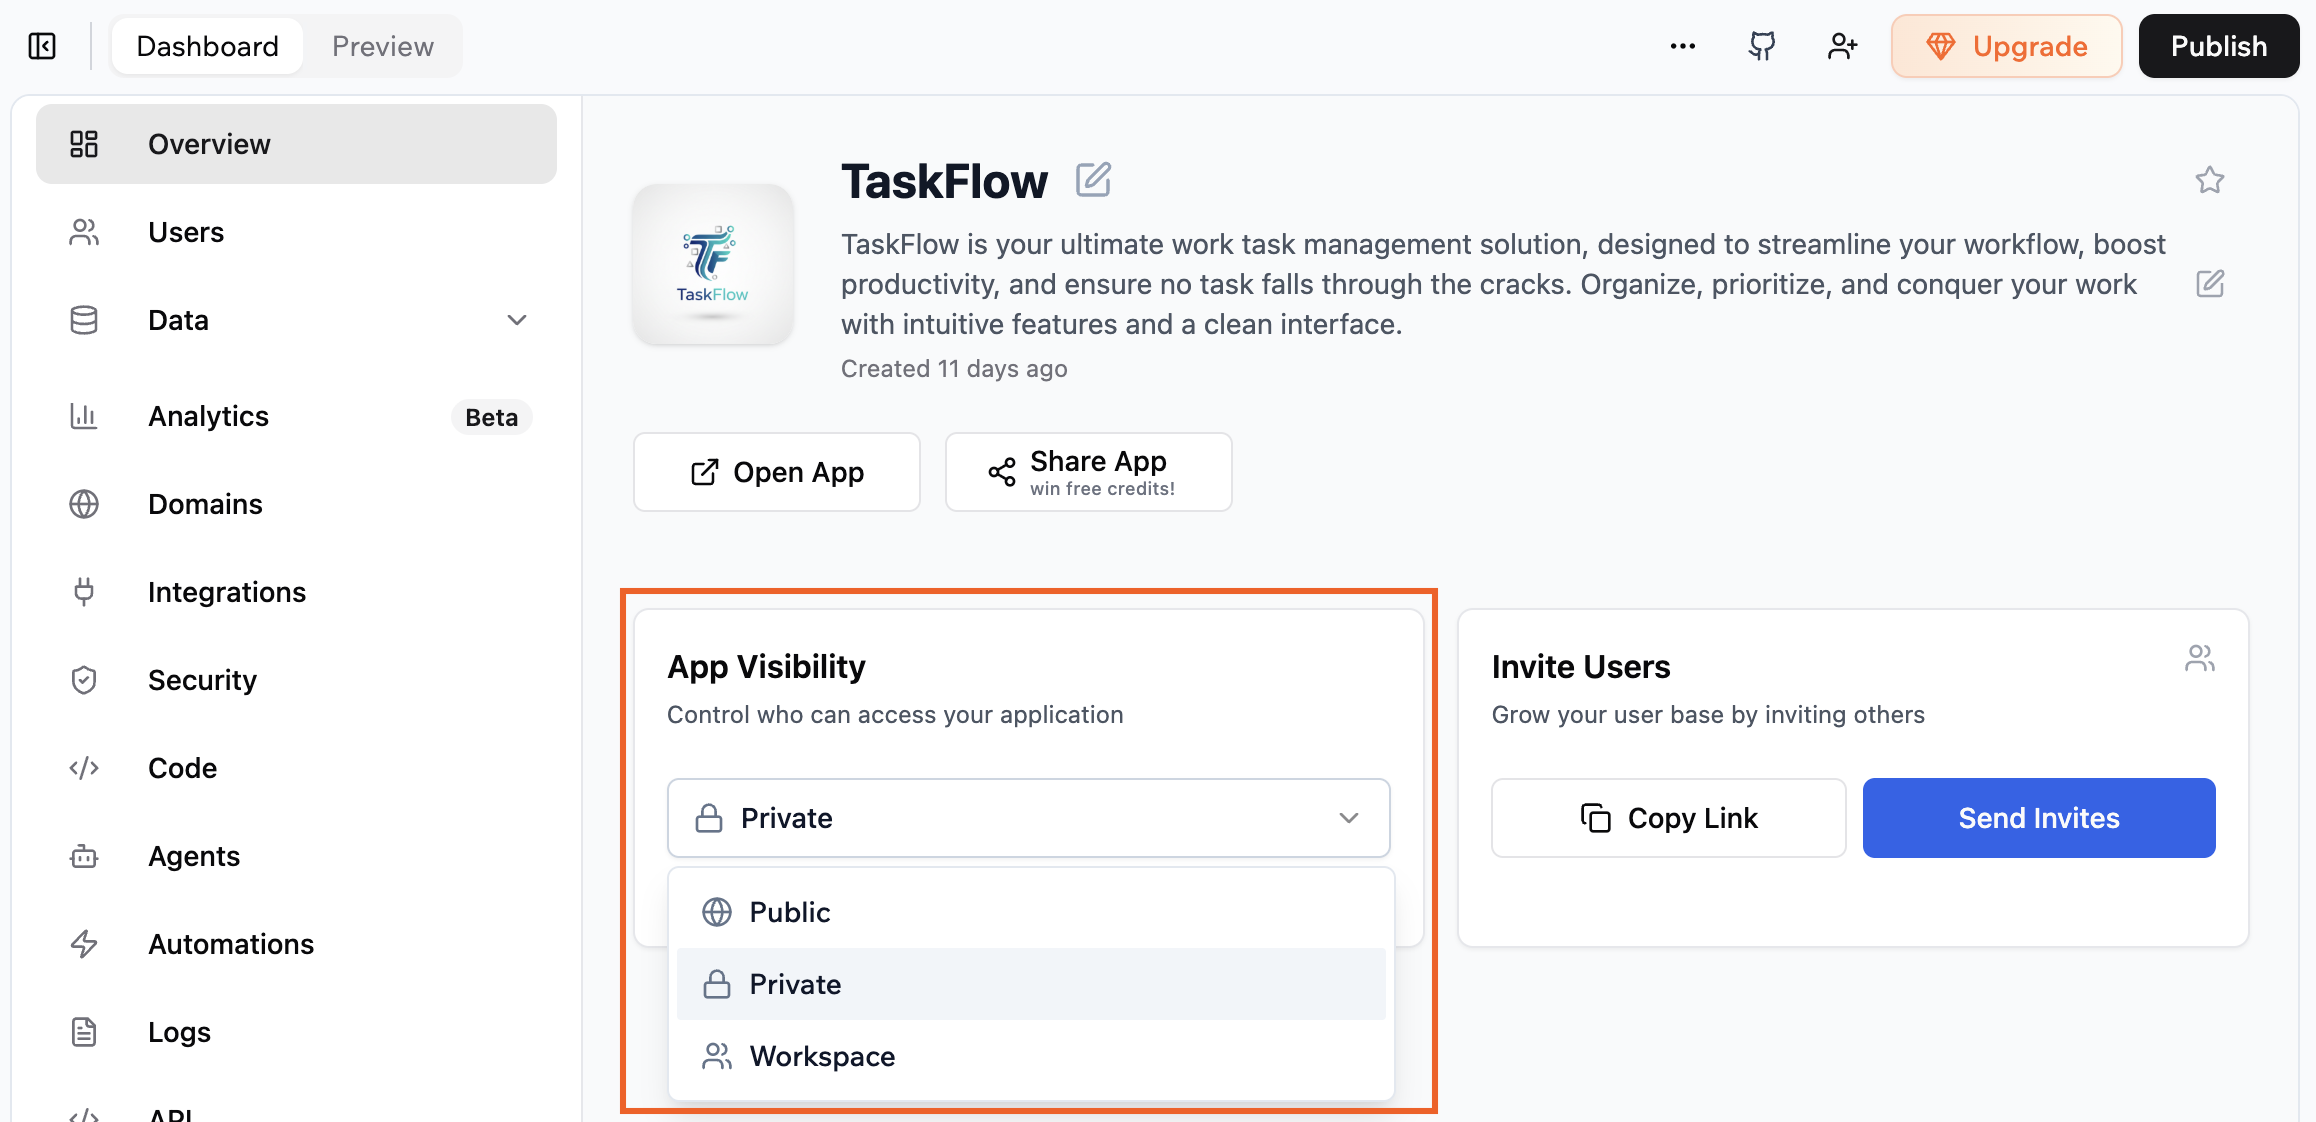
- Go to your app’s Dashboard.
- Click Overview.
- Click the App Visibility drop-down and select one of the following:
- Private: Only invited people can open and use the app. Sign in is required.
- Workspace: Everyone in your Base44 workspace can open and use the app. Sign in is required.
- Public: Anyone with the link can open the app. To require sign in, select Require login to access. For extra protection, click Run security scan.
Features that rely on user identity, such as profiles, are not available if login is not required.
Inviting users to your app
Invite people to use your app by sending them an email invitation from your dashboard or from inside your app. Inviting someone as a user or admin controls what they can do in the live app. It does not give them access to the app editor or your app’s dashboard.Notes:
- If your app is set to Workspace visibility, all workspace members automatically have access and do not need individual invites.
- Invite permissions depend on your app’s visibility:
- Private application: Only admins can invite people and can choose whether the role is user or admin.
- Public application: Admins can invite people and choose roles. People with the user role can invite other users.
From your dashboard
Send invitations from your app’s dashboard and choose the role for each person. To invite people from your dashboard:- Click Dashboard in your app editor.
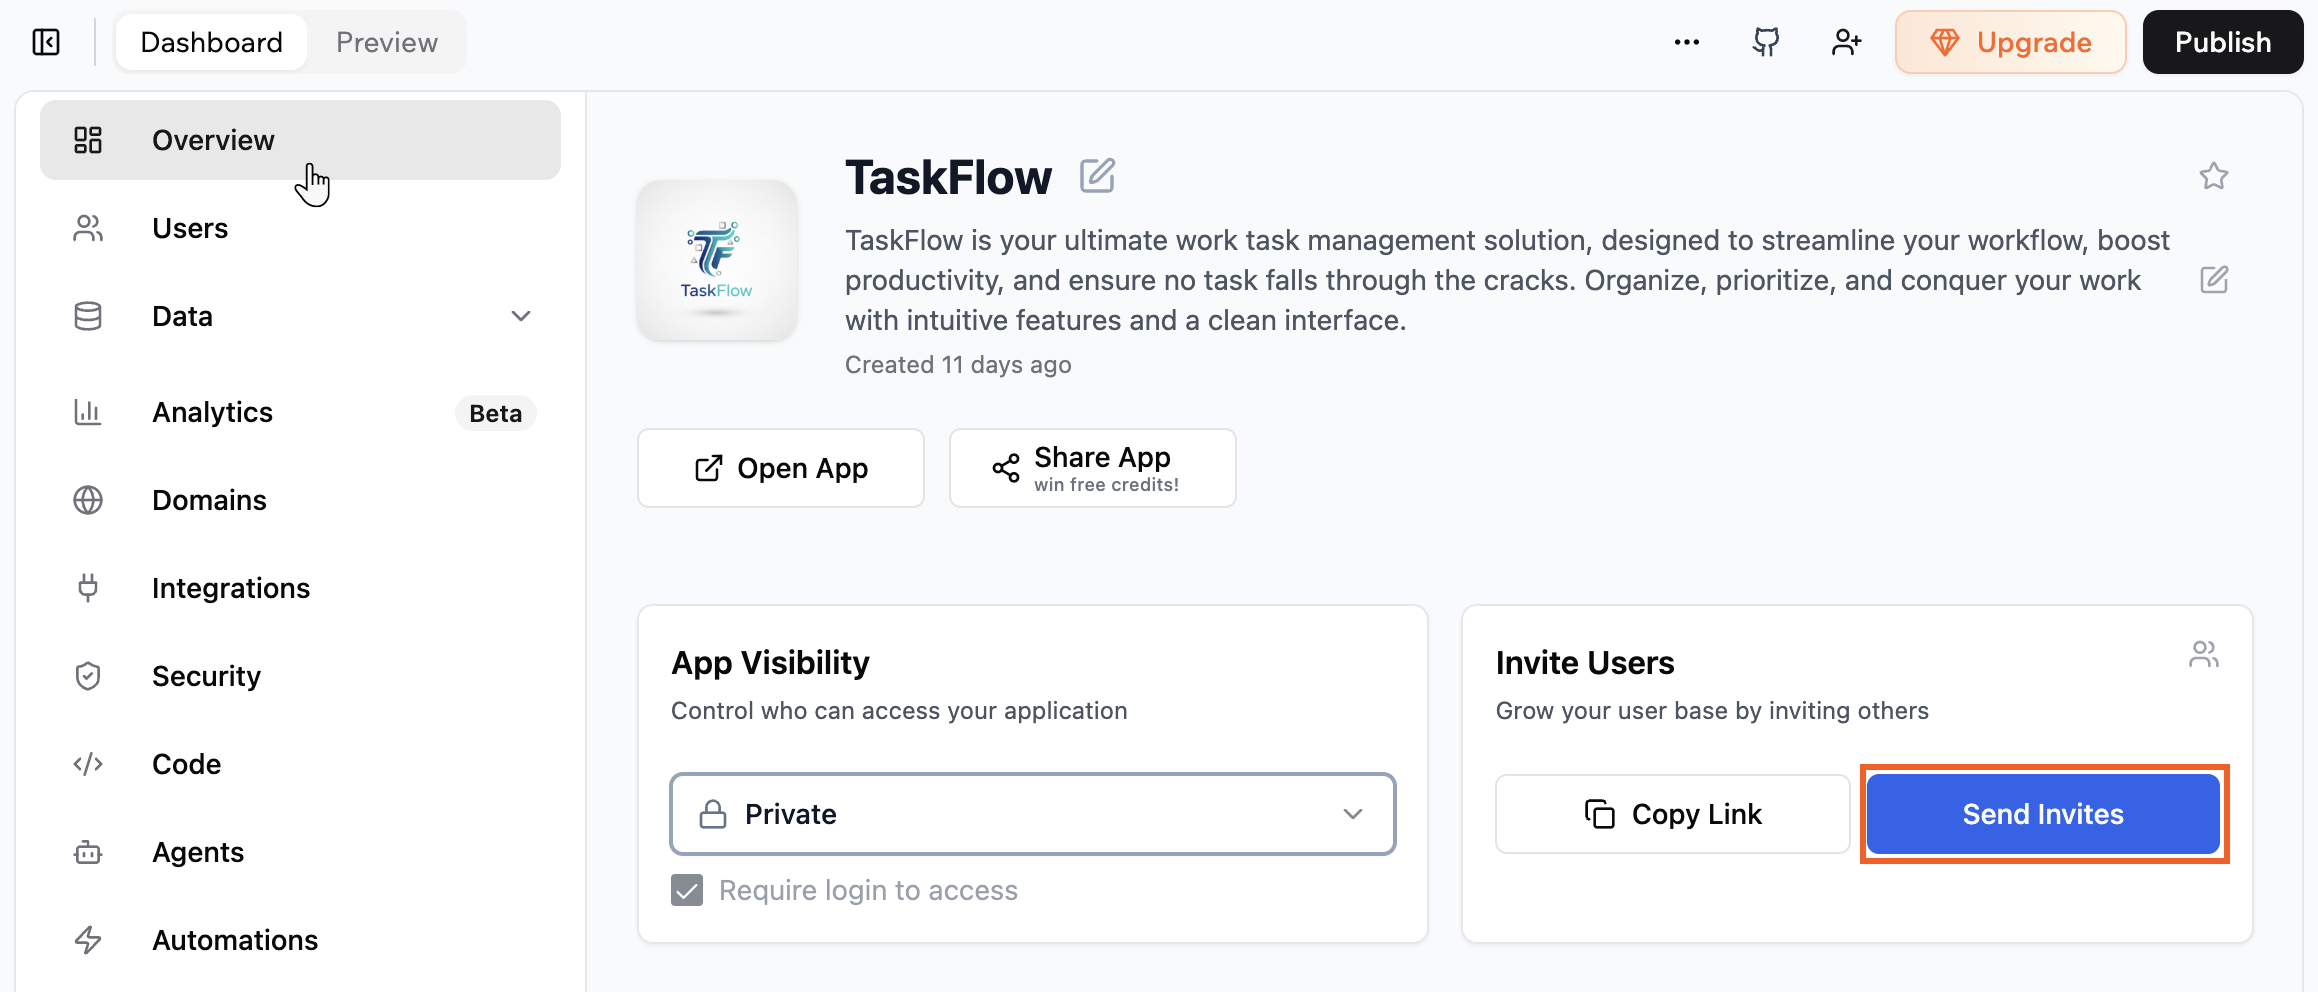
- Click Overview.
- In the Invite Users section, click Send Invites.
- Enter the email address for each person you want to invite.
- Click the Access level drop-down and choose a role.
- Click Send Invitation.
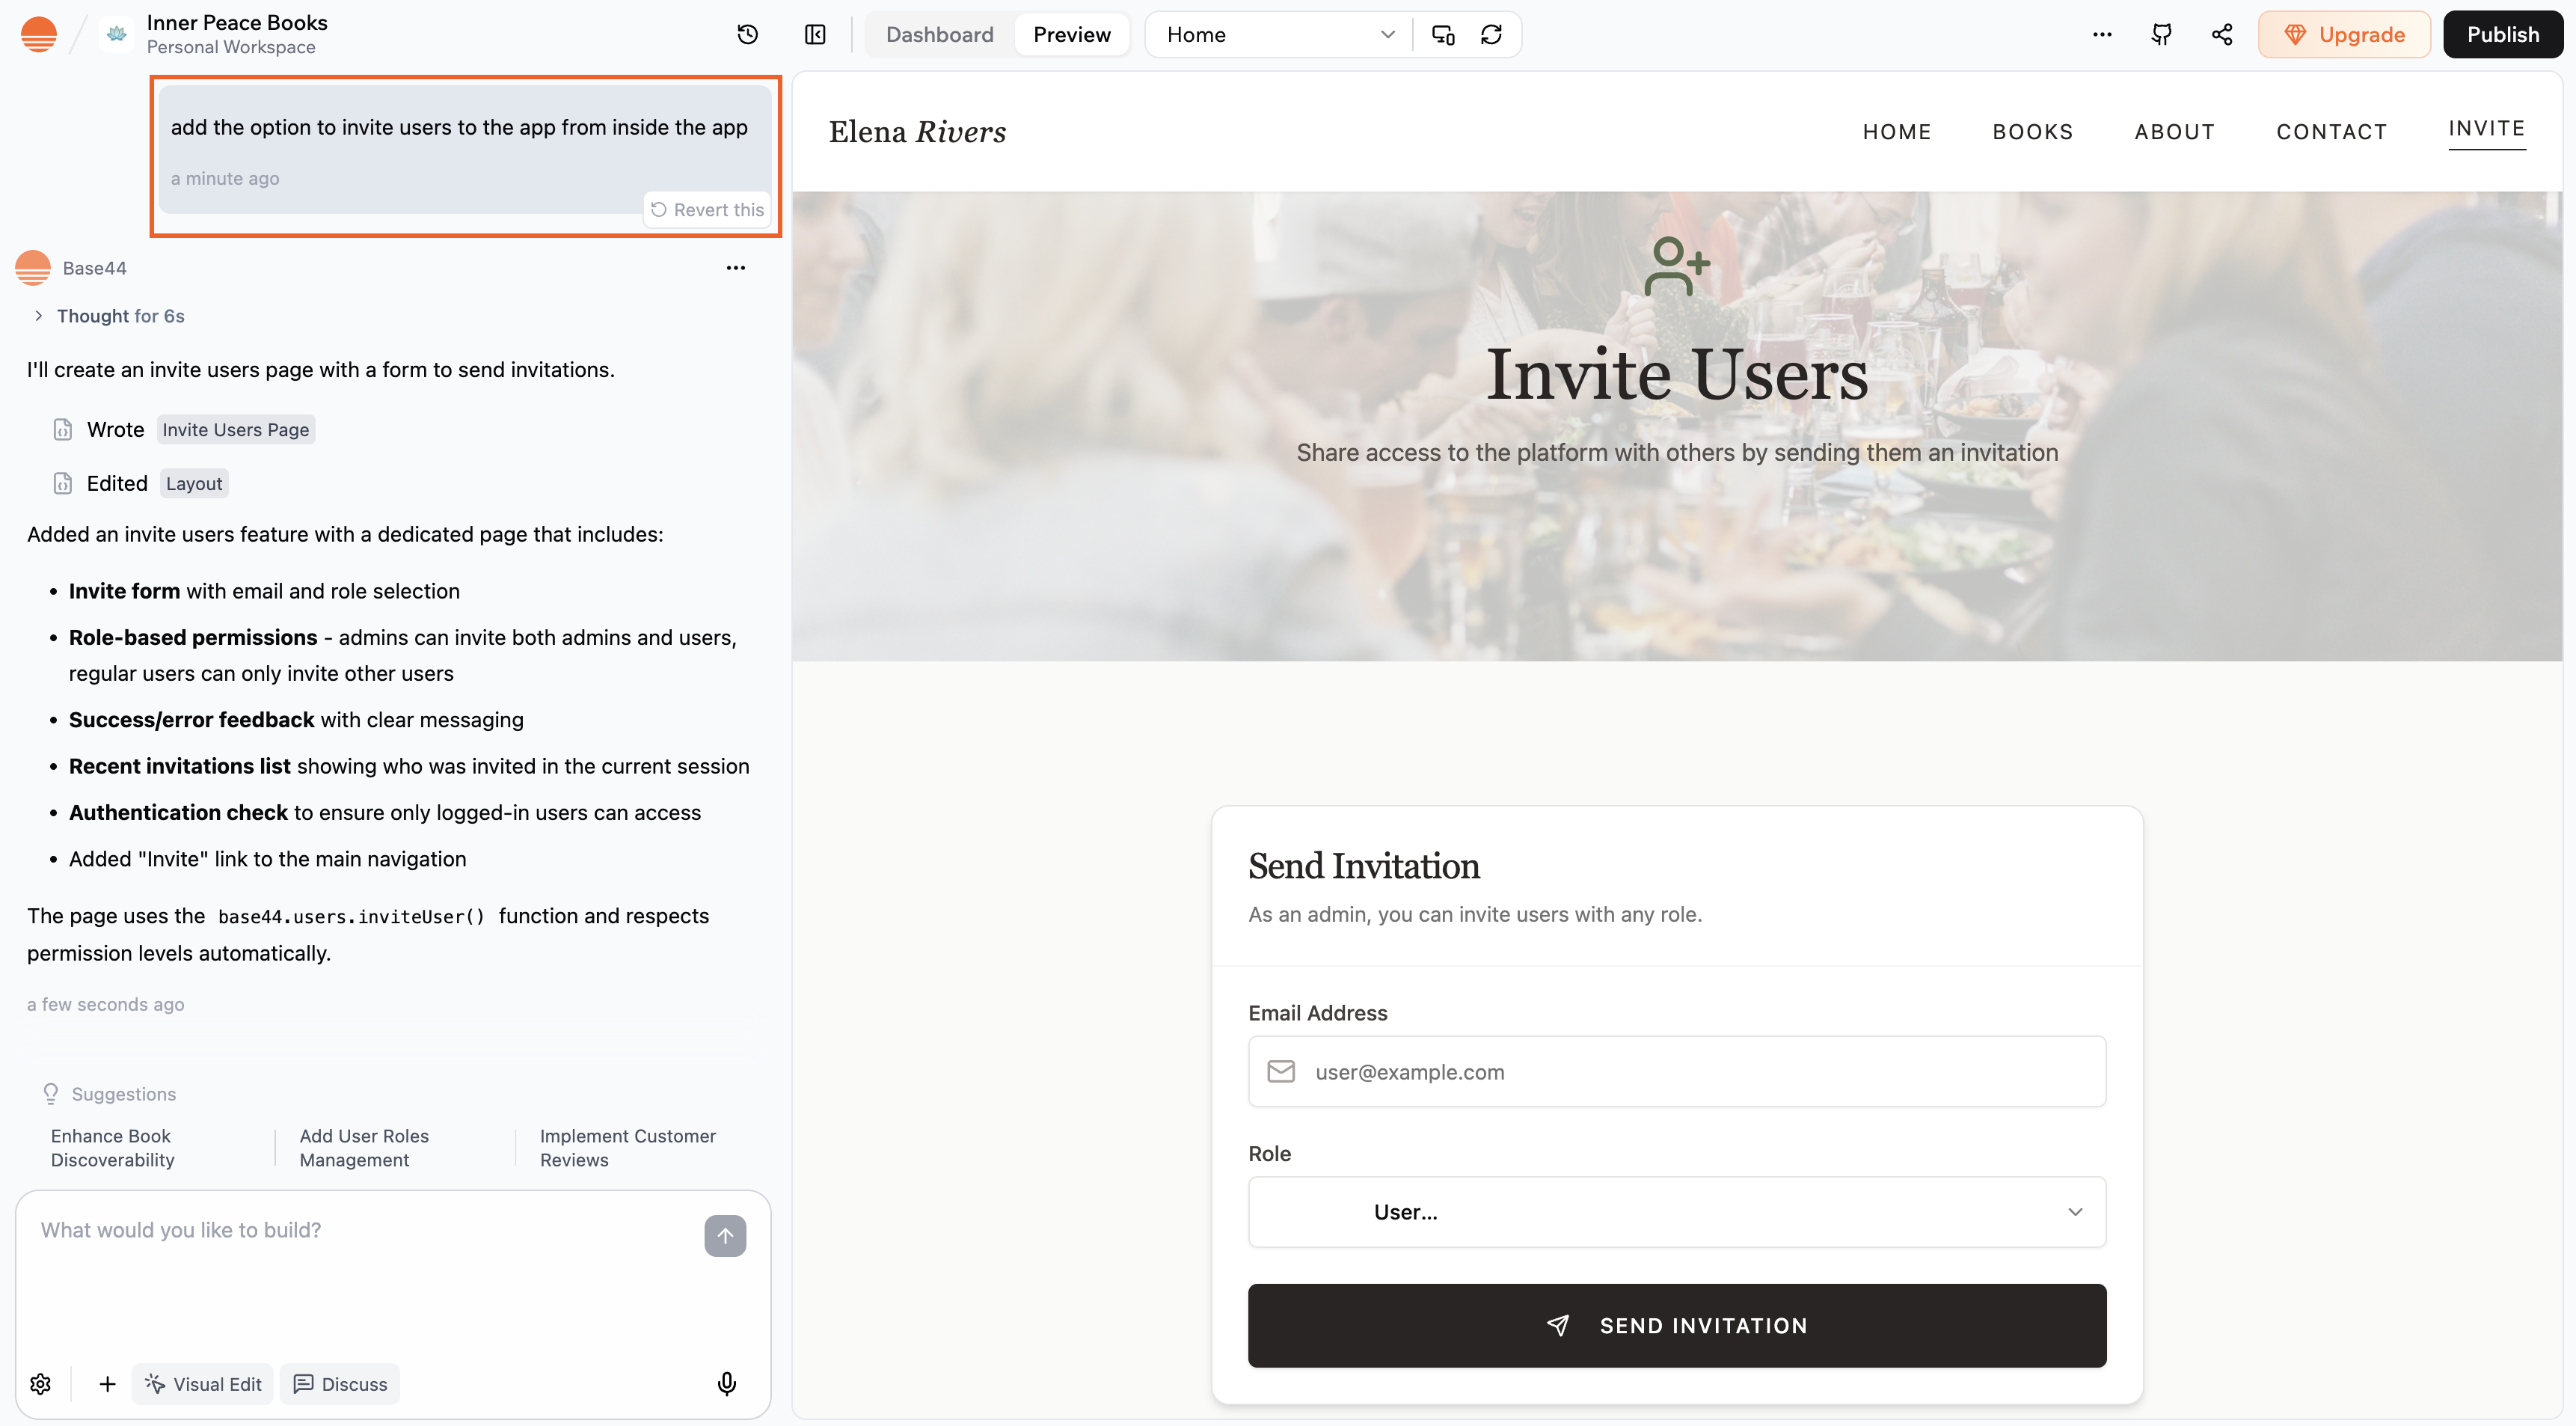
From your app
You can also invite people directly from inside your app by asking the AI chat to set up in-app invites. Use the invite option it adds to enter each person’s email address and, if prompted, choose the role you want to give them. Example prompt:Add the option to invite users to the app from inside the app
Choosing your users’ roles
Roles control what each person can do on your live app. By default, every app includes 2 roles:- Admin: Can manage areas that are restricted to admins on the live app.
- User: Can view and use the app with no special permissions.
To work in the app editor or change dashboard settings, someone must be a collaborator or the app owner.
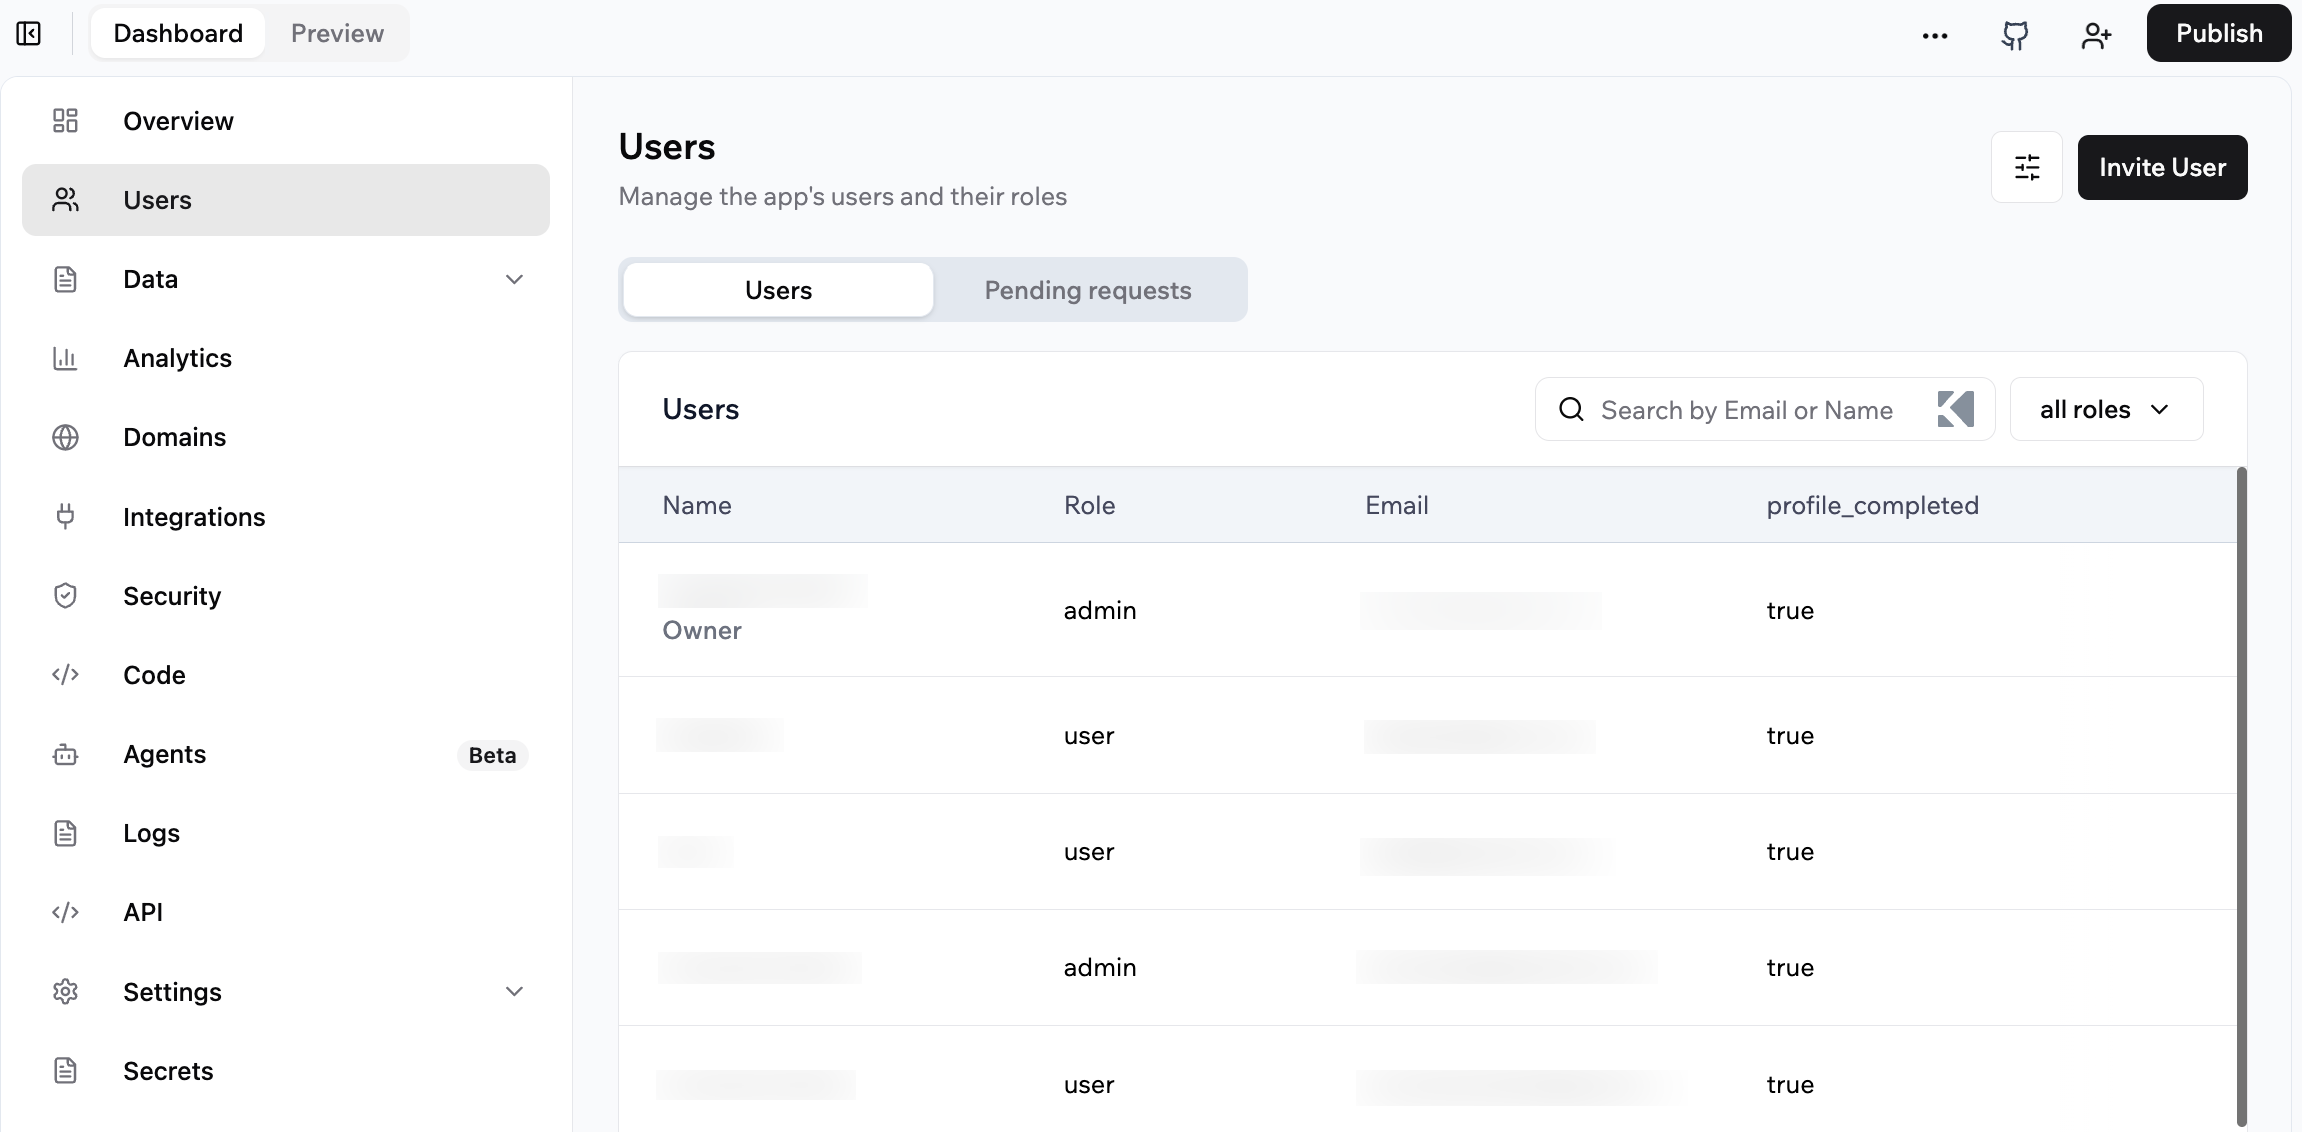
- Click Dashboard in your app editor.
- Click Users.
- Select the user whose role you want to change.
- Click the Role drop-down and choose Admin or User.
- Click Submit.
Sharing your app link
Share a link to your app so people can access it directly. To share your app link:- Click Dashboard in your app editor.
- Click Overview.
- In the Invite Users section, click Copy Link.
- Share the link wherever you want people to access your app.

Testing your app as a user
View and interact with your app as any user or role to check permissions, troubleshoot issues, or test user flows.Changes you make while testing as a user are saved to that person’s data. To avoid affecting real data, test with sample or dummy users whenever possible.
Why would you want to test your app as a user?
- Realistic testing: Test the app exactly as a specific user or role sees it
- Faster troubleshooting: Reproduce and debug user reported issues in their real context
- Permission visibility: Quickly verify what each role or user can and cannot access
- Access tuning: Decide if permissions or roles need to be updated based on real behavior
- Flow validation: Run end to end checks (onboarding, key tasks, critical paths) before releases
- Safe experimentation: Use fake or test users to safely test risky or destructive actions
- Stronger support: Guide people more effectively by seeing their exact experience
- UX insight: Build empathy and improve UX by viewing the app as different user types
- Go to your app editor.
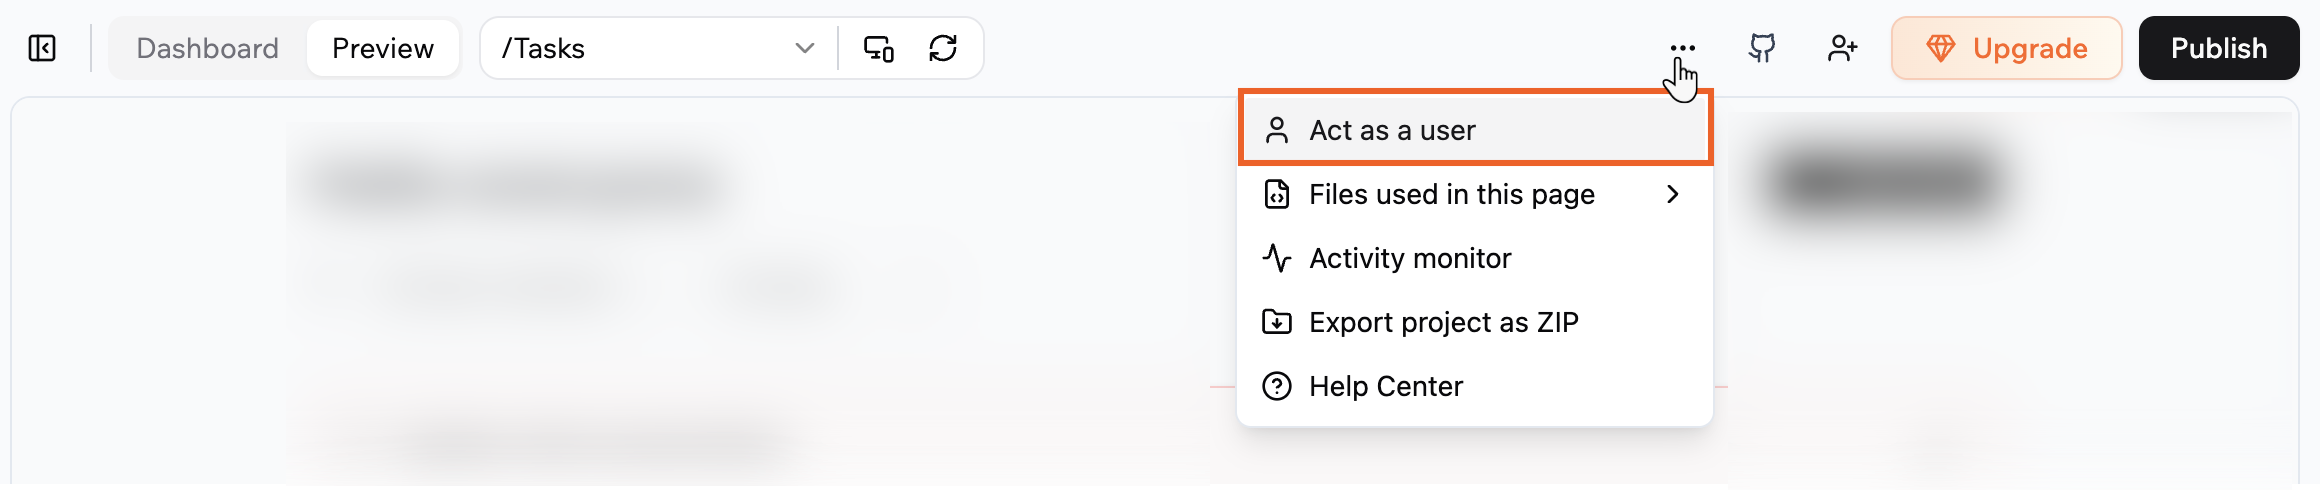
- Click the More Actions icon at the top right.
- Select Act as a user.
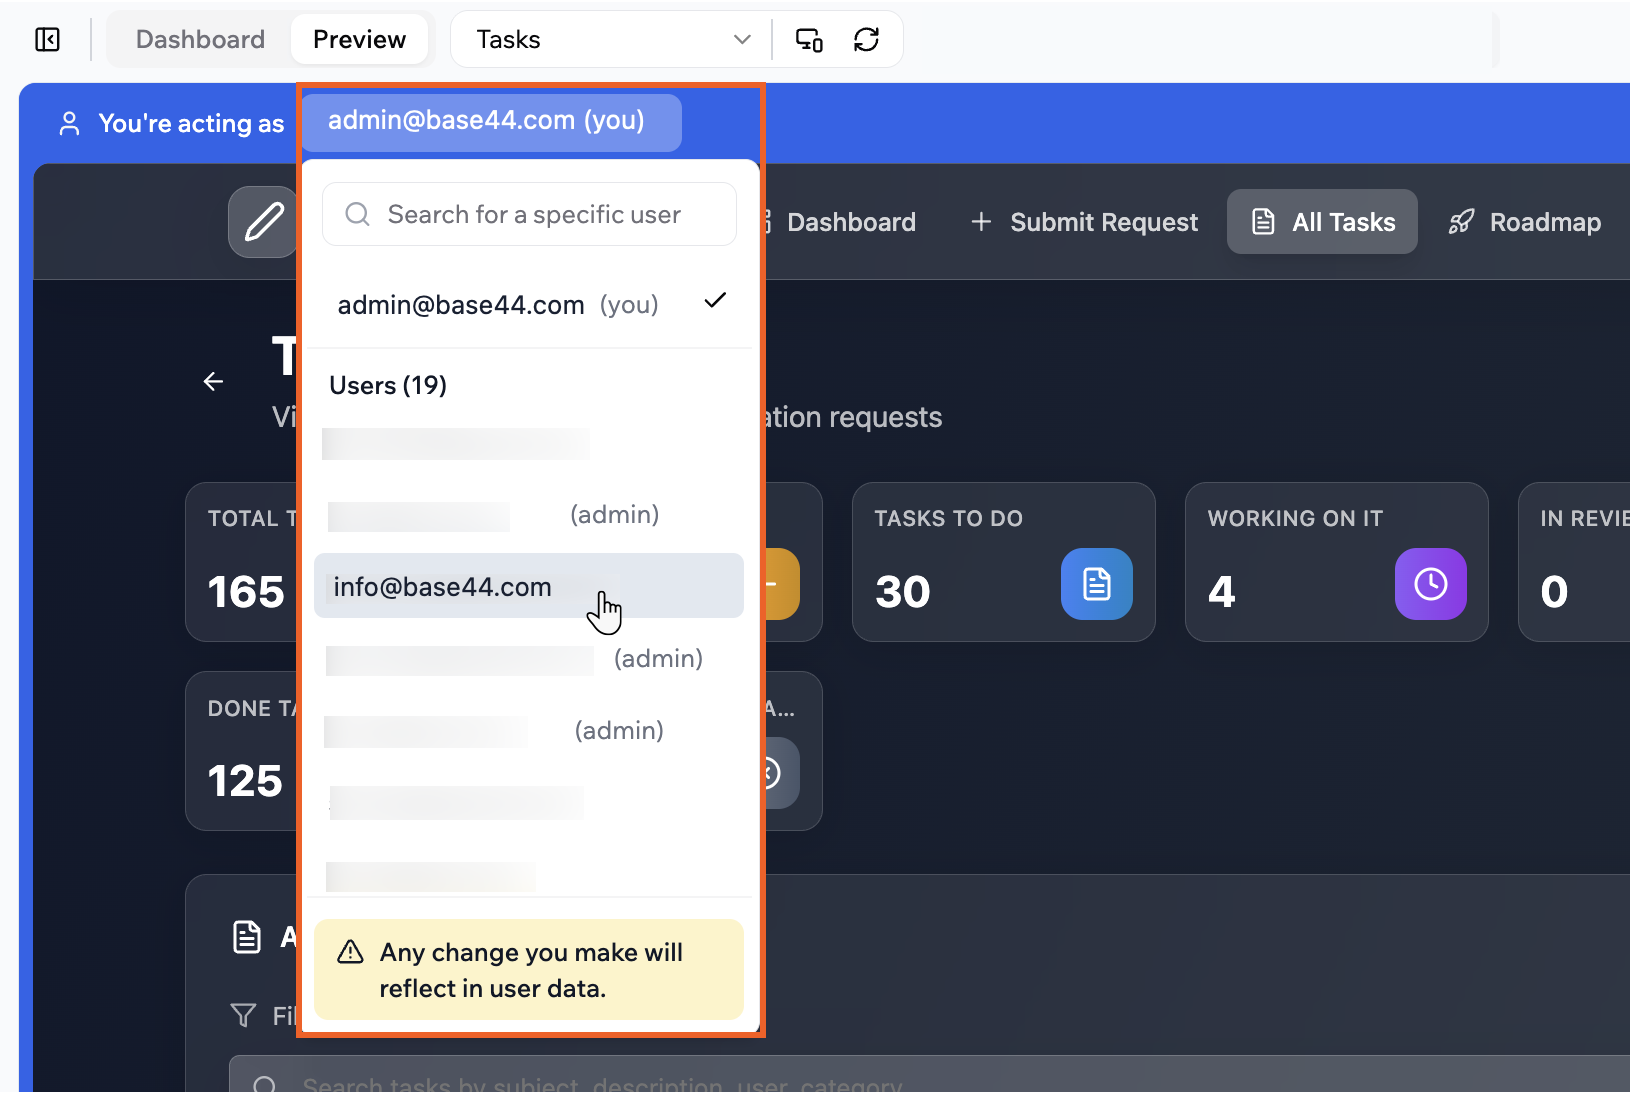
- Click the drop-down next to You’re acting as and select the relevant user.
- Preview and interact with the app as that user.
- Click Exit mode when you’re done testing as another user.
Inviting collaborators to your app
Collaborators are people who help you build your app in your app editor. Add collaborators when you want someone to design, configure, or maintain the app with you.What is the difference between collaborators and admins?
- Collaborators
- Can open the app editor and your app’s dashboard.
- Help you design pages, change logic, connect data, and configure settings.
- Are invited from the Invite collaborators icon in the app editor.
- Admins
- Sign in to the live app.
- Access admin-only areas on the live app, such as protected reports or management tools.
- Cannot open the app editor or your app’s dashboard unless they are also collaborators.
To invite someone as a collaborator, they must be a member of the workspace that owns the app.
- Go to your app editor.
- Click the Add collaborator icon at the top.
- Enter the email addresses of the people you want to invite, separated by commas.
- Click the Send invite icon .


- Go to your app editor.
- Click the Add collaborator icon at the top.
- Find the relevant collaborator and click the More Actions icon .
- Click Remove Collaborator.
- In the confirmation window, select an option:
- Remove collaborator access only: Immediately revoke their access to the app editor and prevent them from making changes, but keep them in the Users list with their existing role so they can still use the live app.
- Remove from app entirely: Revoke their collaborator access and remove them from the Users list so they can no longer sign in or use the app.
When teammates are working on the same app, you see their avatars in the top bar so you always know who is currently editing. Hover over an avatar to see their name and coordinate changes in real time.
Restricting external collaborator invites
By default, any workspace member can invite people from outside the workspace as app collaborators. You can restrict this so that only workspace owners and admins can send these invitations. To configure who can invite external collaborators:- Click your workspace name at the top left of your account.
- Click Settings.
- Click Auth and security.
- Click the External Collaborators toggle:
- Enabled: Only workspace owners and admins can invite people from outside the workspace as app collaborators.
- Disabled: Any workspace member can invite people from outside the workspace as app collaborators.

Enterprise workspaces have this setting on by default. All other workspaces have it off by default.
FAQs
Click below to learn more about managing access to your app.Can people sign up to use my app on their own?
Can people sign up to use my app on their own?
If your app’s visibility is set to Public (Require login), anyone with the link can create an account and sign in.
How do I review access requests for my private app?
How do I review access requests for my private app?
When someone requests access to a private app, owners and collaborators get a notification.To review an access request: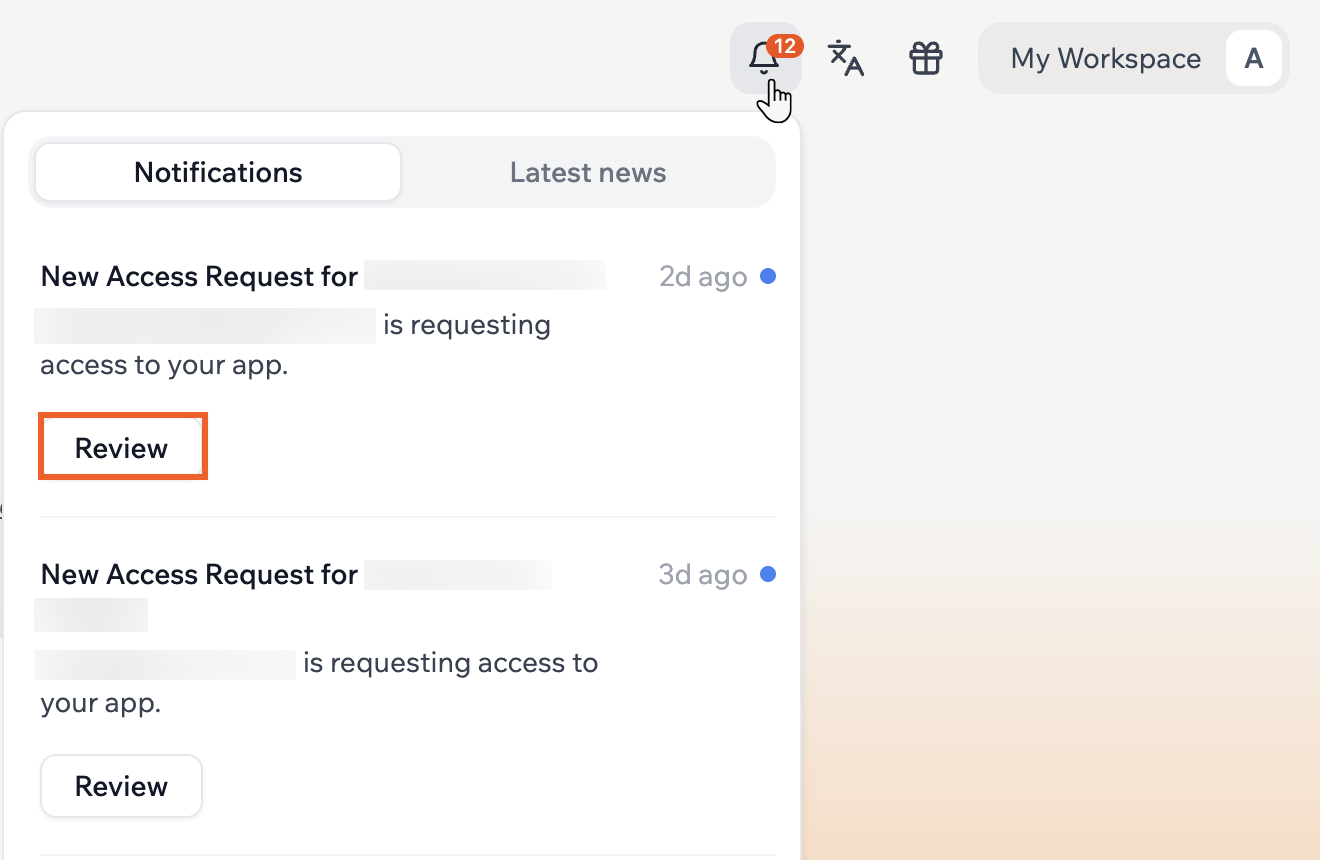
- Click the notifications icon in your workspace.
- Click Review to open the request and decide whether to grant access.
What is the difference between an app user and a collaborator?
What is the difference between an app user and a collaborator?
An app user is someone who signs in and uses your app. Their access is controlled by visibility settings and roles such as Admin or User. They can only see and use the live app (including any admin-only sections), not the app editor or dashboard.A collaborator is someone who helps you build the app in the app editor. Only collaborators and the app owner can open the app editor and your app’s dashboard. When you add someone as a collaborator, they are automatically assigned the Admin role in Users in the app by default so they can manage live data and settings while they build. You can change their app role later without changing their collaborator status.
Update: On February 16, 2026, we released the ability to add app collaborators. Before this date, if you wanted someone to help edit your app, you made them an admin from the Users page in the dashboard. This also gave them access to the app editor, even if you only wanted them to manage things inside the app.With app collaborators, you can now invite people directly from the app editor to help build and maintain your app, without changing their role as an app user. This means you can safely use the built in Admin role for people who manage your live app, while keeping app editor access limited to collaborators.Following this change, existing admins in existing apps are not blocked from editing. They keep their current access and are added as collaborators so they can continue working on the app as before. For new people, you can choose whether you want them to be a collaborator, admin, or both, based on whether they need access to the app editor, in app admin access, or both.
Do I need to make someone an admin in Users so they can edit my app?
Do I need to make someone an admin in Users so they can edit my app?
No. If you want someone to help build or edit your app, invite them as a collaborator from the app editor. This gives them access to the app editor and, by default, the Admin role in your app. Make someone an admin in Users without adding them as a collaborator only when they need admin access in the live app but do not need to work in the app editor.
Do collaborators need to be workspace members?
Do collaborators need to be workspace members?
Yes. To invite someone as a collaborator, they must be a member of the workspace that owns the app. If they are not yet a member, invite them to the workspace first from your workspace settings.
Which roles can access the Users entity?
Which roles can access the Users entity?
Only collaborators and the app owner can access the Users dataset in the app dashboard.
How can I manage app security settings?
How can I manage app security settings?
You can control who can access, read, write, or delete records in your app’s data entities by setting Row Level Security (RLS) rules and permissions. Configure access for each entity to ensure data is only available to authorized people. Learn more about managing security settings.
Can I remove a user from my app?
Can I remove a user from my app?
Yes. Go to your app’s Dashboard → Users and click the Delete icon next to the person you want to remove. Removing them immediately revokes their access.
I made a feature for my members, but it's only working for admins. Why is that?
I made a feature for my members, but it's only working for admins. Why is that?
By default, features connected to the ‘User’ entity are only available to admins. If you build a member facing feature such as a member profile page using the ‘User’ entity, it works for admins but is not visible or accessible to regular members.To make your feature available to all members, or just to specific members, set up a custom entity for member data such as ‘MemberProfile’. Connect your features to this new entity instead of the default ‘User’ entity. This lets you decide exactly which members have access, so both admins and the members you choose can use your feature as expected.
Why am I getting an 'Authentication required to view users' error?
Why am I getting an 'Authentication required to view users' error?
The built-in
Users entity is secured by Base44 to protect authentication data. Only collaborators and the app owner can access it directly. If your app tries to read from the Users entity for regular users, for example to display profiles or process orders, it triggers this error.The recommended approach is to create a separate UserProfile entity that stores the data your app needs, and connect it to the built-in Users entity.To set this up using the AI chat, paste the following prompt:Create a new entity called UserProfile. Move custom fields from the Users entity to UserProfile. Establish a 1:1 relationship between Users and UserProfile. Ensure a UserProfile is automatically created when a new user signs up. Update the app to fetch user details from UserProfile instead of Users. Set permissions so users can only edit their own profile, but anyone can read it.After the AI makes the changes, go to your app’s Dashboard, click Security, and review the RLS rules on your new UserProfile entity to make sure they match your intended access levels.How can I create fake users to safely test user flows?
How can I create fake users to safely test user flows?
To safely test user flows without affecting real data, add a test person directly to your app. Once the test profile exists, you can use the Act as a user feature to impersonate them and preview their experience.To create a fake (test) user:
- Go to your app’s Dashboard.
- Click Users.
- Click Invite User to send an invitation, or register a new account using your app’s public signup page.
- Assign the desired role or permissions to the test profile.