Note: Google Places integration is available on the Builder plan and above. If you’re on the Free plan, you’ll need to upgrade your app to use backend functions and payment features.
Step by step setup:
Part 1: The Google side
If you already have a Google Places API key, feel free to skip ahead to Part 2: The Base44 side.Create (or choose) a project in Google Cloud
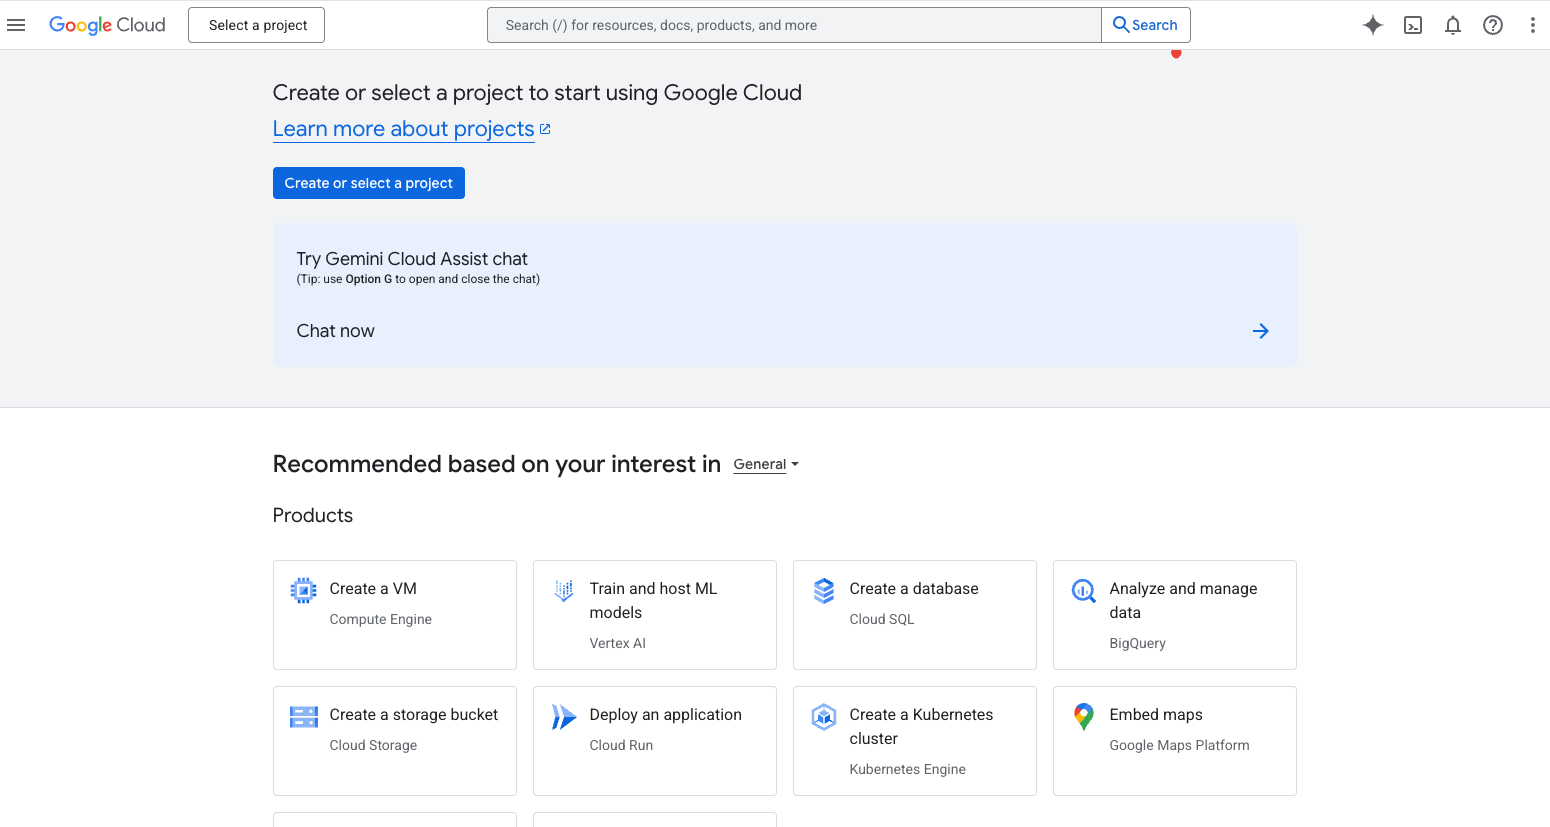
- Head to the Google Cloud Console and either pick an existing project or create a new one.
Enable the places API (New)
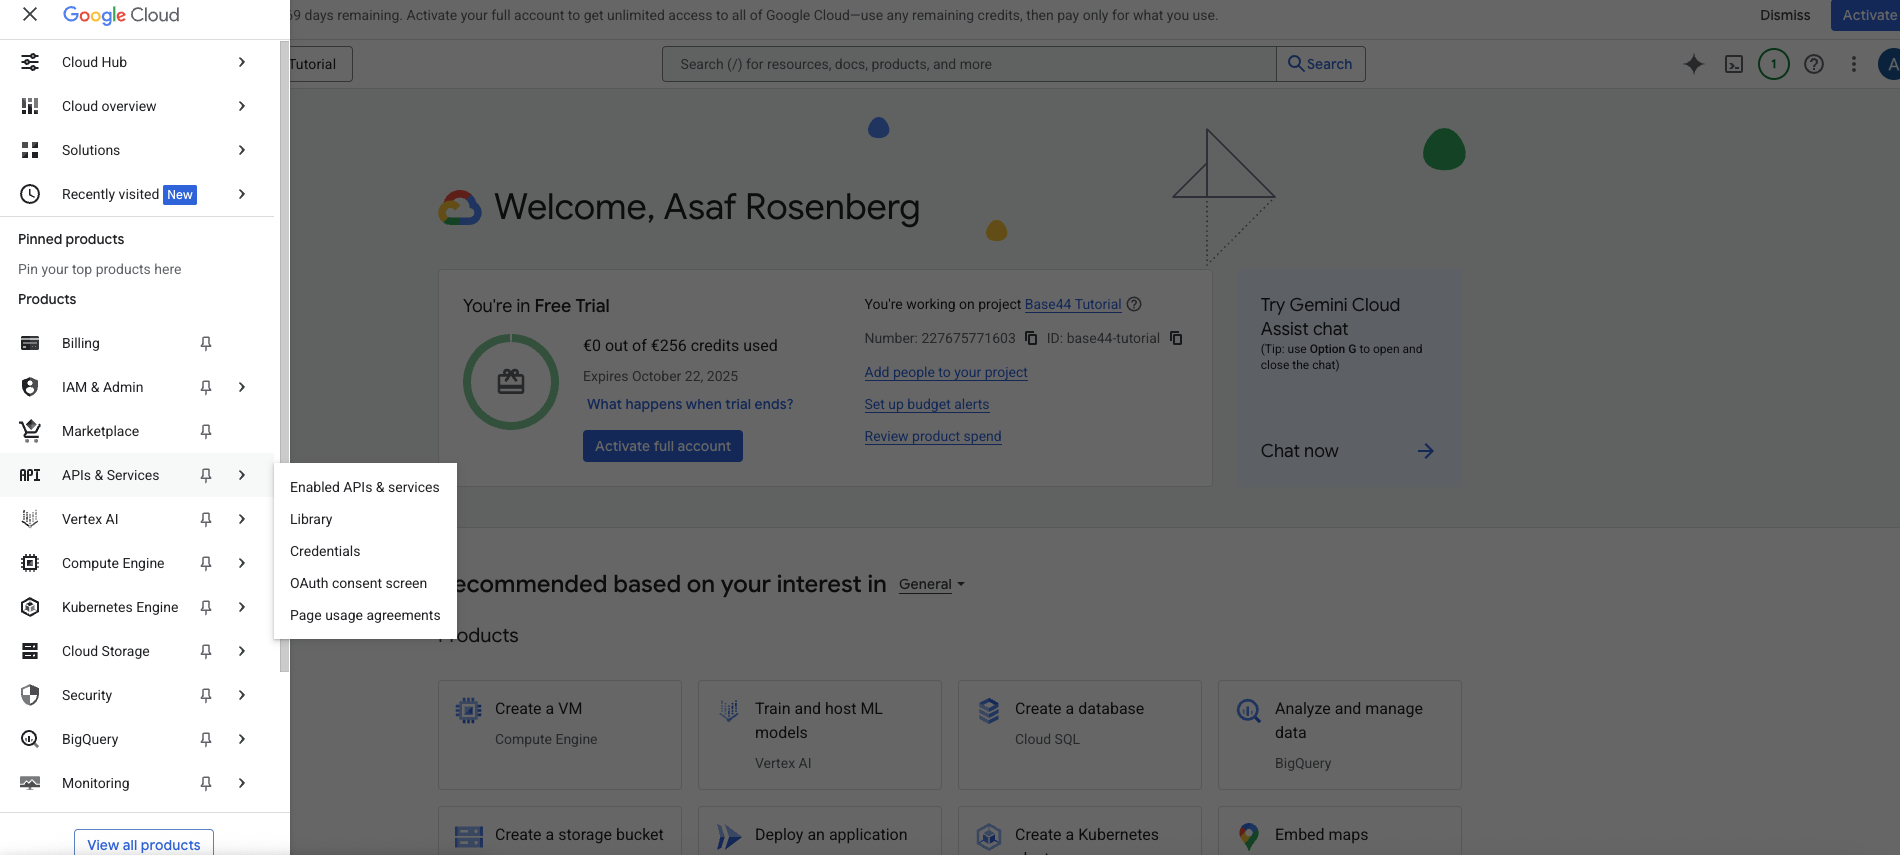
- In the left sidebar, click APIs and Services → Library.
- Use the search bar to find Places API (New) and open it.
- Click Enable to activate it for your project.
Part 2: The Base44 side
Once you have your Google Places API key, you can connect it to Base44 in two different ways:Option A: Ready-made integration (preferred)
- Choose this path if you are starting a new app from scratch.
Option B: Instant integration
- Choose this path if you are already in the midst of building and would like to integrate Google Places into an existing app.
Option A: Ready-made integration (create a new app)
Choose the integration
-
In Base44 click on Integrations
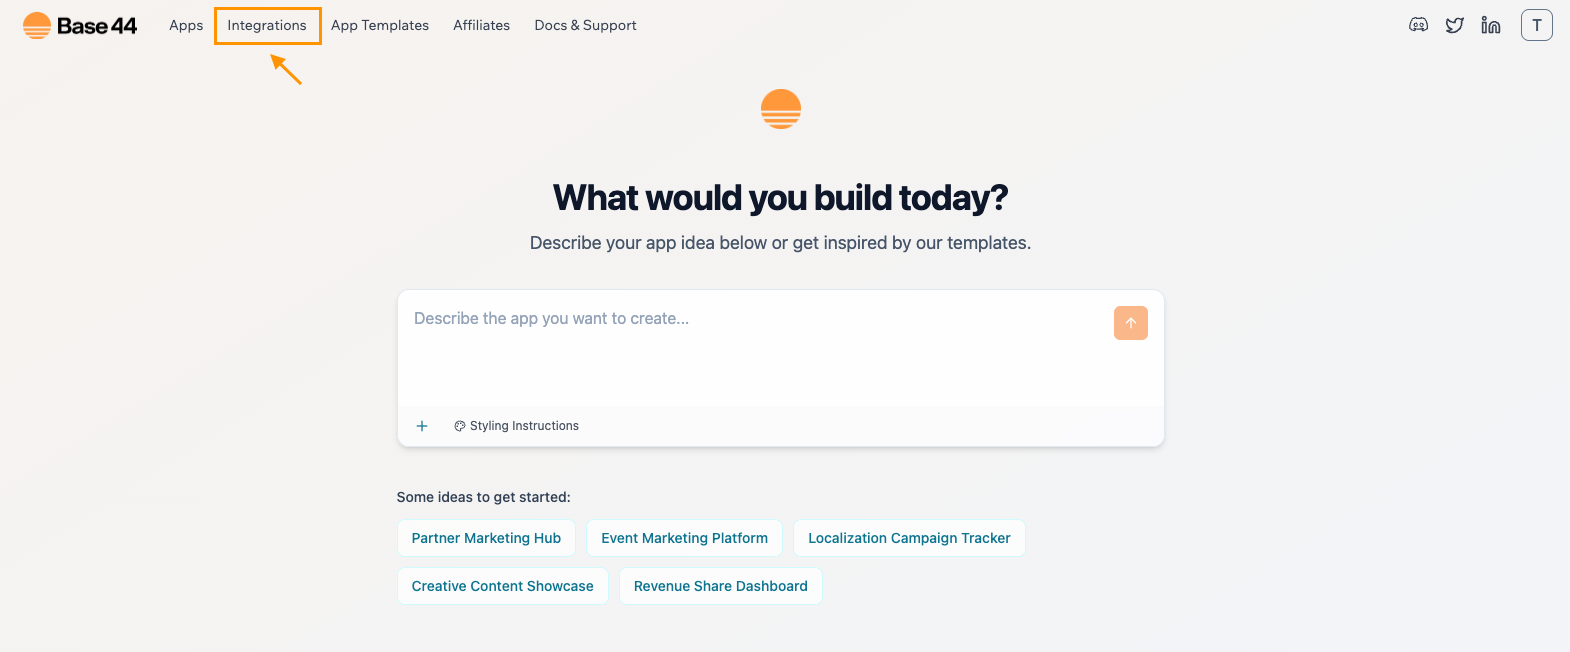
- Find Google Places
- Select Use this Integration
Provide your API key
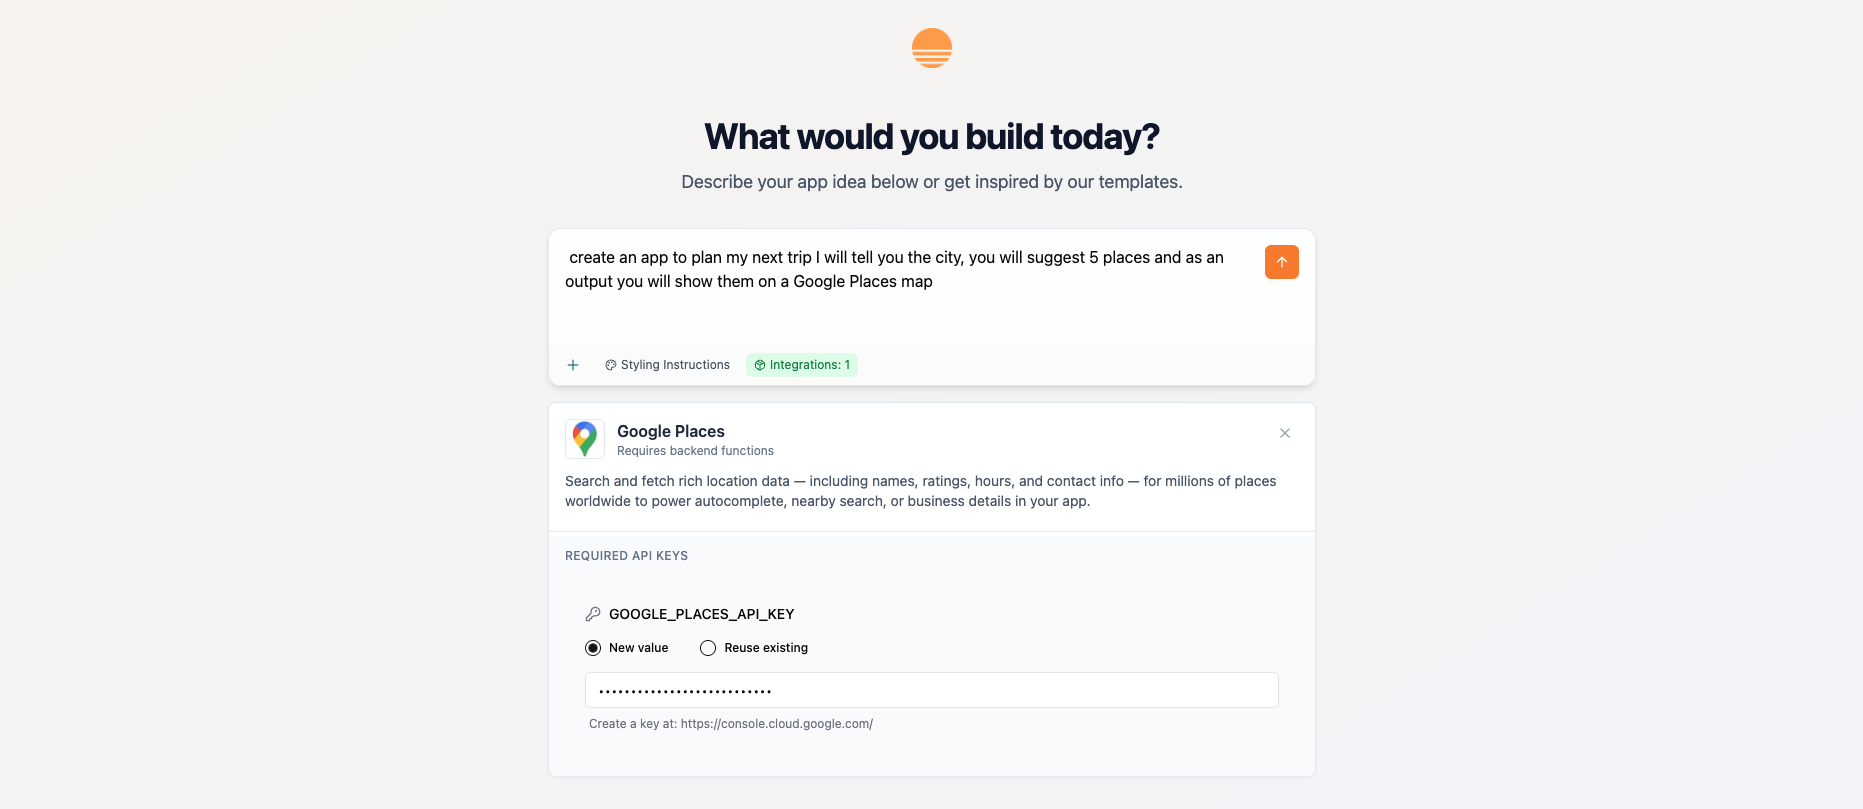
- When prompted, paste your Places API key into the field labeled
GOOGLE_PLACES_API_KEY.
Build your app
- In the AI chat, describe your app’s purpose.
- For example:
Create an app to plan my next trip. I will tell you the city, you will suggest five places, and you will show them on a Google Places map. - Base44’s AI will build the basic structure for you.
Option B: Instant integration (connecting to an existing app)
Use this approach when your app is partially built and you want to integrate Places without starting over.Access your existing app
- Here’s the prompt that we typed out in the AI chat to build our sample app:
“Create an app to plan my next trip. I will tell you the city and you will choose five places for me to visit.”
Connect your app to Google Places using the AI chat
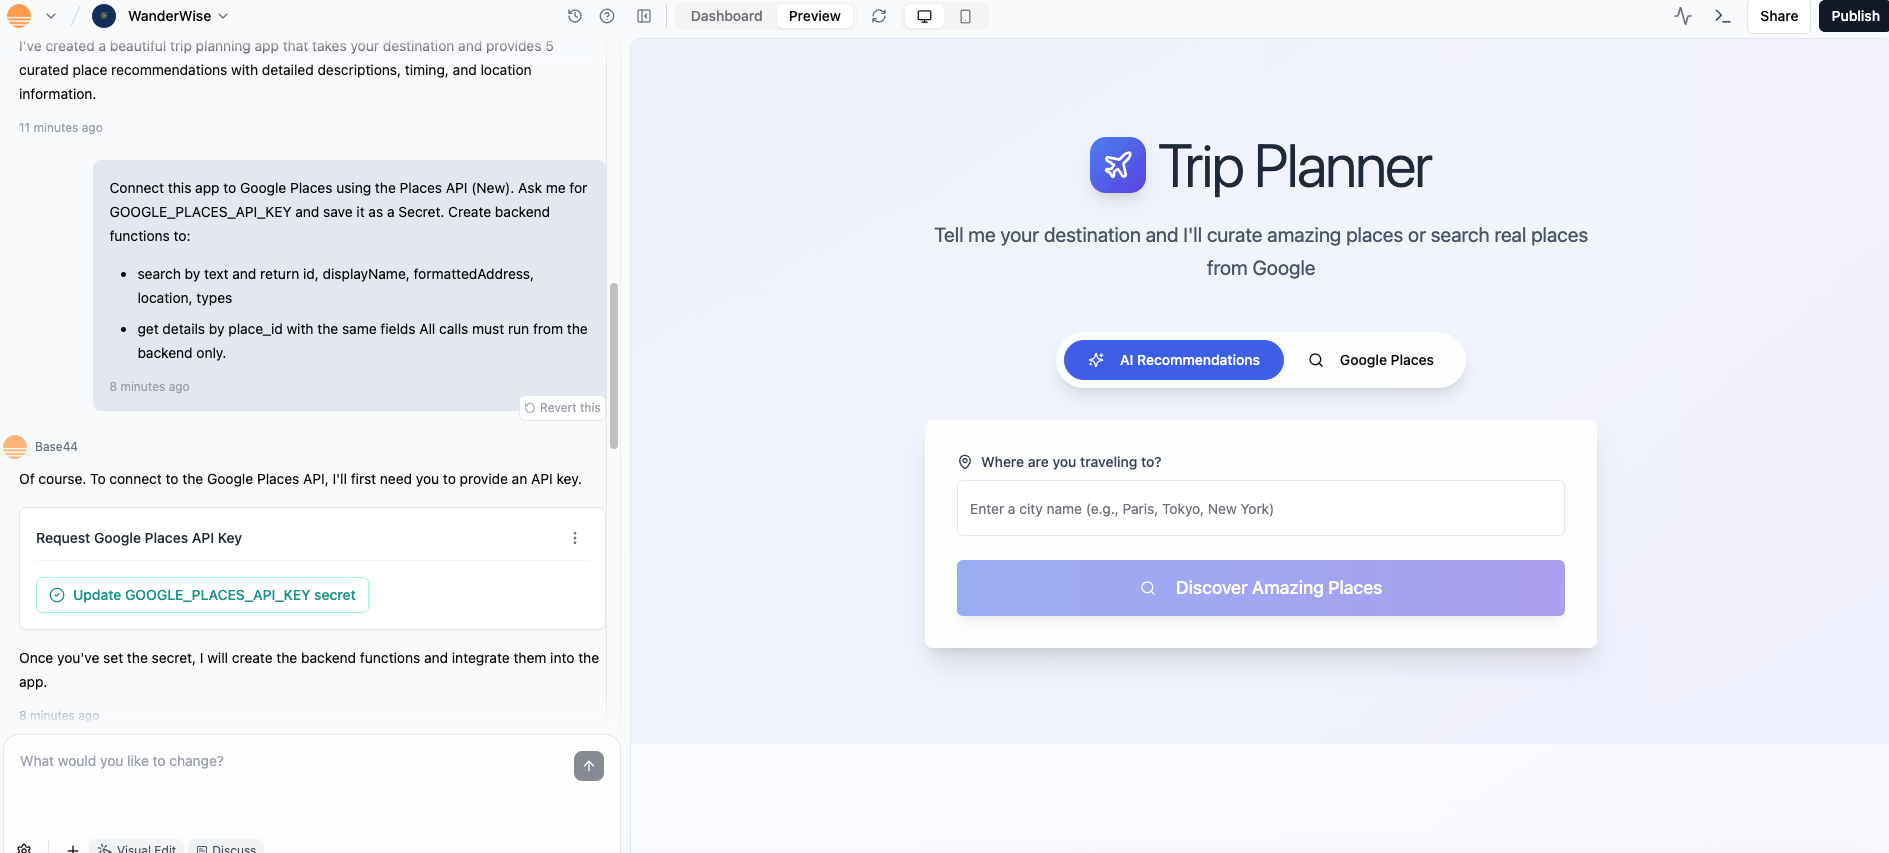
-
Ask the chat to connect your app to Google Places. You can edit this sample prompt:
Connect this app to Google Places using the Places API (New). Ask me for GOOGLE_PLACES_API_KEY and save it as a Secret. Create backend functions to:- search by text and return id, displayName, formattedAddress, location, types- get details by place_id with the same fieldsAll calls must run from the backend only.
When prompted by the AI chat, paste your API key
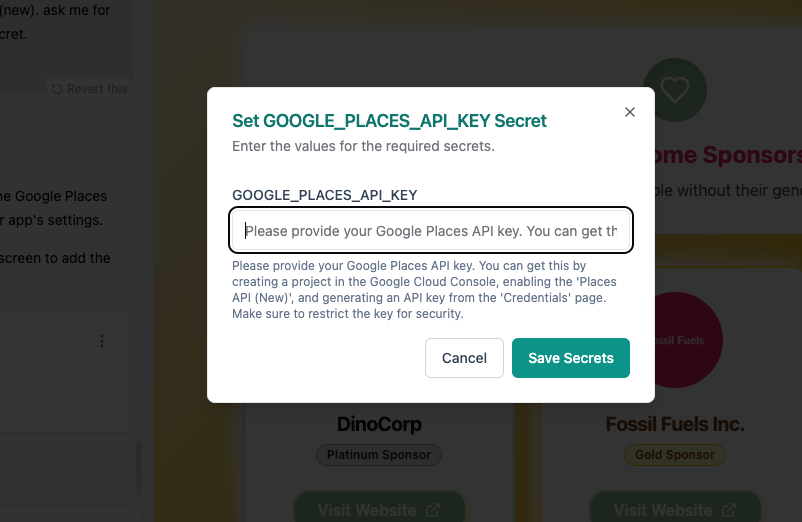
- When prompted by the AI Chat, click on
Update GOOGLE_PLACES_API_KEY - Then paste your API key into the pop up window
Build the interface
- Add the Trip Planner UI and map.
-
You can use a prompt similar to this one to build your interface:
Add a Trip Planner page with:- a City field- 5 auto-suggest place inputs powered by the backendWhen a place is selected, save place_id, name, formatted_address, latitude, longitude, types.Add a Google Map that places a marker for each saved place and automatically fits bounds to show them all. Include a Reset button.
Troubleshooting
- 403 or REQUEST_DENIED errors – Usually the Places API isn’t enabled, the API key is wrong, or key restrictions are too strict. Double‑check that Places API (New) is enabled, your billing account is set up, and relax restrictions during testing.
- Empty suggestions – Try a different city or search term. Make sure the search is happening on the backend, not in the browser.
- Map doesn’t fit all points – Ensure your app calls fitBounds after all markers have been added to the map.
- Wrong fields saved – Save exactly the fields listed above (place_id, name, formatted_address, latitude, longitude, types) so the map and filters work reliably.
Common use Cases
Here are some ideas for how you can leverage the Google Places API inside Base44 apps, based on examples from Google’s own documentation and other Places API providers:- Trip planners – Suggest restaurants, attractions, or hotels when someone picks a city.
- Local business finders – Let users search for nearby cafés, shops, or services.
- Route helpers – Show gas stations, rest stops, or food spots along a journey.
- Real estate tools – Highlight schools, parks, or shops near a property.
- Emergency services locators – Quickly find hospitals, police stations, or pharmacies.
- City guides – Build apps with curated landmarks, events, or lifestyle spots.