About integrations
Integrations connect Base44 to the rest of your stack so you can automate workflows, pull in data, and call external services without wiring every API call by hand. You can integrate at 3 levels:- App level: Integrations inside a single app:
- Built-in integrations such as Invoke LLM and SendEmail.
- Connectors for OAuth-based connections to tools like Notion, Slack, or Google Workspace.
- External API calls with backend functions that use per-app Secrets and functions.
- Workspace level: Shared APIs managed once for the whole workspace:
- Custom OpenAPI integrations based on OpenAPI specs that any app in the workspace can call securely.
- Account level: Connections that live on your Base44 account:
- MCP connections that you configure once so the Base44 AI chat can use external tools while you build, without changing your app’s deployed code.
App level integrations
App-level integrations live inside a single app. They include built-in integrations, connectors, and backend-powered external APIs that you wire to that app only.Built-in integrations
Some integrations come preinstalled in Base44 and are available to use immediately. They do not require a paid plan, extra setup, or separate API keys. With these core integrations, you can add AI, messaging, file handling, and advanced logic to any app with no additional configuration. Base44 built-in integrations include:- Invoke LLM: Generate AI responses from the built-in language model using detailed prompts. Supports JSON schema outputs, file attachments for added context, image analysis, and web search for up-to-date information.
- SendEmail: Send emails to people in your Base44 app with customizable sender names and rich HTML content.
SendEmail does not support sending to external mailing lists or adding file attachments.
- UploadFile: Let people upload files to your app. Use the returned file URL in other integrations or workflows.
- GenerateImage: Create images from detailed text prompts. Returns a URL to the generated image.
- ExtractDataFromUploadedFile: Pull structured data from uploaded files (CSV, PNG, JPG, JPEG, PDF) using JSON schemas. Useful for importing data in bulk.
Connectors
Connectors are OAuth-enabled integrations that let a specific app connect to supported tools. You ask the AI chat to connect a service, sign in, and approve the requested permissions. Your app can then read or write data in that tool based on what you allow. Examples of what you can build with connectors:- Sync a Notion database to power a knowledge view in your app.
- Post updates to a Slack channel.
- Sync Salesforce or HubSpot records into an internal dashboard.
- Save files from your app to Google Drive.
- Block off time in Google Calendar when a new booking is made.
- Publish a LinkedIn post when a new blog post is published.
- Show TikTok profile stats and follower counts in a dashboard.
External API calls with backend functions
External integrations using backend functions let a specific app talk directly to third-party services like Stripe, Twilio, or Google APIs with per-app credentials. These calls are wired through your own backend functions and Secrets.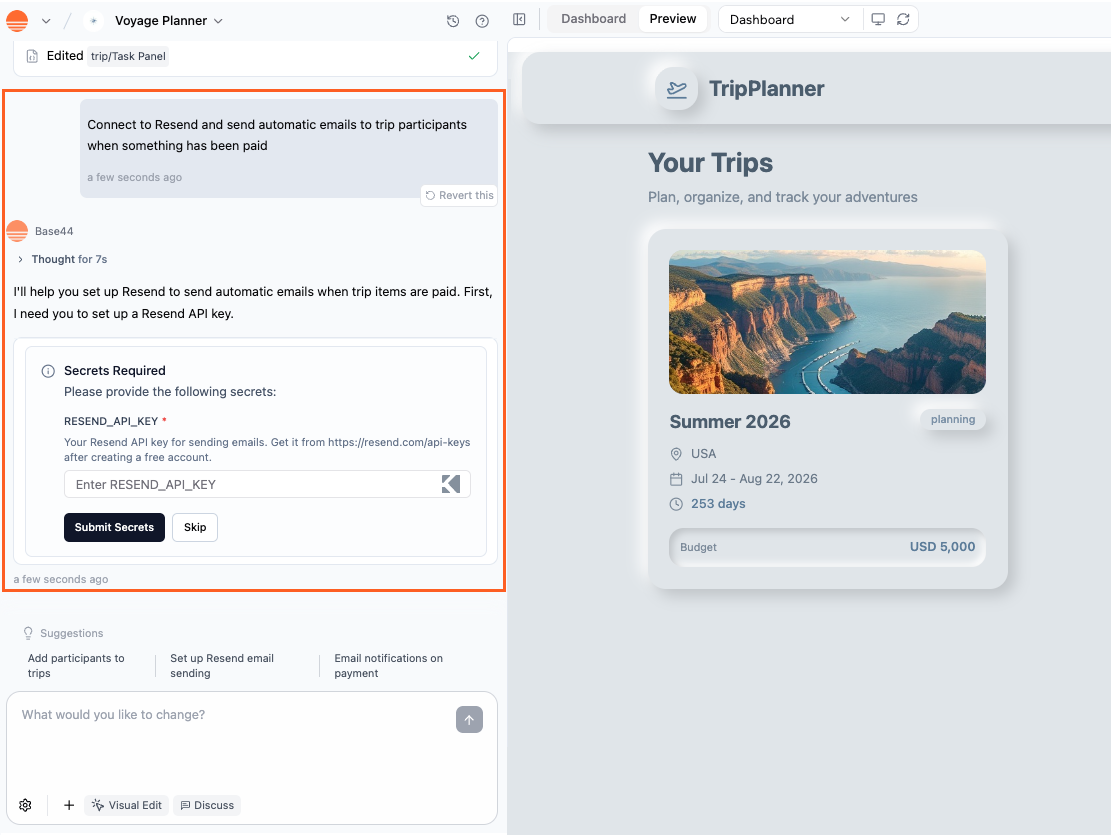
Connecting an integration to your Base44 app using the AI chat
- You want a one-off integration for a single app.
- You need custom logic that is tightly coupled to that app.
- The service is not yet set up as a custom OpenAPI integration in your workspace.
- Sending welcome emails to new people using your app via your email provider.
- Syncing your existing CRM with your app database.
- Alerting your team in Slack when someone submits a form.
- Generating content with AI tools using your own provider keys.
- Calling vendor-specific APIs that do not have a connector or custom OpenAPI integration yet.
Workspace level integrations
Workspace-level integrations live in a workspace and can be reused across many apps without repeating setup or credentials.Custom OpenAPI integrations
Custom OpenAPI integrations let you register shared external APIs at the workspace level from an OpenAPI specification. You import a spec once, select the operations you want to expose, and any app in that workspace can call those operations through the SDK. The AI builder and your frontend code can call custom OpenAPI integrations directly throughbase44.integrations.custom without exposing credentials. Calls are proxied through the Base44 backend, so secrets never reach the browser.
This is ideal for internal APIs and partner APIs that your team uses across many apps.
Account level connections
Account-level connections are configured once for your Base44 account and are available wherever you use the Base44 AI chat.MCP connections
MCP connections let you connect custom MCP servers to your Base44 account so the AI chat can use external tools and data as context while you build. This gives you a context-aware builder chat without changing your app’s deployed runtime. Examples of what you can do with MCP connections:- Ask the AI chat to search an internal docs MCP and summarize the most relevant pages for a feature.
- Connect a GitHub MCP server and ask for a summary of open issues in a specific repo.
- Connect an analytics MCP, such as Amplitude or a custom metrics service, and ask the chat to pull recent product metrics into the conversation while you plan changes.
Getting your API keys
Some integrations require an API key, which acts like a private password between Base44 and the external service. Your API key proves ownership and keeps your connection secure. Base44 stores your key safely so your app can use it without exposing it. To get your API key:- Log into the external service (for example, OpenAI, Resend, Notion).
- Find the Developer, API, or Integrations section.
- Click Create API Key or Generate Token and copy it.
- Paste your API key in Base44:
- Using the AI chat: Enter your API key in the AI chat when prompted.

Adding your API key in the AI chat in Base44
- Setting up manually: Save your API key in Secrets.
a. Click Dashboard in your app’s editor.
b. Click Secrets.
c. Click Add Secret.
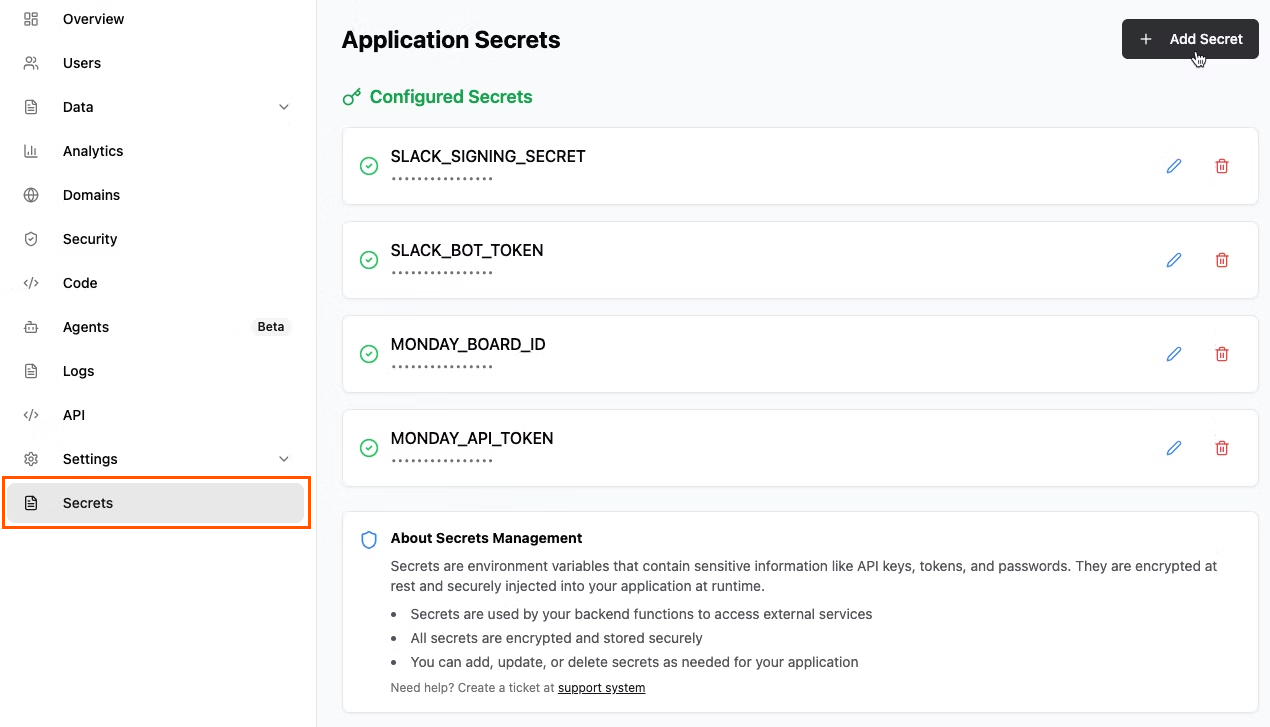
Adding secrets in the app dashboard of Base44
- Using the AI chat: Enter your API key in the AI chat when prompted.
FAQs
Click a question below to learn more about using integrations.What is the difference between custom OpenAPI integrations and per-app external APIs?
What is the difference between custom OpenAPI integrations and per-app external APIs?
Custom OpenAPI integrations are configured once in a workspace from an OpenAPI spec and are available to every app in that workspace through
base44.integrations.custom.call(). Credentials are stored as encrypted workspace secrets and never exposed to app code, and you do not need backend functions to use them.Per-app external APIs use backend functions and Secrets in a specific app. They are ideal for app-specific logic or when you do not want to share an API across all apps in a workspace.How should I test my integration before I publish?
How should I test my integration before I publish?
Before publishing your app, test your integration so you can catch issues early:
- Use sandbox or test mode (for example, Stripe test keys), if the provider offers it.
- Try real flows and edge cases, not just a single happy path.
- Check that inputs and outputs match your expectations in your UI and in the provider’s dashboard.
- Monitor integration credit usage in both Base44 and the external service.
- Preview your app to catch slow loading, failed API calls, or missing data before going live.
Why is my integration not working?
Why is my integration not working?
If you run into issues, check the following:
- Your workspace is on a Builder plan or higher (for per-app external APIs that use backend functions).
- Your API key is correct and saved in Secrets or in the custom OpenAPI integration, if relevant.
- You have enough active credits in the external service.
- You are using live credentials, not test ones, when testing production flows.
- Your API request includes the correct endpoint, payload, and parameters.
- You have not hit the service’s rate limits.
Who can use backend functions and per-app external APIs?
Who can use backend functions and per-app external APIs?
Backend functions and per-app external APIs require a Builder plan or higher on the workspace where the app was created. If the workspace is on a Free or Starter plan, backend functions and integrations that depend on them are unavailable.Workspace owners and admins can create backend functions in apps they own. Collaborators with an Editor role can also edit and create backend functions in an app as long as the workspace has a Builder plan or higher.
Why do I get 403 errors when using backend functions?
Why do I get 403 errors when using backend functions?
If you see a 403 error when using backend functions, it may mean backend functions are not available for your app or workspace, or the request is missing permissions.Common causes and fixes:
- Plan requirement: Backend functions are only available on a Builder plan or higher. If the workspace is on a Free or Starter plan, backend calls and per-app integrations that rely on them can fail with 403.
- Permissions in your function: Your backend function may be rejecting the request because the person is not signed in or does not have the right role. Check any role or access checks you added in the function code.
- External service permissions: A 403 can also come from the external API you are calling. Make sure the API key has the right scopes and that the request uses the correct endpoint and method.
- Still having trouble: See the Troubleshooting Issues article or contact Base44 support.
How do I regenerate or update my API key?
How do I regenerate or update my API key?
There are 2 types of API keys you may need to regenerate or update:
- Third-party service keys: Regenerate your key in that service’s developer portal, for example OpenAI, Resend, Notion, then update it in Dashboard → Secrets or in your custom OpenAPI integration settings.
- Your Base44 account API key:
- Click your profile icon at the top right of your account.
- Click Account settings.
- Click Regenerate next to API Key.
Once regenerated, your Base44 API key updates across all of your Base44 apps automatically. If you have added your Base44 key in another service, update it there as well.
What happens to my integrations if I downgrade my plan?
What happens to my integrations if I downgrade my plan?
- Built-in integrations remain available.
- Connectors, custom OpenAPI integrations, MCP connections, and per-app external APIs that rely on backend functions may stop working until you upgrade to a Builder plan or higher.
Can I use multiple integrations in one app?
Can I use multiple integrations in one app?
Yes. You can mix built-in integrations, connectors, custom OpenAPI integrations, and per-app external APIs in the same app, as long as your plan and settings support them.
Why can Base44 or the AI not fetch my API key for me?
Why can Base44 or the AI not fetch my API key for me?
For security reasons, external services like Stripe, OpenAI, or Notion do not let third parties, including Base44, access your credentials automatically. Instead, you need to:
- Log in to the service.
- Go to the API or developer section.
- Generate your key.
- Paste it into Base44 as a Secret or workspace header.
Why this matters: API keys act like passwords for services. Keeping them private and under your control keeps your data safe and ensures only you authorize access.
Do MCP connections work like other app integrations?
Do MCP connections work like other app integrations?
No. MCP connections are only for the Base44 AI chat while you build. They are configured at the account level under Settings → MCP Connections and are used only when your prompt requires that MCP server. Your deployed app does not call MCP servers through this settings page.