Note: Airtable integration is available on the Builder plan and above. If you’re on the Free plan, you’ll need to upgrade your app to use backend functions and payment features.
Step by step setup:
Part 1: The Airtable side
If you already have a Airtable API token and Base ID, feel free to skip ahead to Part 2: The Base44 side.Create a Personal Access Token
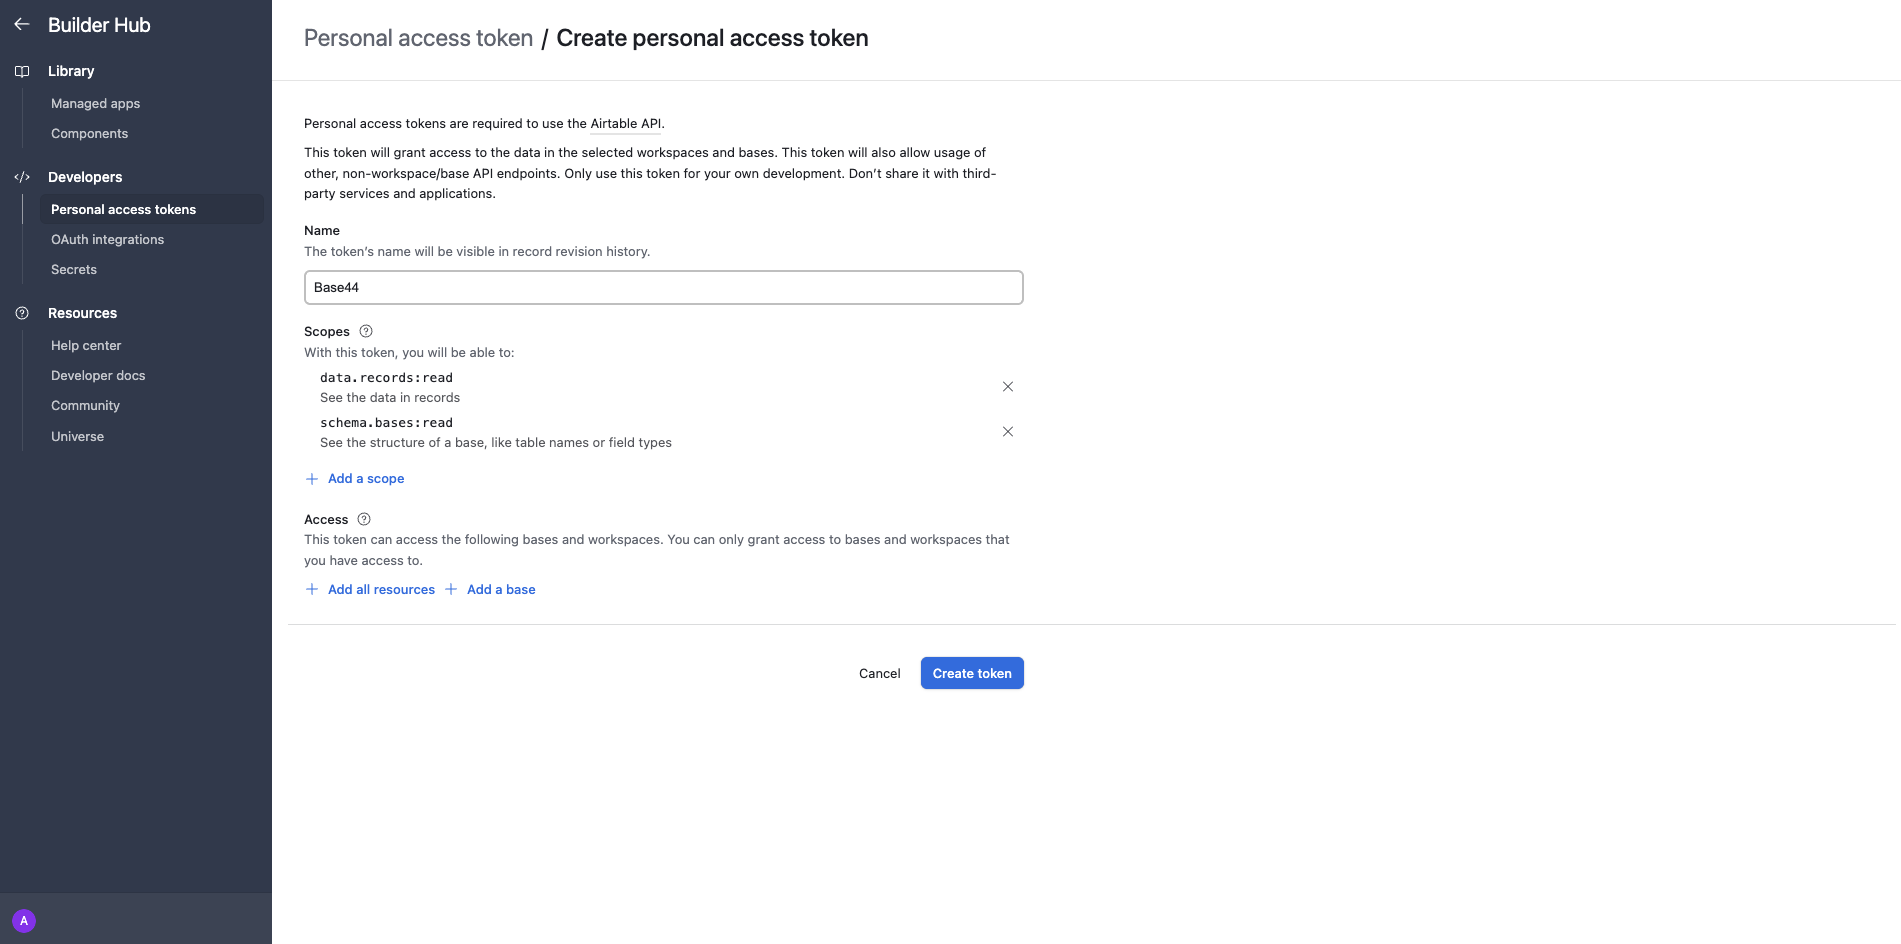
- Go to Airtable’s token creation page .
- Under “Scopes,” create a token scoped to the correct workspace/base with at least:
data.records:readschema.bases:read(optional but helpful for testing)
- Name your token, set a credit limit if you use them, and copy the token somewhere safe.
Part 2: The Base44 side
Once you have your API token and Base ID, you can connect it to Base44 in two different ways:Option A: Ready-made integration (preferred)
- Choose this path if you are starting a new app from scratch.
Option B: Instant integration
- Choose this path if you are already in the midst of building and would like to integrate Airtable into an existing app.
Option A: Ready-made integration (create a new app)
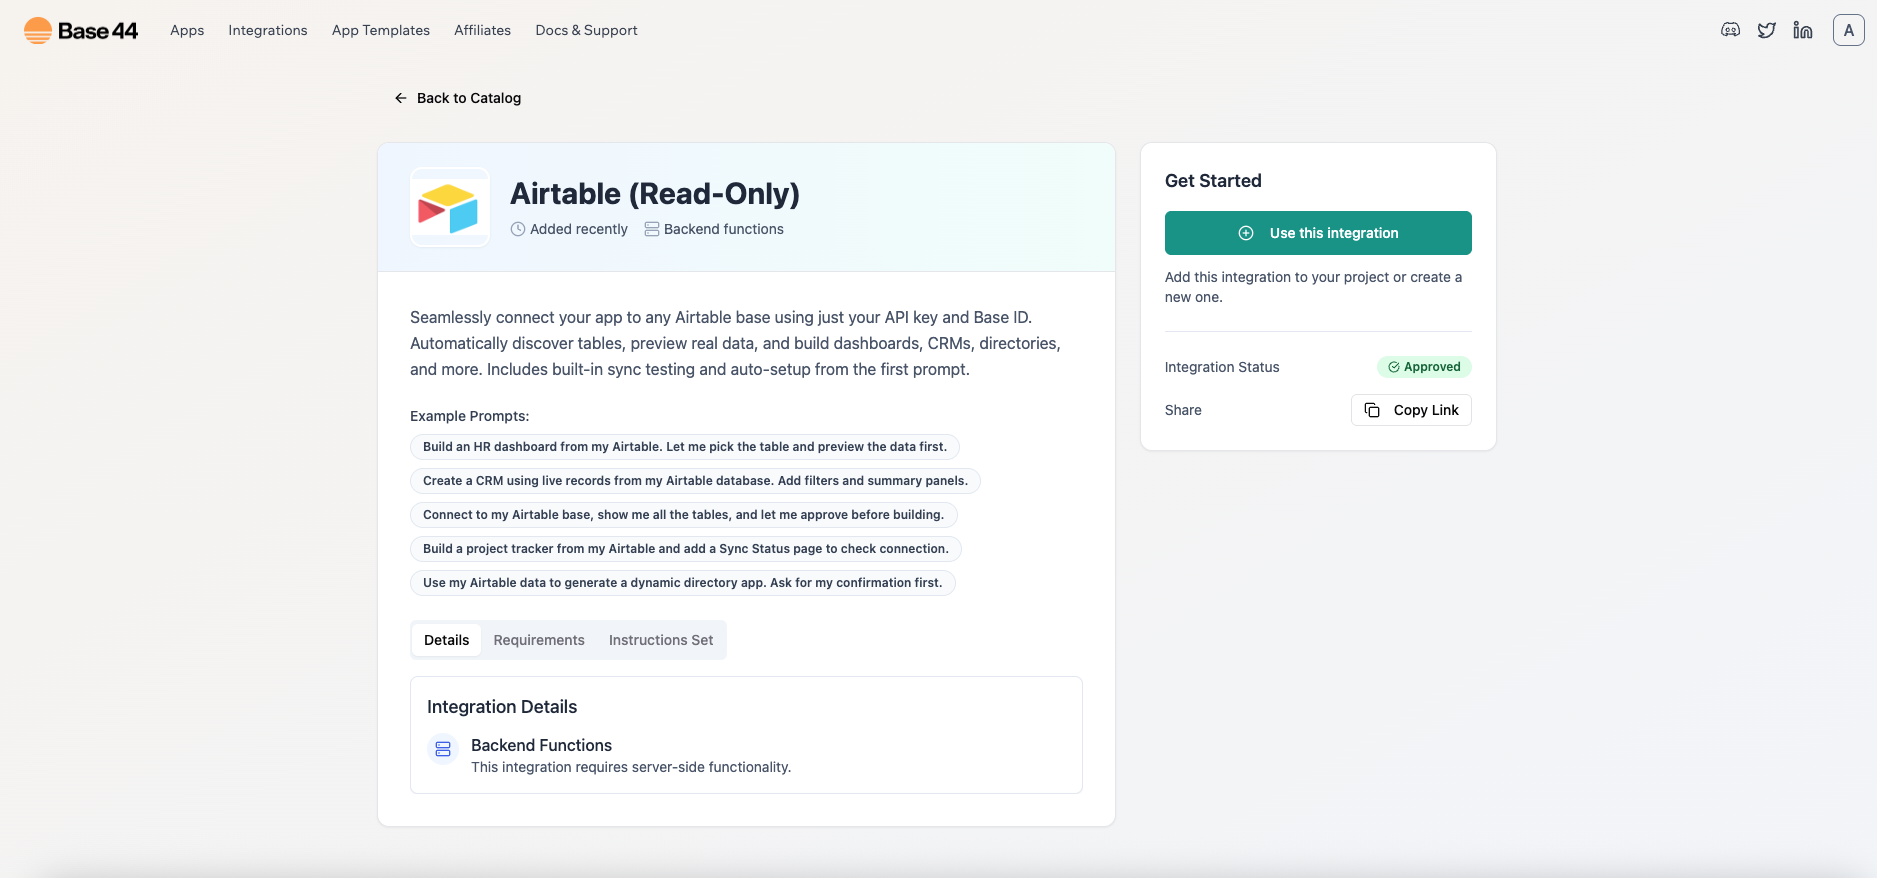
Add Airtable from the Integrations Catalog
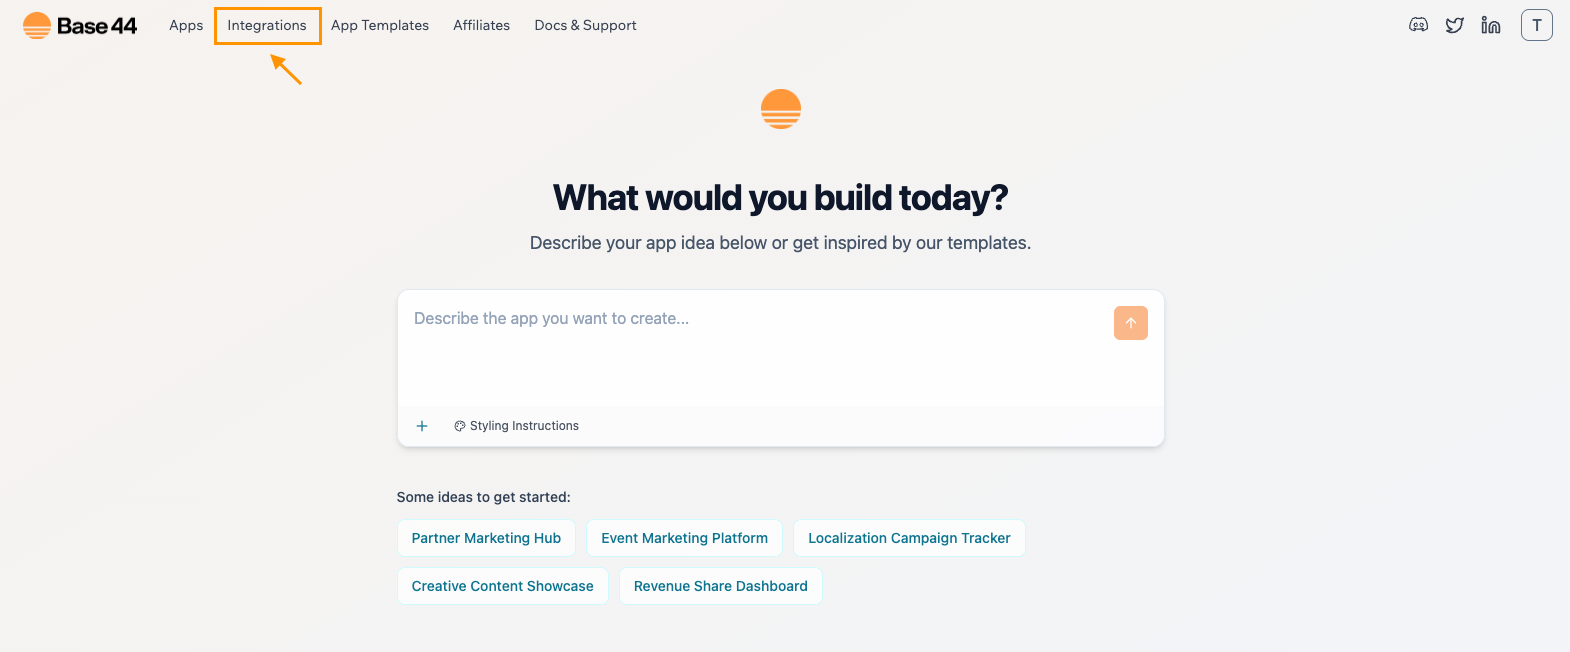
- In the integrations catalog, select Airtable
-
Then click “Use this integration”
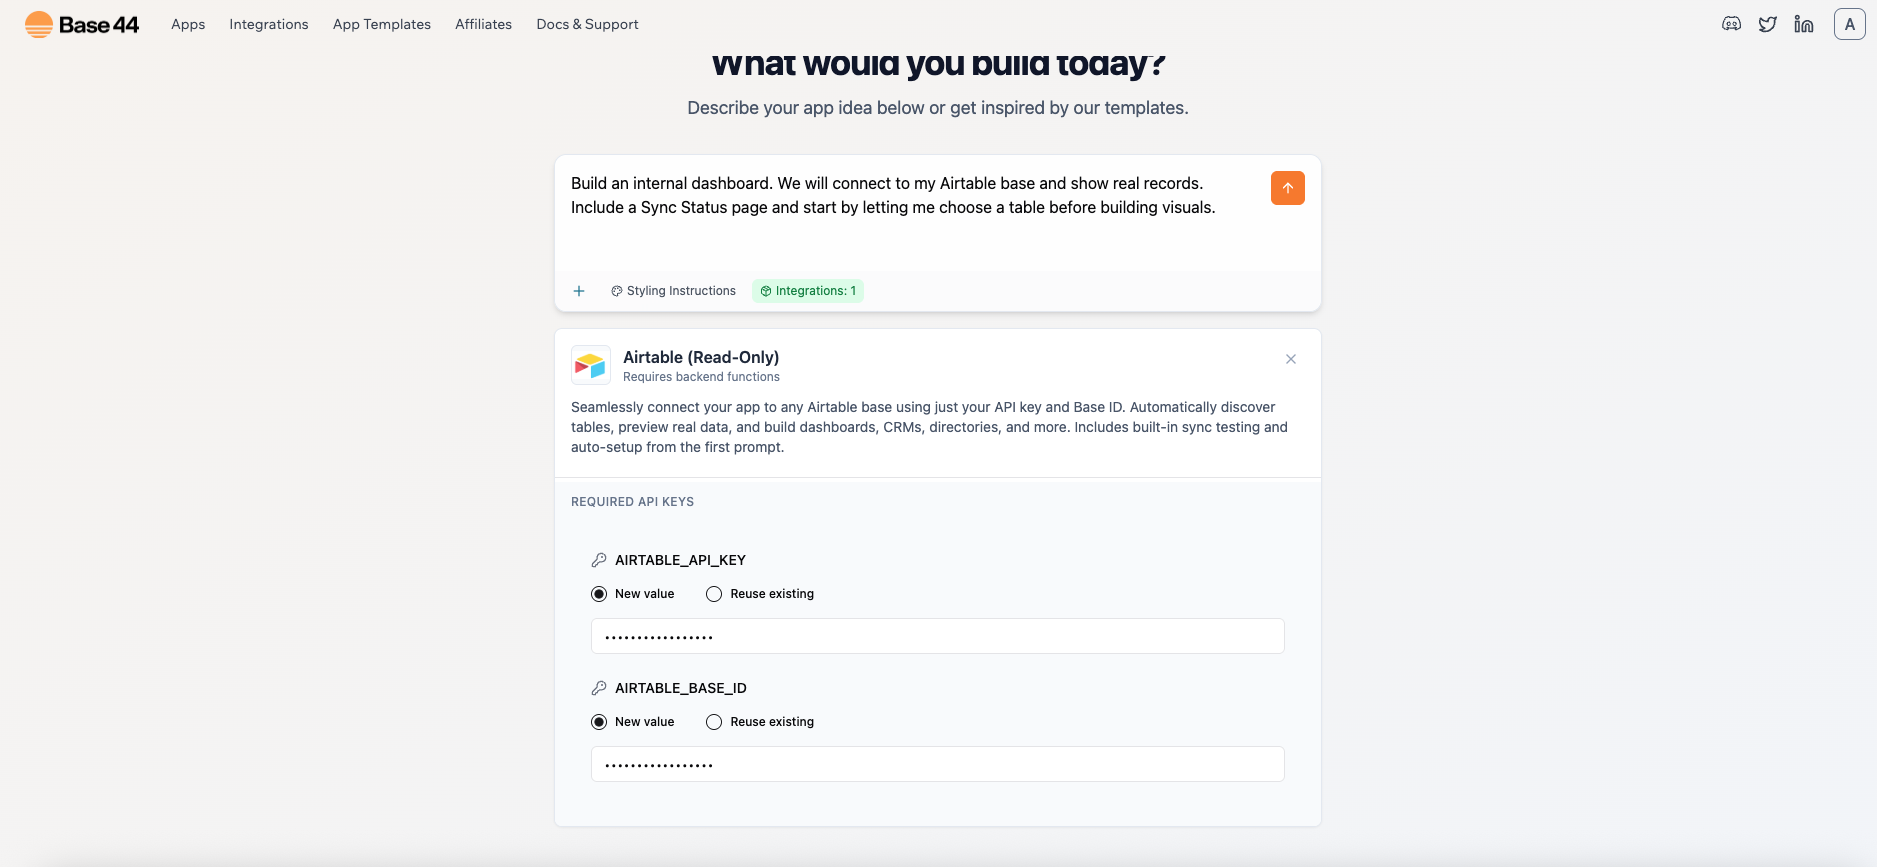
Build your app
-
Here’s a sample prompt you can use:
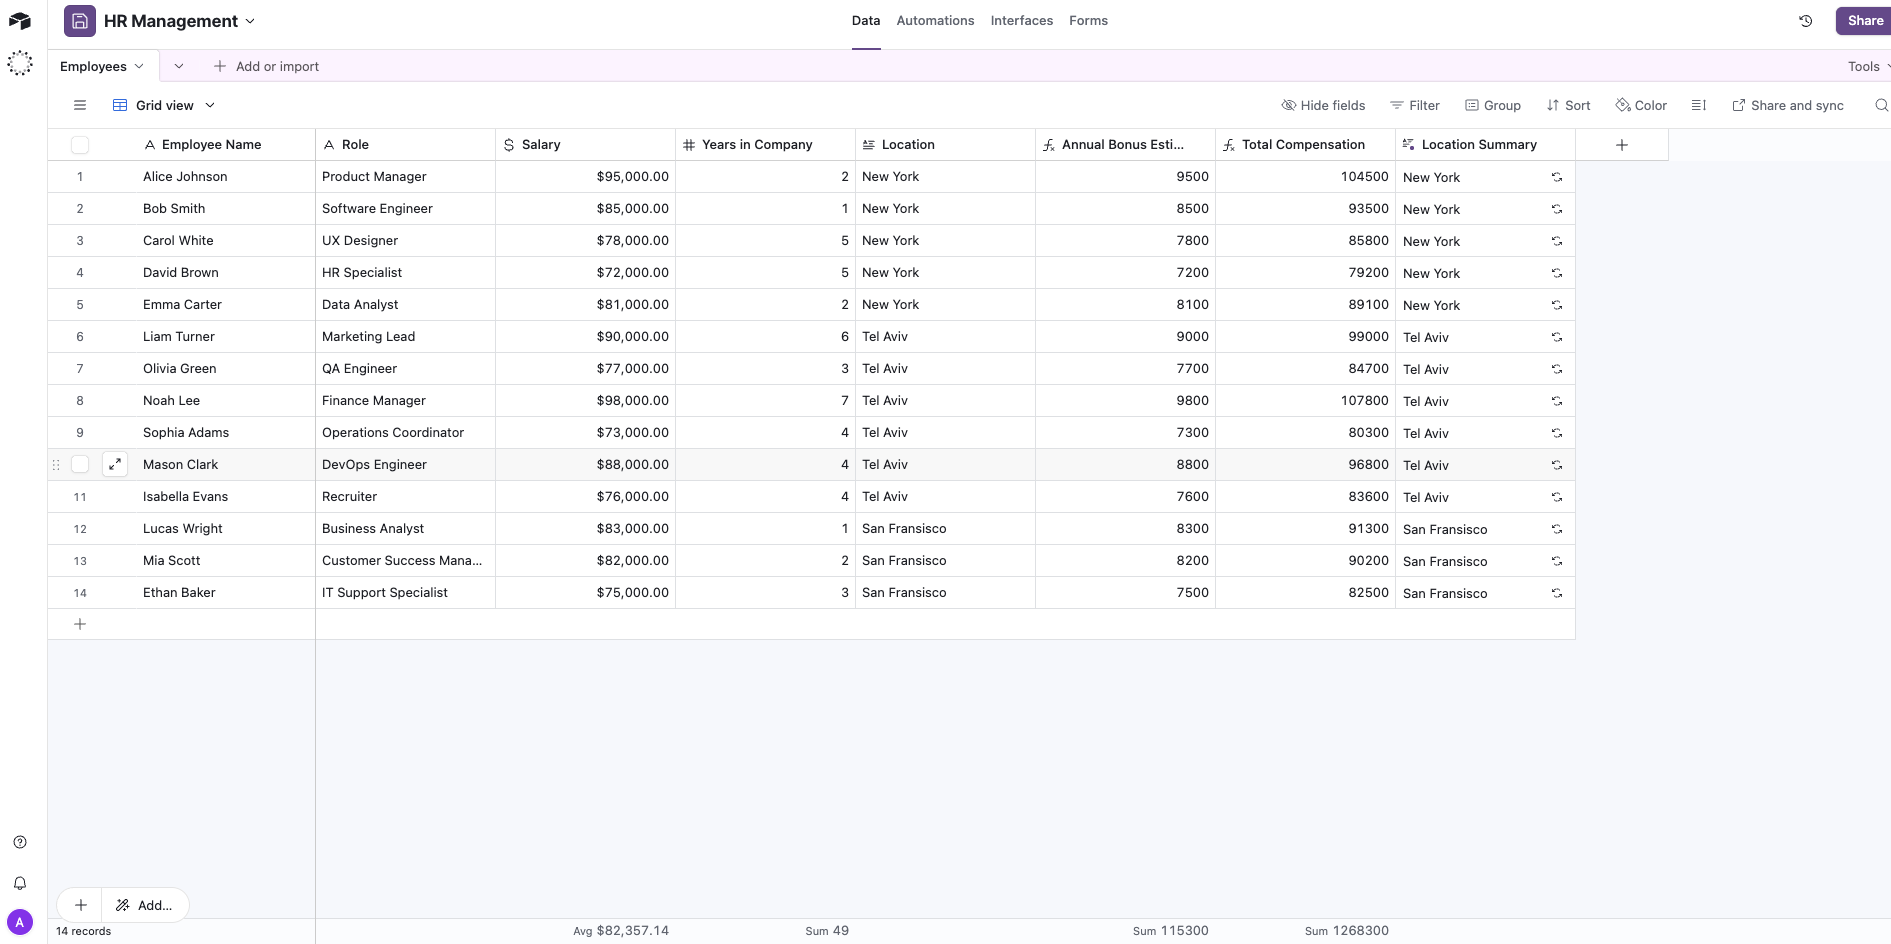
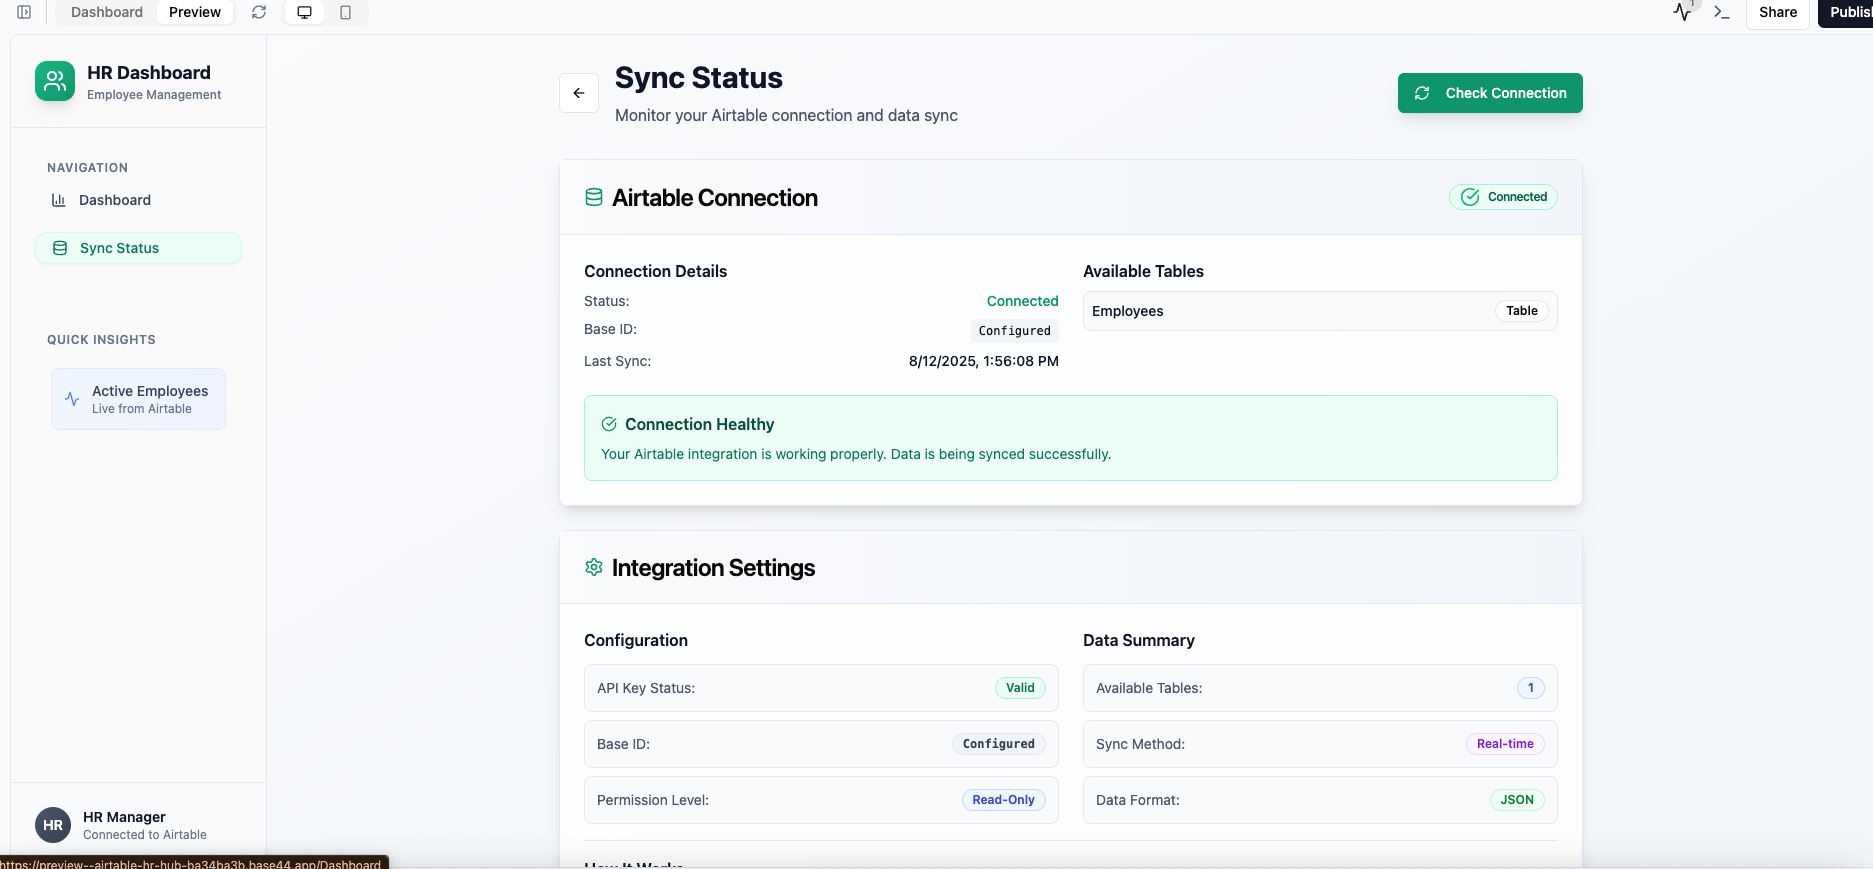
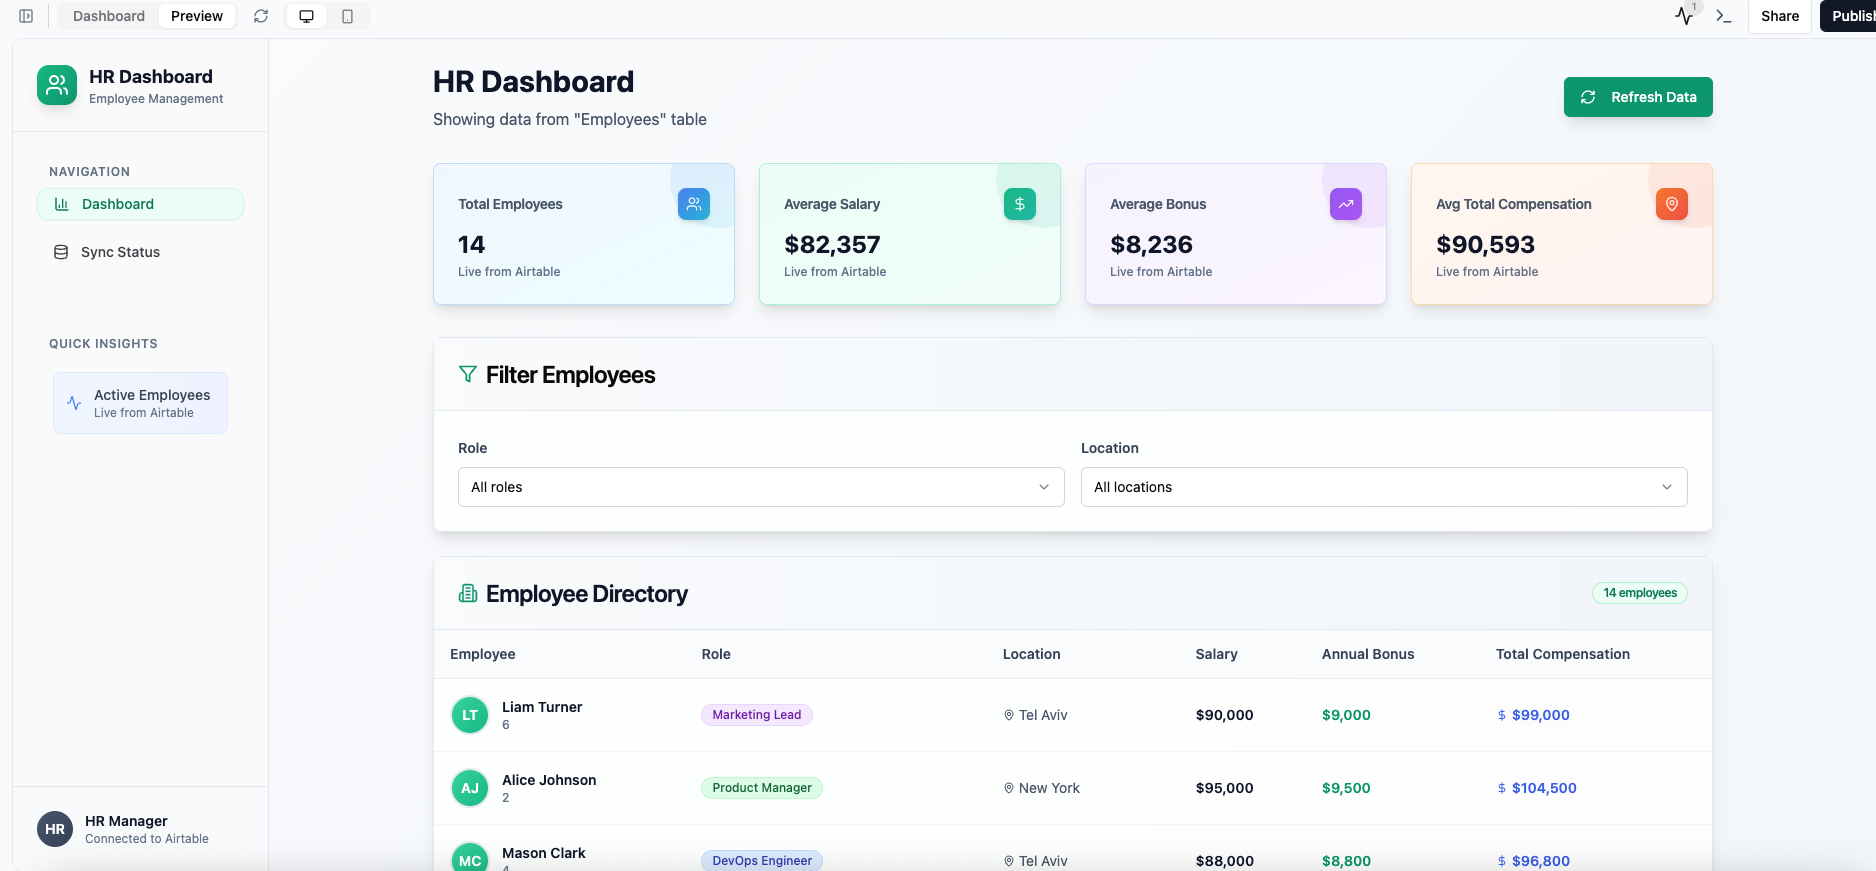
“Build an internal dashboard. We will connect to my Airtable base and show real records. Include a Sync Status page and start by letting me choose a table before building visuals.” - The app runs a test call to Airtable and lists your tables
- You select one
- It fetches real records and shows a raw data table so that the schema is clear
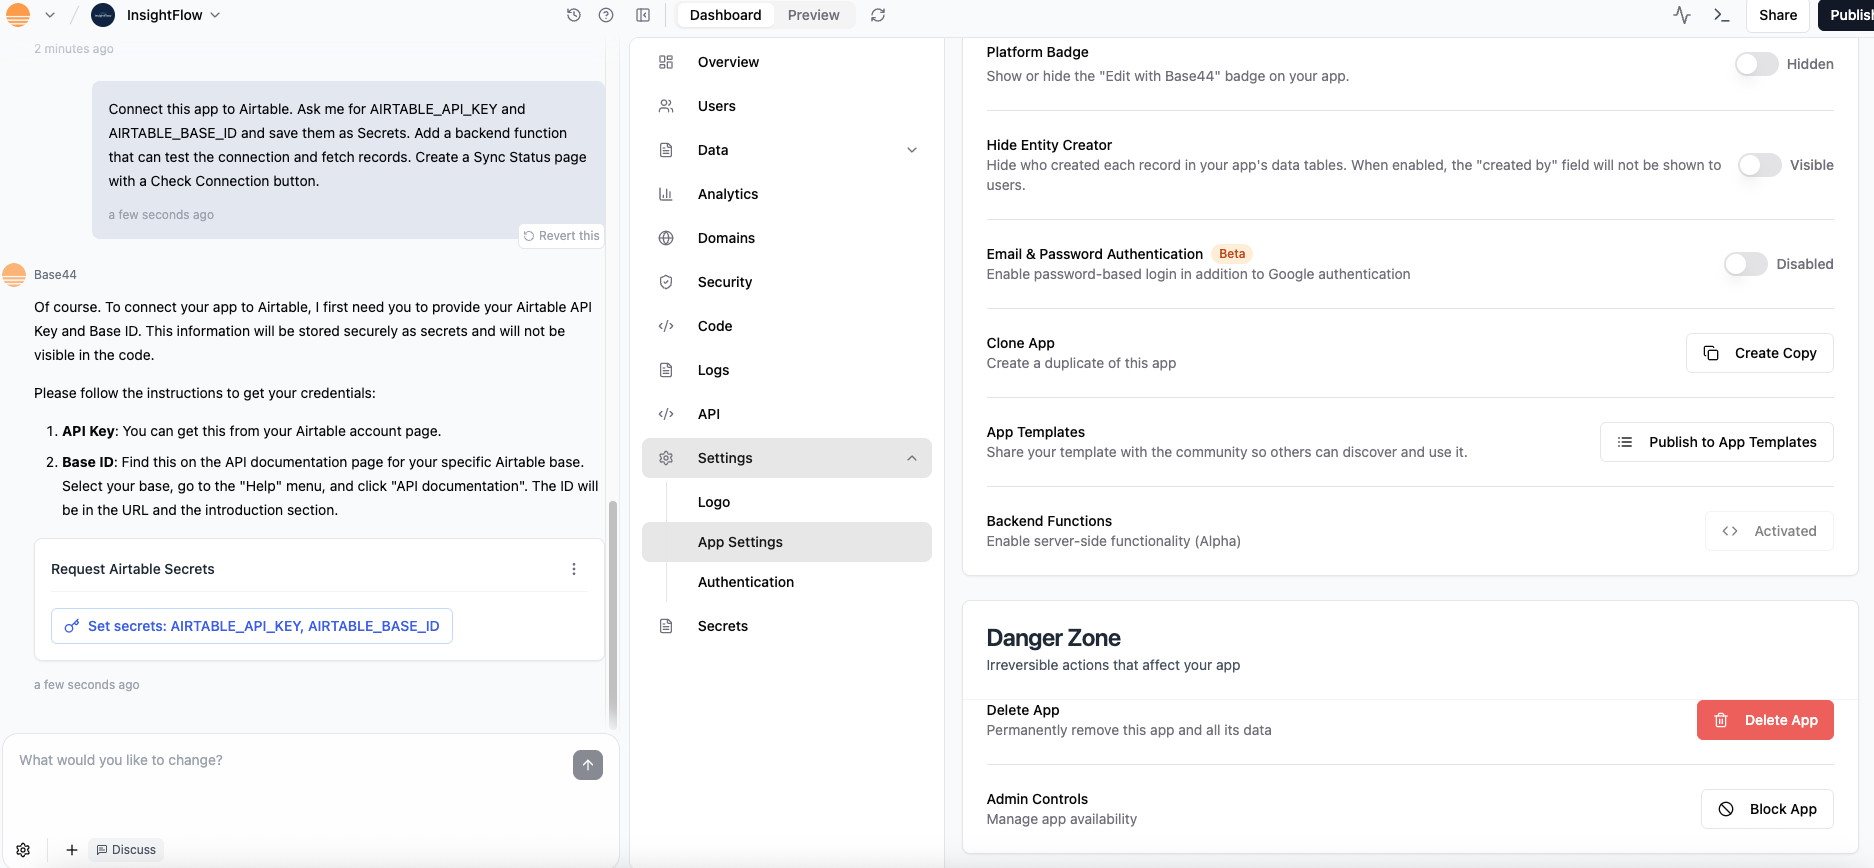
Option B: Add Airtable as an Instant integration
Choose this path if you already have an app in progress.Access your existing app
-
Here’s the prompt that we typed out in the AI chat to build our sample app:
“Build an internal dashboard. Let me pick a data source later.”
Connect to Airtable through the AI chat
-
Here’s a sample prompt that we pasted in our AI chat:
Connect this app to Airtable. Ask me for AIRTABLE_API_KEY and AIRTABLE_BASE_ID and save them as Secrets. Add a backend function that can test the connection and fetch records. Create a Sync Status page with a Check Connection button. - Click on “Set secrets” in the AI chat
- Paste your API Key and Base ID when prompted
Fetch tables and show data
- Prompt the AI chat to show you the data
-
Here’s a sample prompt that we used for our app:
Run the connection test to list my tables, let me pick one, then fetch records and show a raw table view before any visuals.
Troubleshooting
- 403 or connection failed – Token scope is wrong. Make sure data.records:read is enabled. Add schema.bases:read if table listing fails.
- Wrong Base ID – Double-check you copied the app… string from the URL.
- No data shown – Make sure the base actually has records and the token has access.
- Public preview vs builder session – Stay logged into the builder while testing Sync Status.
Common use cases
Here are a few ways teams often use Airtable with Base44:- Dashboards – Pull in Airtable data and visualize it in real time.
- Data management – Give teammates a friendly UI for viewing or checking Airtable records.
- Sync monitors – Create a Sync Status page to quickly test connections and confirm updates.
- Internal tools – Build lightweight apps (like CRM views or content trackers) on top of Airtable without custom code.