

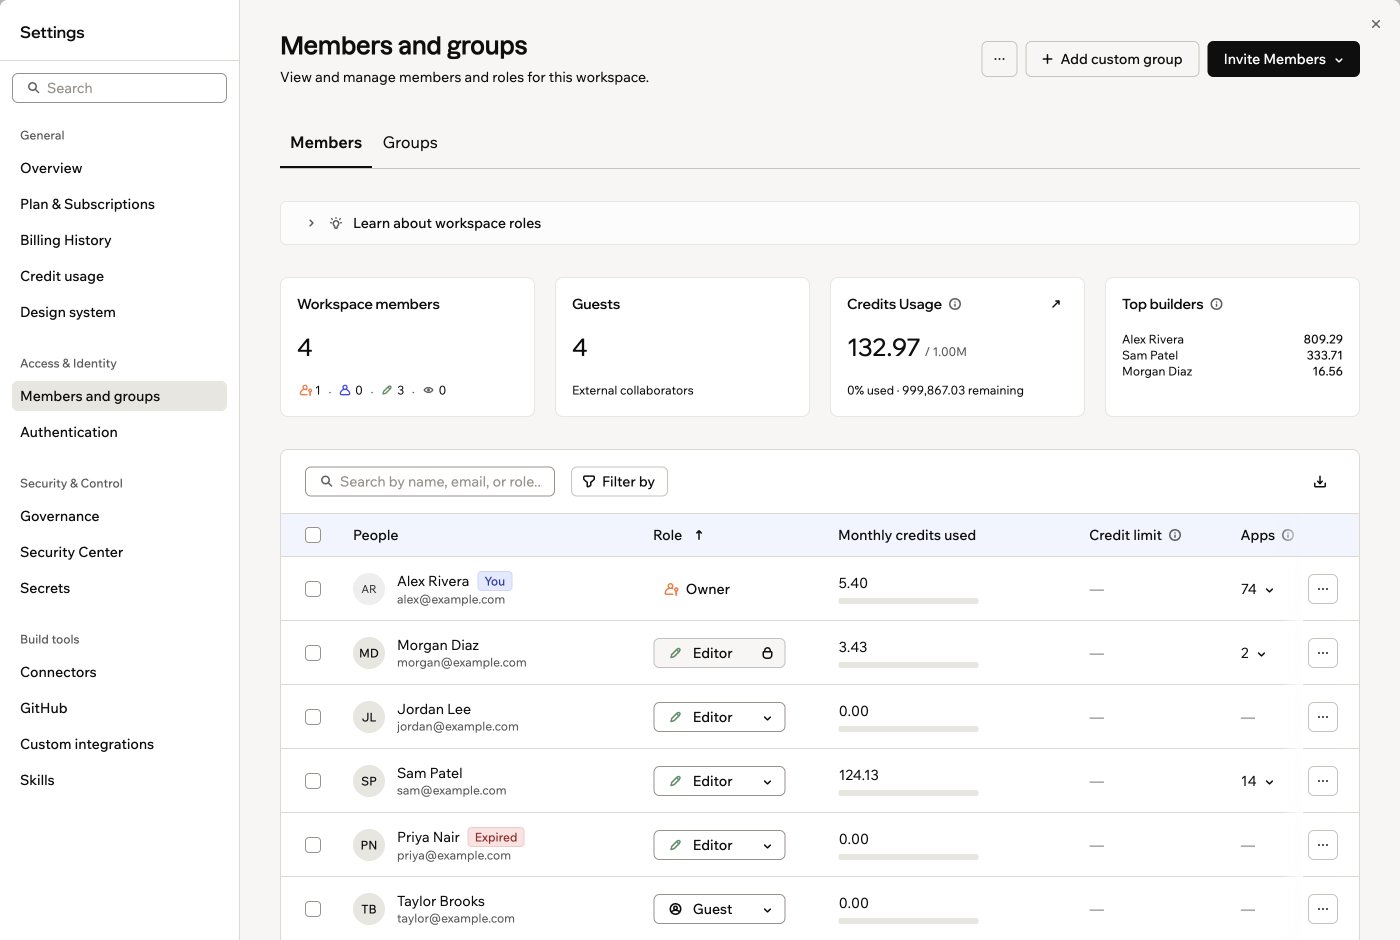
The Members tab in Members and groups
Workspace roles
On an Enterprise plan (Business or Enterprise), your workspace includes an additional Admin role alongside the standard Owner, Editor, and Viewer roles.If a workspace moves off an Enterprise plan (Business or Enterprise), any members with the Admin role are automatically moved to the Editor role.
Managing workspace groups
Workspace Owners and Admins can assign one workspace role to multiple members at once by creating a group. When a group has a role, its members inherit that role, so you can manage access by team instead of one person at a time. If someone belongs to more than one group, they get the highest role among their groups. Once a group exists, you can use it across Base44:- Workspace roles: Assign a role to the group so its members inherit it, as described in this section.
- App access: Give a group access to a specific app with one role, kept in sync as people join or leave.
- Publishing permissions: Set publishing permissions for a group that its members follow instead of their role’s.
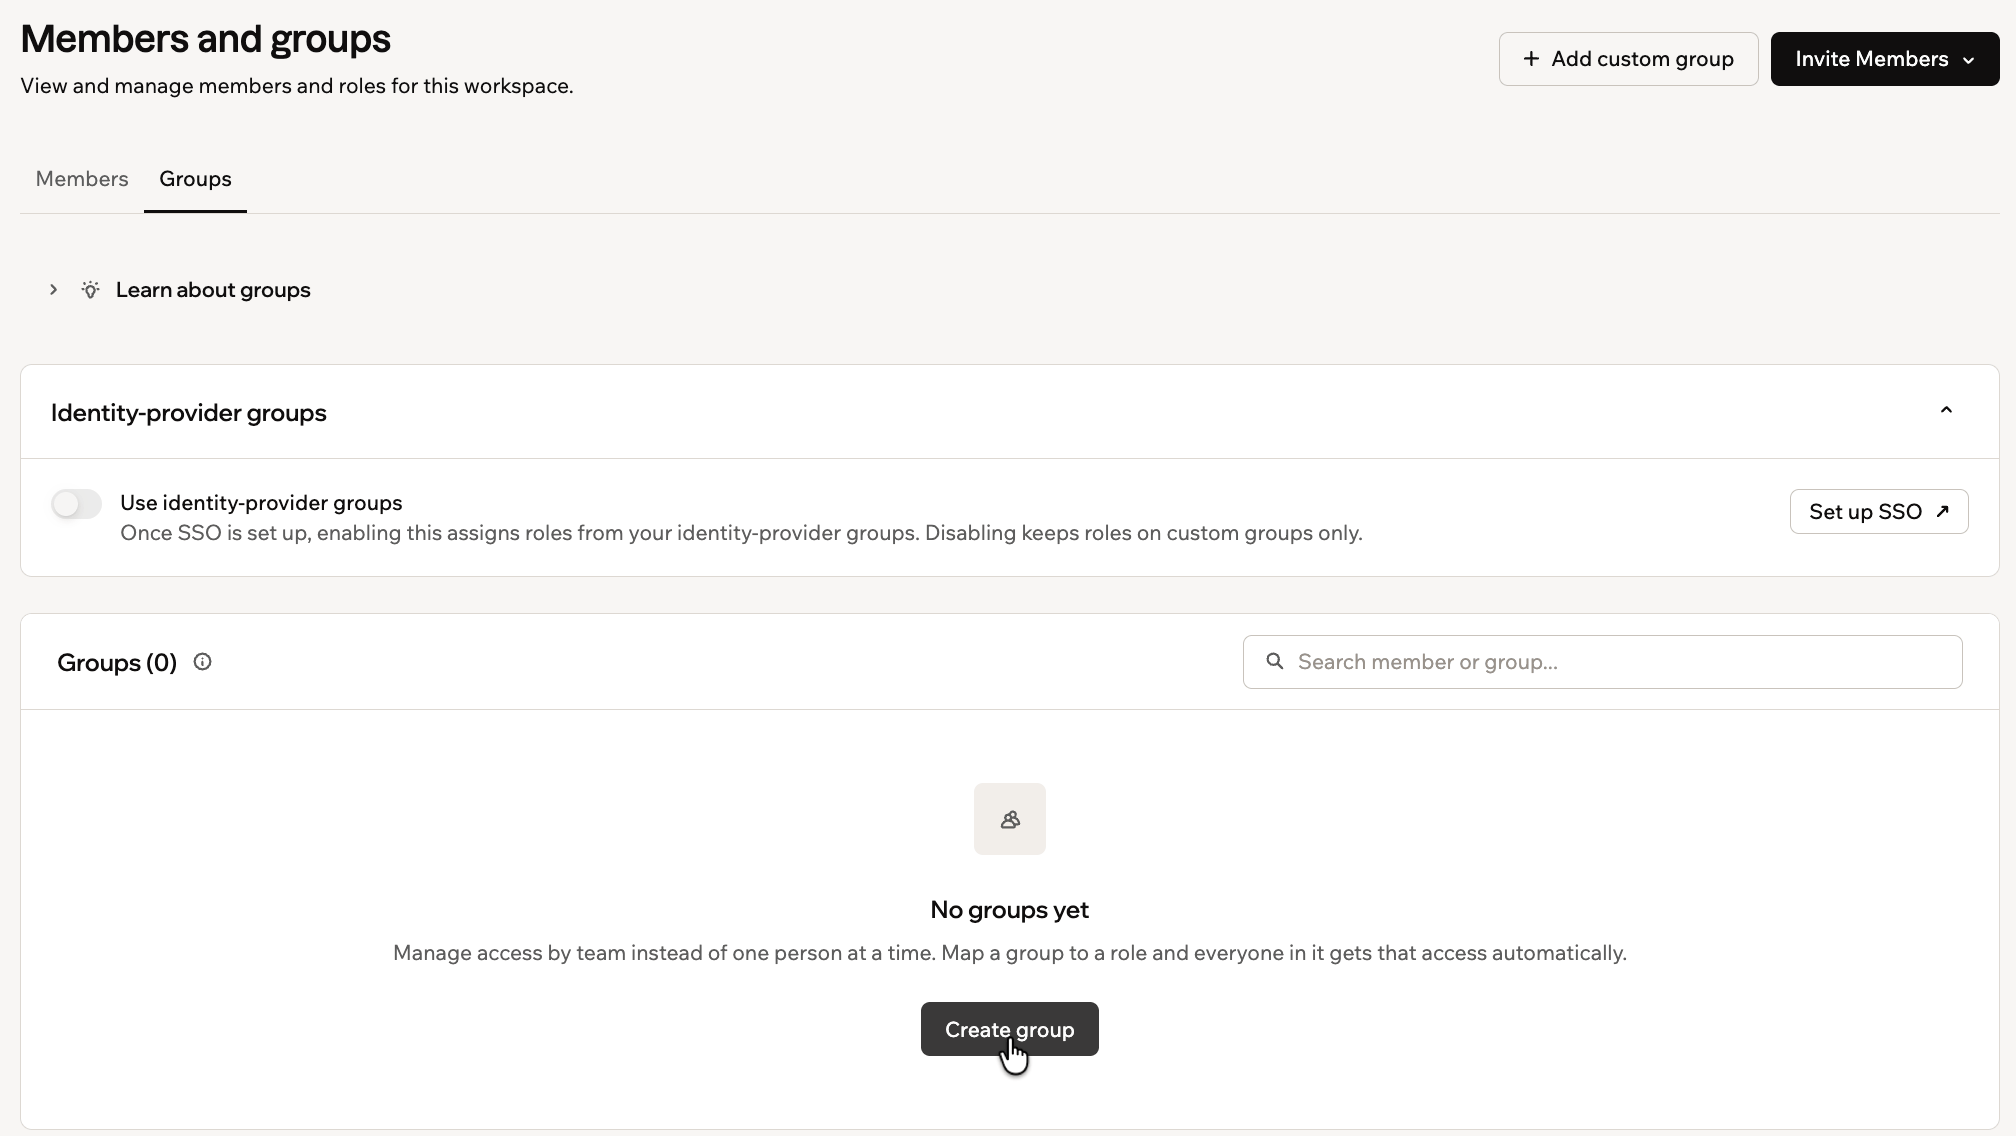
The Groups tab in Members and groups
Good to know about groups:
- If a member inherits their role from a group, you cannot change it from the member row on the Members tab. Change the group’s role or the member’s group membership instead.
- Editors can open the Groups tab in read-only mode. They see the group list, each group’s role, and its members.
Creating a custom group
Custom groups are created and managed in Base44 and don’t require SSO or SCIM.- Open Settings → Members and groups, then select the Groups tab.
- Click Add custom group.
- Enter a Group name.
- Add a Group description (optional).
- Choose the Role every member inherits: Admins, Editors, or Viewers. To create the group without granting a role, choose No assigned role. The group does not grant a role.
- (Optional) Add members to the group.
- Click Create group.
Managing a group
To view or edit a group, click the More actions icon next to it and select View group. In the View group dialog you can rename the group, change the Role it grants, or add and remove members. Click Save to apply your changes. To delete a group, click the More actions icon next to it and select Delete group. Deleting a group does not remove its members from the workspace. Their roles are recalculated from remaining groups or the workspace default.Working with identity-provider groups
Identity-provider (IdP) groups are synced into Base44 from your identity provider through SCIM and appear with the IDP badge. Their name and membership come from your identity provider, so they’re read-only in Base44. You assign the workspace role each IdP group grants. To let IdP groups govern member roles, turn on Use identity-provider groups in the Identity-provider groups section of the Groups tab. SSO must be set up first. IdP groups require the Enterprise plan, which the Business plan doesn’t include, with SCIM configured. To set up syncing, see SCIM provisioning.Credit limits
You can control how many credits workspace members can use per month. There are 2 levels: a workspace default that applies to everyone, and individual overrides for specific members. Credit limits apply to the Admin and Editor roles only. Viewers do not consume credits, so a credit limit cannot be set on a Viewer.Default credit limit
The default credit limit sets a monthly cap that applies to all workspace members automatically. If you also set a limit on a specific member, that individual limit takes priority over the default. To set a default credit limit:- Click your workspace name at the bottom left.
- Click Settings.
- Click Members and groups.
- Click the More actions icon at the top right of the members list.
- Click Set default credit limit, enter the limit, and click Set credit limit.
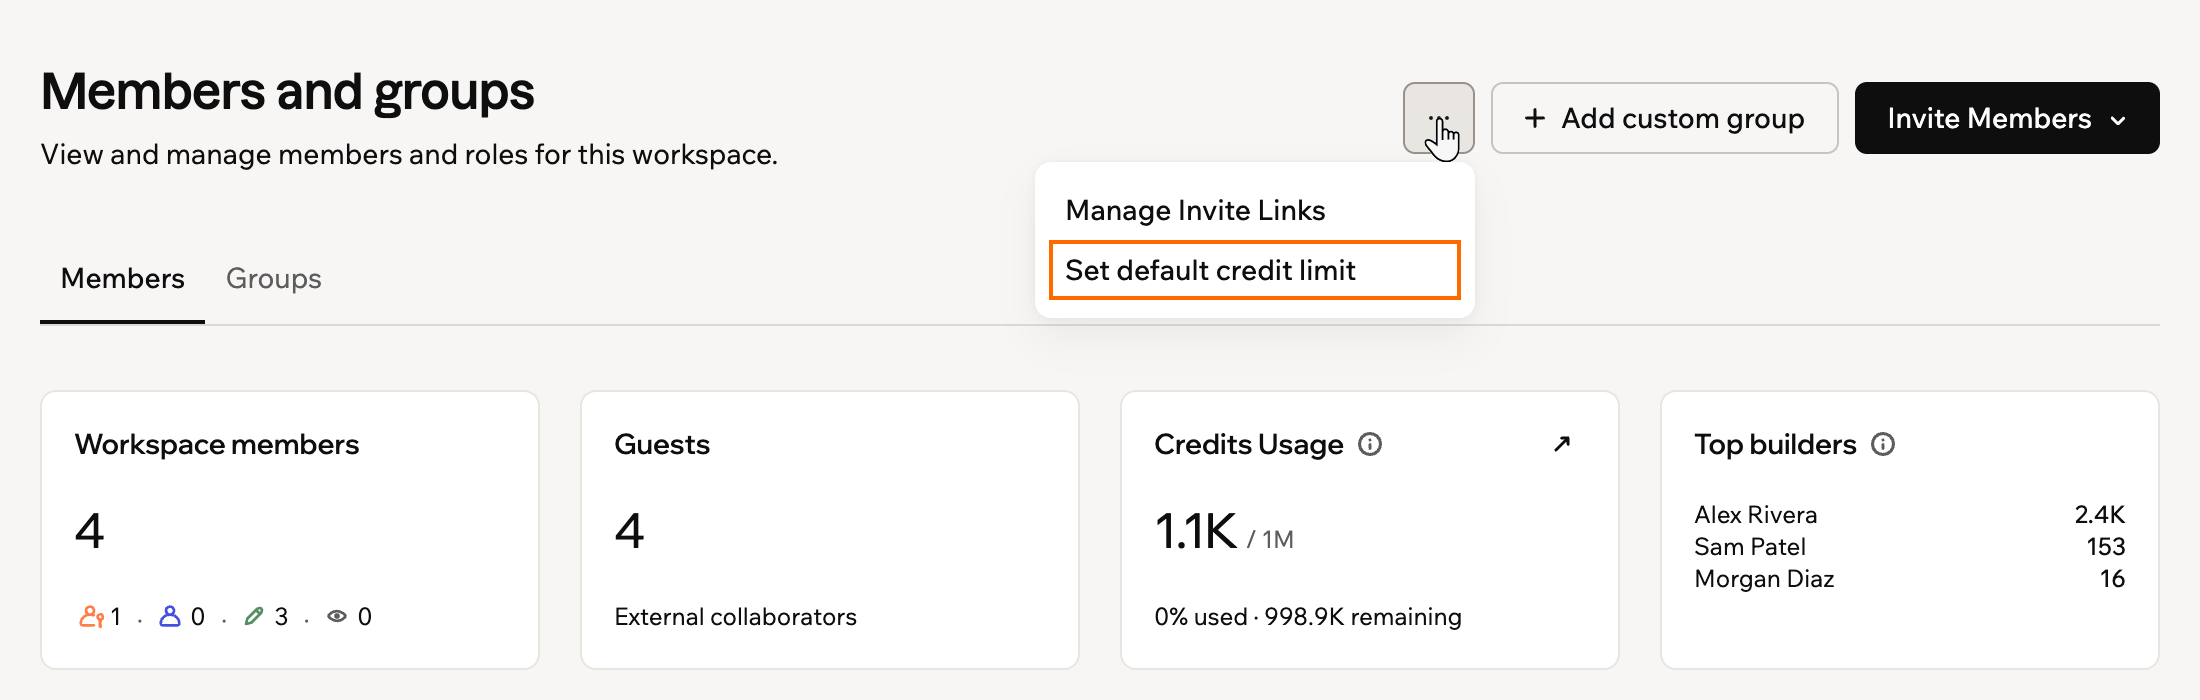
Setting the default credit limit
Per-member credit limits
You can set a credit limit for a specific member to override the workspace default. To set a credit limit for a member:- Click your workspace name at the bottom left.
- Click Settings.
- Click Members and groups.
- Click the More actions icon next to the relevant member.
- Click Set credit limit, enter the limit, and click Save.
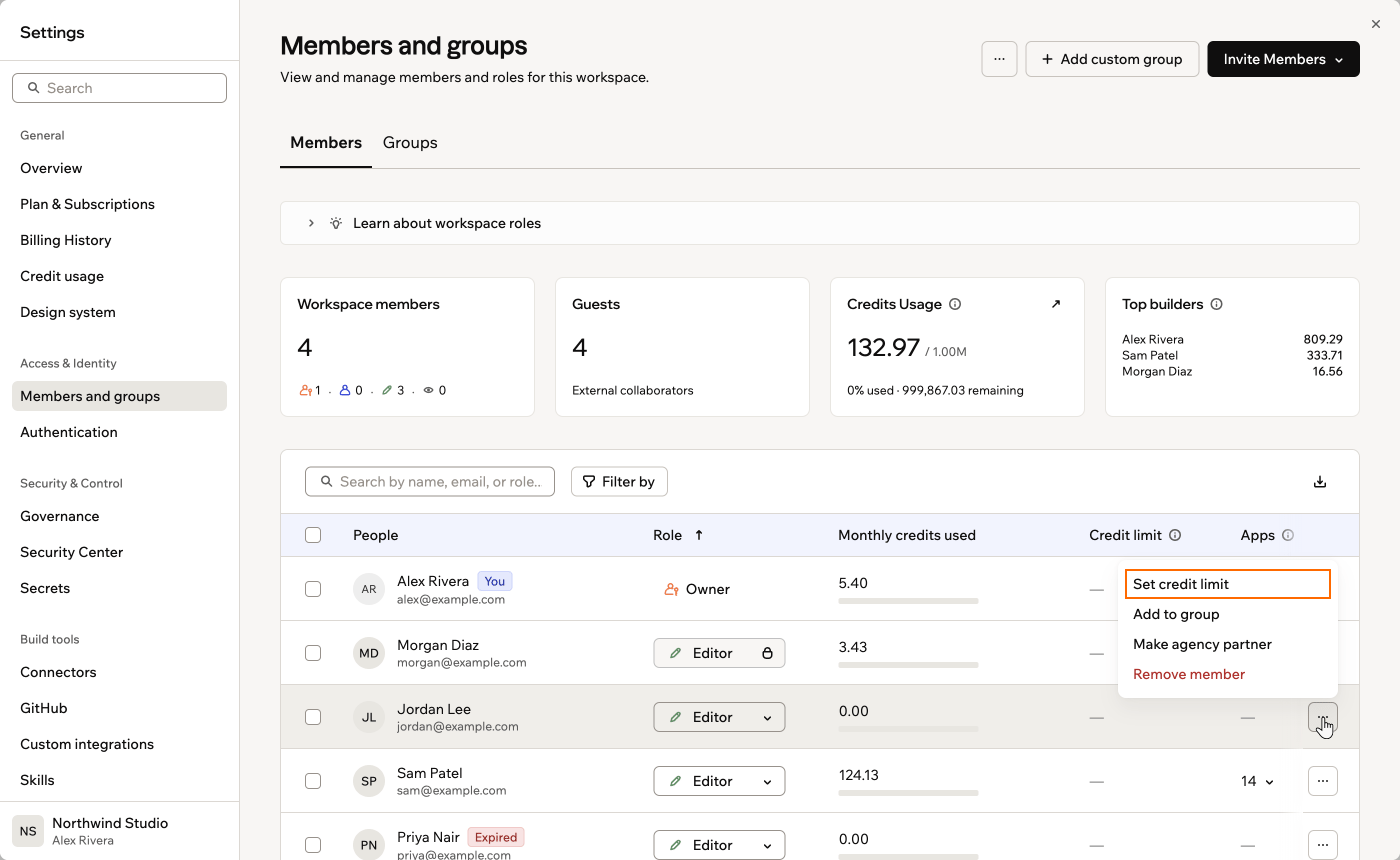
Setting a credit limit for an individual member