

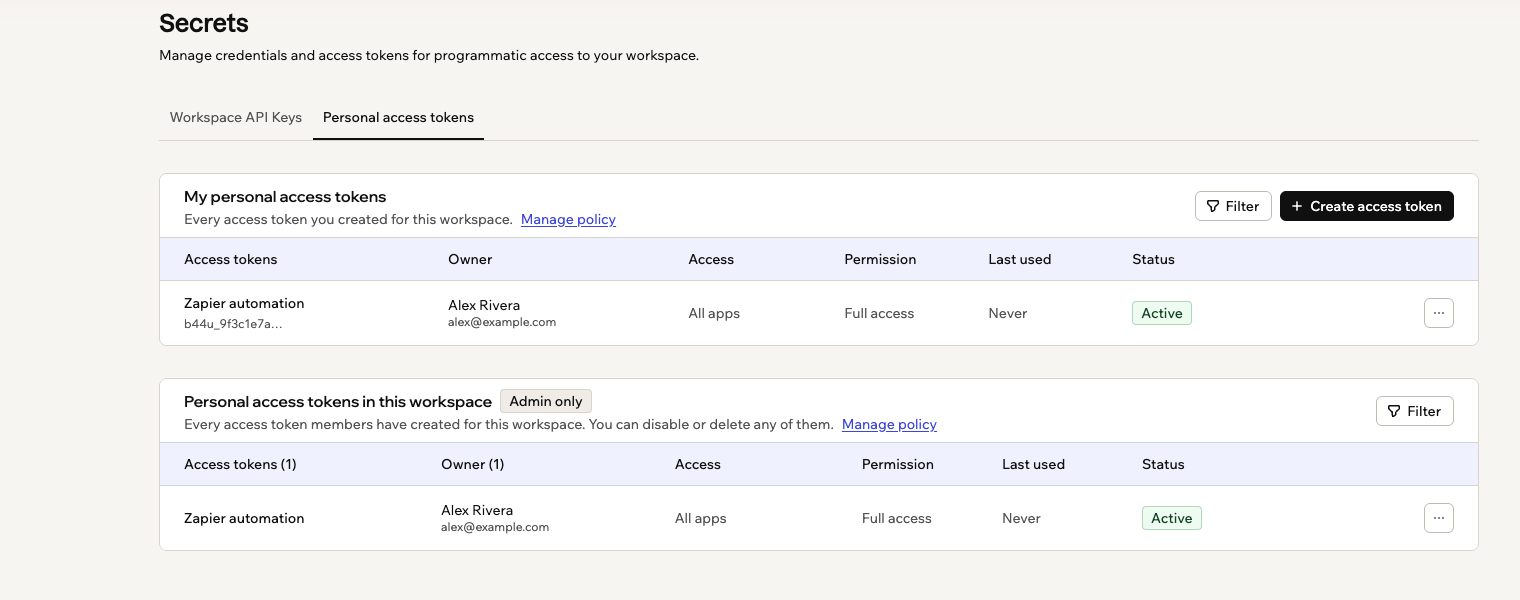
Your own access tokens, and every member token in the workspace
Creating an access token
You decide what each token is allowed to do at the moment you create it, and Base44 shows you the value once.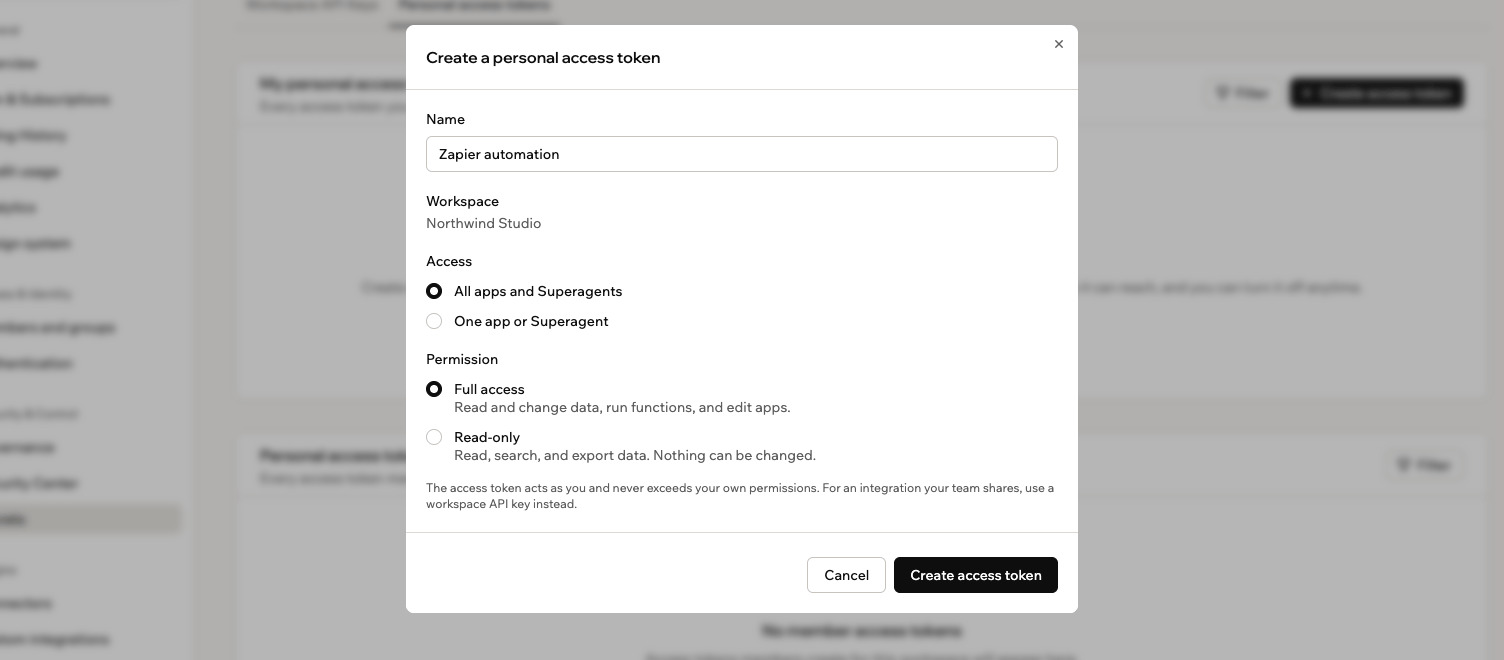
Choosing what a new access token can reach and what it may do
- In your workspace, click your workspace name at the bottom left, then click Settings.
- Click Secrets in the sidebar.
- Click the Personal access tokens tab.
- Click Create access token.
- Enter an Access token name that says what the token is for, such as the tool you are connecting.
- Under Access, choose what the token may reach:
- All apps and Superagents: Everything in the workspace that you can reach.
- One app or Superagent: Search for the app or Superagent you want, then select it.
- Under Permission, choose what the token may do:
- Full access: Read and change data, run functions, and edit apps.
- Read-only: Read, search, and export data. Nothing can be changed.
- Click Create access token.
- Click the Copy icon next to the value, paste the token into the tool you are connecting, then click Done.
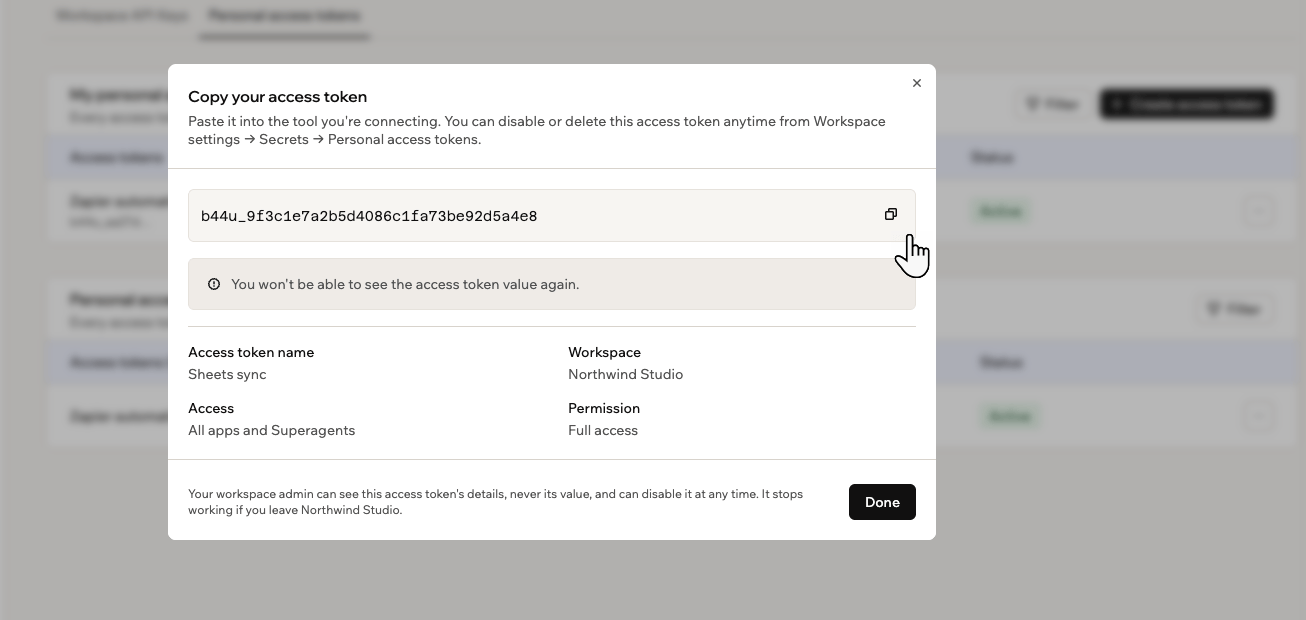
Copying a new access token, which Base44 shows only once
Using your token in a request
Whatever you connect has to send your token with every request, so Base44 knows the request is coming from you. It goes in a line called a header, and it looks like this:YOUR_PERSONAL_ACCESS_TOKEN with your own token, or the request fails. You do not have to type any of this from scratch: open your app’s API reference in your app editor and it shows the same request with your tokens listed, ready to copy.
Account API keys used a different header,
api_key: YOUR_API_KEY. If you are updating something that already works, swap the whole line, not just the value. A token sent under the old header is rejected.Moving from account API keys
Base44 is replacing account API keys with personal access tokens, so everyone using one needs to move across. If you have ever copied an API key out of your account settings, that key is an account API key, and from October 15, 2026 you can no longer use one. A personal access token does the same job, and 2 things change when you swap one for the other:- Where the credential comes from: Instead of one key that reached everything you could reach, you create a token in Secrets and choose what it may touch.
- The header it travels in:
Authorization: Bearerreplacesapi_key. Update both the header and the value, because a token sent under the old header is rejected.
- In your workspace, click your workspace name at the bottom left, then click Settings.
- Click Secrets in the sidebar, then click the Personal access tokens tab.
- Click Create access token, and give the token only the access and permission that script actually needs.
- Click the Copy icon next to the value, then click Done. Base44 never shows the value again.
- Replace the key in your script with the token value.
- Change the request header from
api_key: YOUR_API_KEYtoAuthorization: Bearer YOUR_PERSONAL_ACCESS_TOKEN. - Run the script to confirm it works, then delete the old account API key.
Managing a token
Your tokens are listed under My personal access tokens, with what each one may reach, what it may do, when it was last used, and whether it is switched on. If the list gets long, click Filter to narrow it by permission, last used, or status. Disabling is the safe choice when something looks wrong, because everything using that token stops at once and you can switch it back on afterwards. Deleting is permanent, so keep it for a tool you have finished with. The exception is a token that has been exposed, in a screenshot, a shared file or a public repository: delete that one rather than disabling it, then create a replacement, because deleting makes the old value useless immediately. To manage a token:- In your workspace, click your workspace name at the bottom left, then click Settings.
- Click Secrets in the sidebar, then click the Personal access tokens tab.
- Next to the token you want to change, click the More Actions icon .
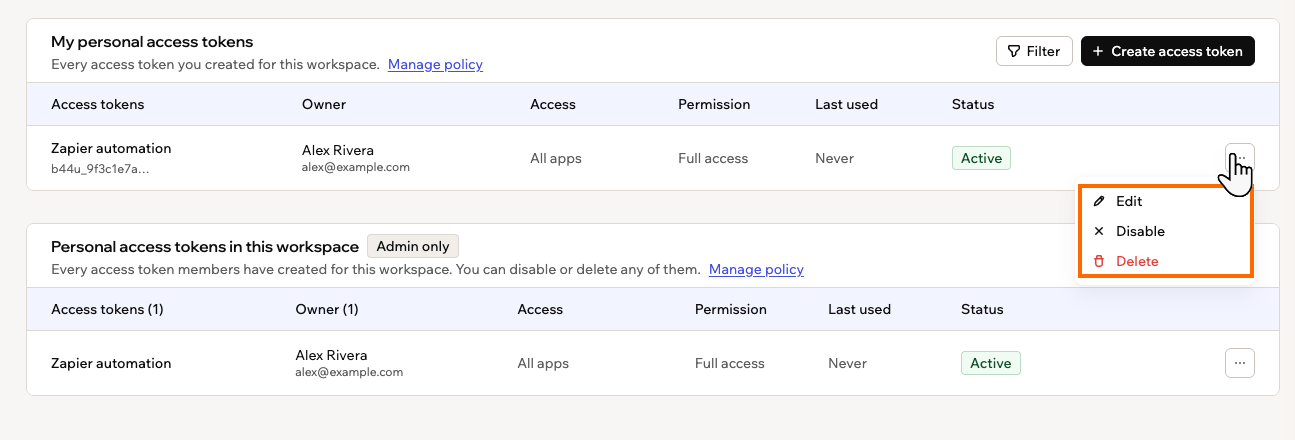
Editing, disabling or deleting a token from its More Actions menu
Change what a token is called or can reach
Change what a token is called or can reach
Click Edit, update the name, access or permission, then click Save. The token value itself never changes, so whatever is using it keeps working.
Switch a token off for now
Switch a token off for now
Click Disable, then click Disable again to confirm. Anything using the token stops working until you switch it back on, and the token shows as Disabled in your list.
Switch a token back on
Switch a token back on
A disabled token offers Enable in the same menu. If your workspace has tightened its policy since you made the token, you cannot switch it back on until the token matches the policy again.
Delete a token permanently
Delete a token permanently
Click Delete, then click Delete again to confirm. Anything using the token stops working immediately, and this cannot be undone.
If your workspace limits tokens
Some workspaces decide whether tokens can be used at all, and how much a token may do. If you are a workspace admin, see managing workspace secrets to set that policy. As a member, you will run into it in one of these ways:- Personal access tokens are blocked in this workspace: No member token can reach the workspace’s apps or data. Existing tokens are suspended until an admin turns them back on.
- Doesn’t meet policy: The token was allowed when you made it, but the policy changed since. It keeps working until someone disables it, and the tooltip says which part of the policy it misses.
- Not allowed by workspace policy: A permission or access option you cannot choose, because the policy does not permit it.
If a token you need is blocked, or an option you want is greyed out, ask your workspace admin about the policy. They can loosen it, or switch a specific token back on for you.