> ## Documentation Index
> Fetch the complete documentation index at: https://docs.base44.com/llms.txt
> Use this file to discover all available pages before exploring further.
# Airtable 連携
> Base44 アプリを Airtable に接続して、ライブデータをダッシュボード、ツール、ワークフローに取り込みます。
注意: Airtable 連携は Builder ティア以上で利用できます。Free ティアをご利用の場合、バックエンド関数や支払い機能を使用するにはアプリのアップグレードが必要です。
# ステップごとのセットアップ:
## パート 1: Airtable 側
すでに Airtable API トークンと Base ID をお持ちの場合は、[**パート 2: Base44 側**](https://docs.base44.com/Integrations/Airtable-integration#part-2%3A-the-base44-side) に進んでください。
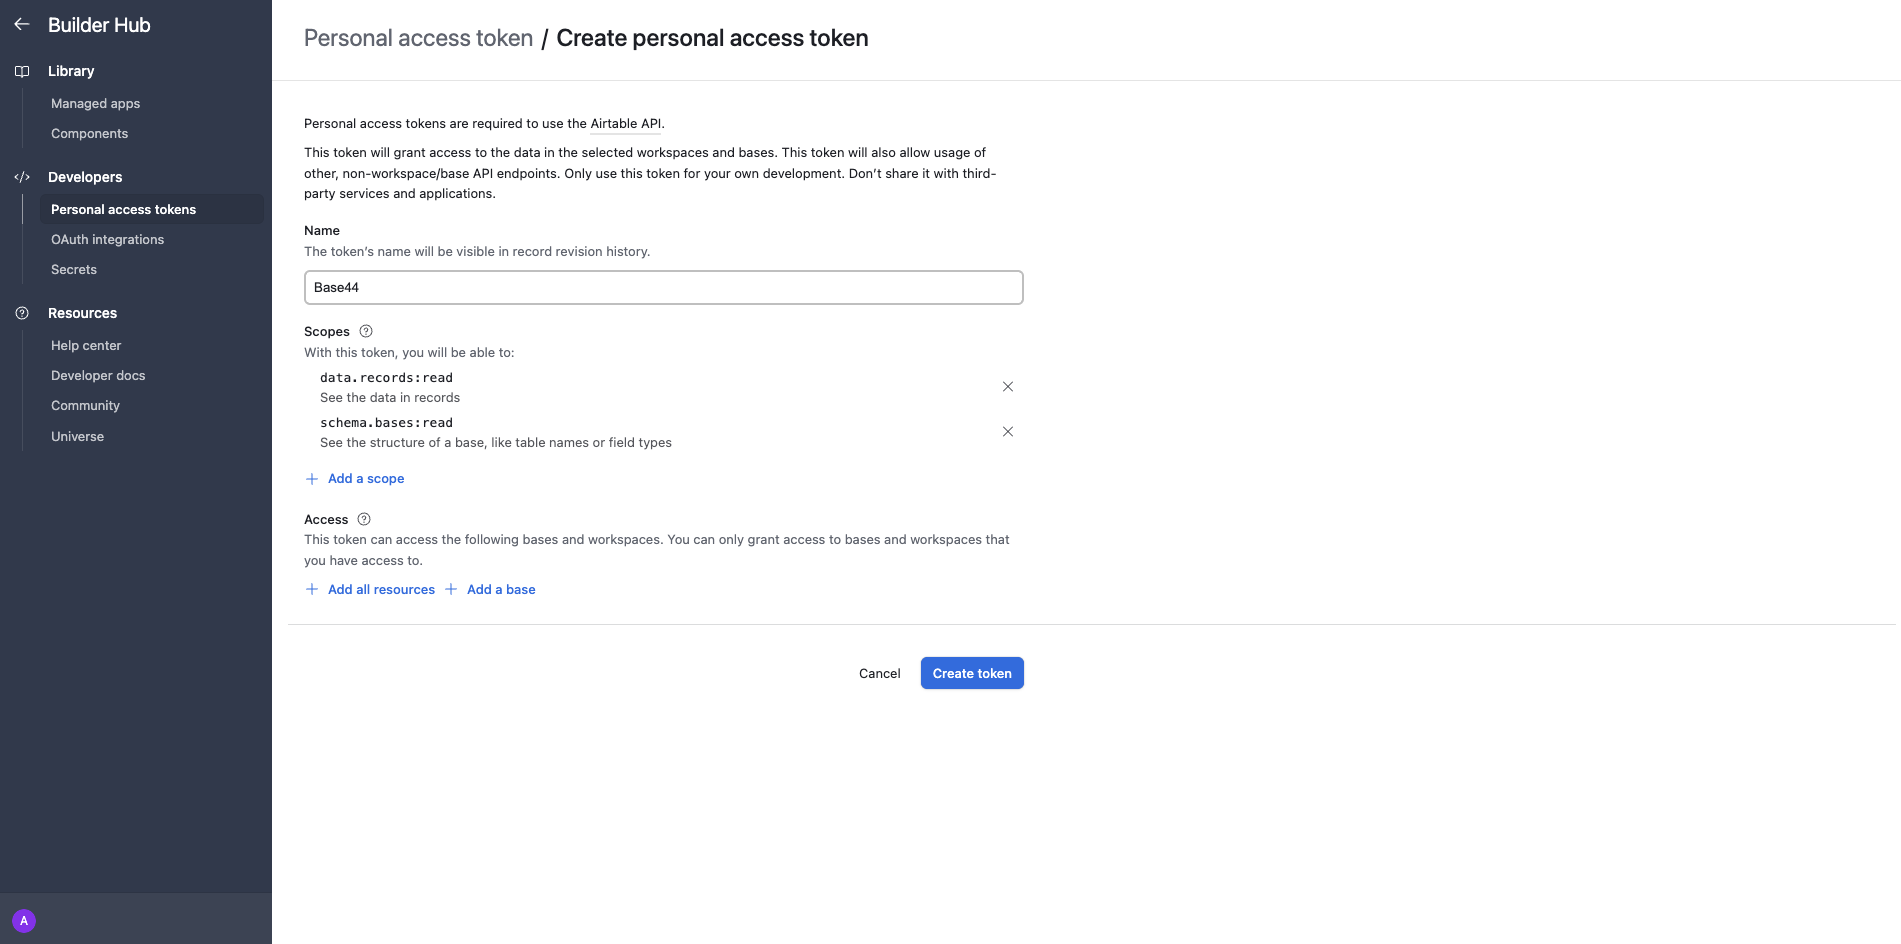 * [Airtable のトークン作成ページ](https://airtable.com/create/tokens/new) にアクセスします。
* "Scopes" で、少なくとも以下の権限を持つトークンを正しいワークスペース/ベースに対して作成します:
* `data.records:read`
* `schema.bases:read` *(任意ですがテストに役立ちます)*
* トークンに名前を付け、使用する場合はクレジット上限を設定し、安全な場所にトークンをコピーしておきます。
* [Airtable のトークン作成ページ](https://airtable.com/create/tokens/new) にアクセスします。
* "Scopes" で、少なくとも以下の権限を持つトークンを正しいワークスペース/ベースに対して作成します:
* `data.records:read`
* `schema.bases:read` *(任意ですがテストに役立ちます)*
* トークンに名前を付け、使用する場合はクレジット上限を設定し、安全な場所にトークンをコピーしておきます。
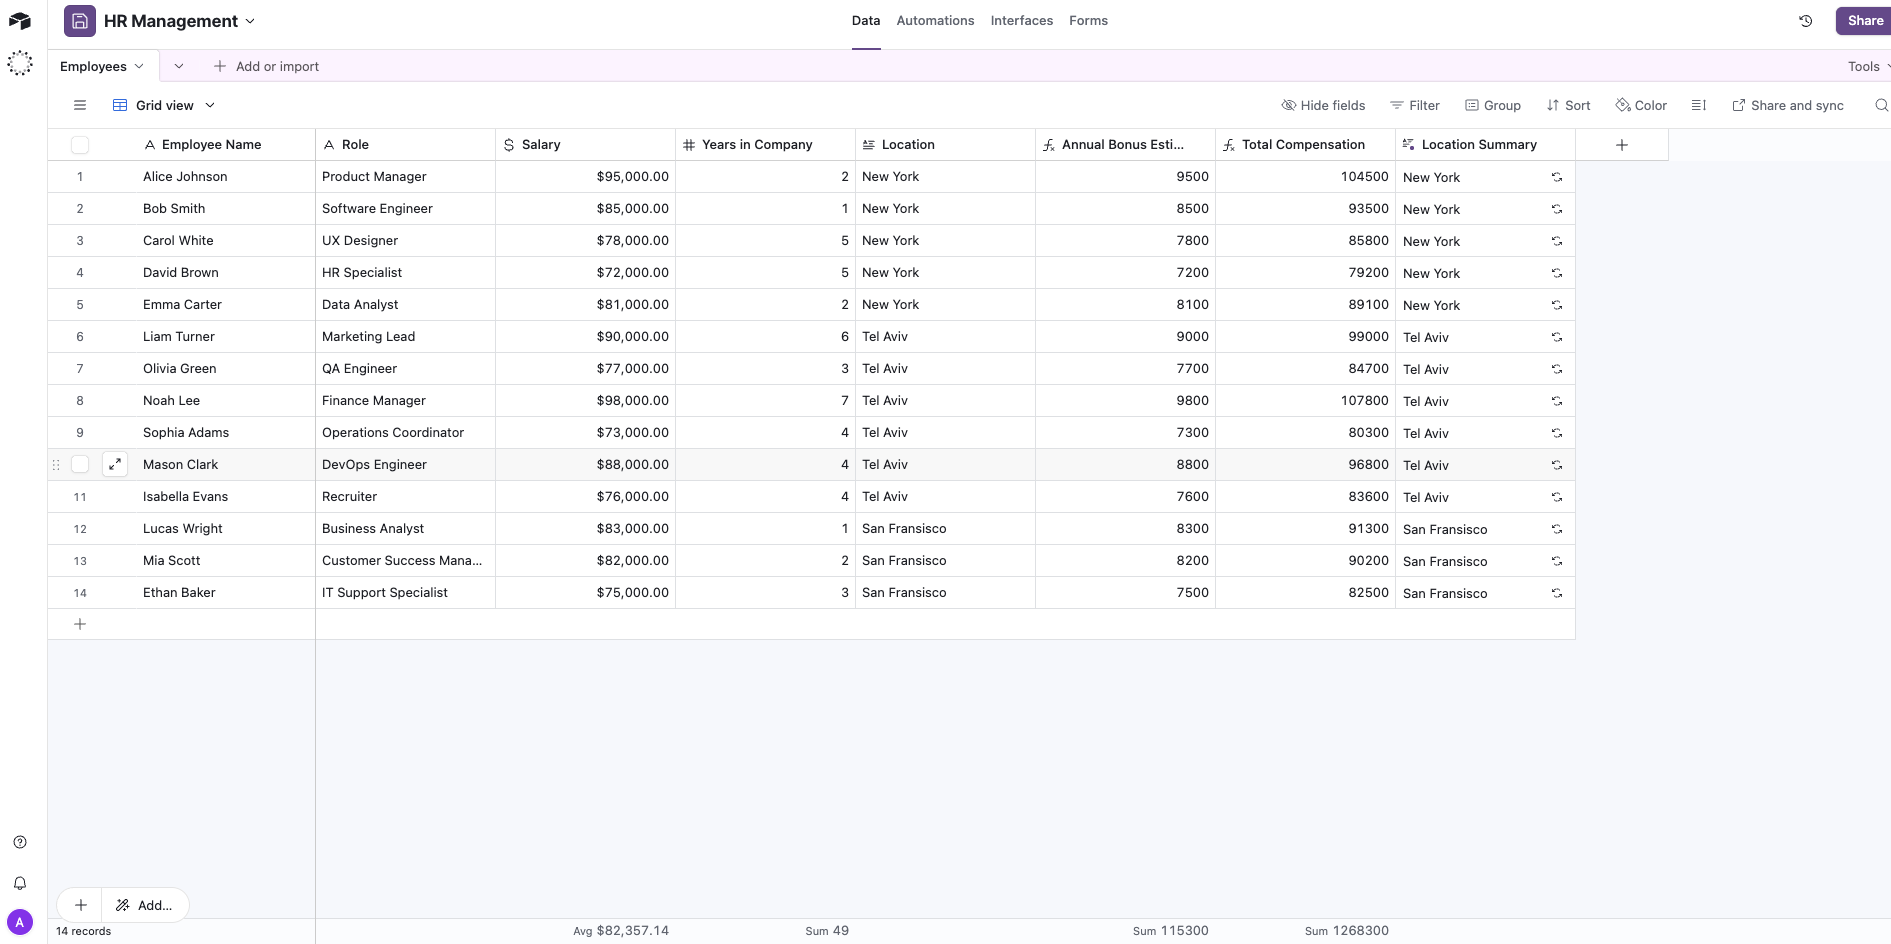 1. ブラウザで Airtable ベースを開きます。
2. URL を確認し、"**app**" で始まる文字列をコピーします。これが Base ID です。
例: `https://airtable.com/app123XYZ/...`
***
## パート 2: Base44 側
API トークンと Base ID を取得したら、2 つの方法で Base44 に接続できます:
* ゼロから新しいアプリを始める場合は、こちらの方法を選択してください。
* すでにアプリを構築中で、既存のアプリに Airtable を統合したい場合は、こちらの方法を選択してください。
### オプション A: Ready-made 連携 (新しいアプリを作成)
1. ブラウザで Airtable ベースを開きます。
2. URL を確認し、"**app**" で始まる文字列をコピーします。これが Base ID です。
例: `https://airtable.com/app123XYZ/...`
***
## パート 2: Base44 側
API トークンと Base ID を取得したら、2 つの方法で Base44 に接続できます:
* ゼロから新しいアプリを始める場合は、こちらの方法を選択してください。
* すでにアプリを構築中で、既存のアプリに Airtable を統合したい場合は、こちらの方法を選択してください。
### オプション A: Ready-made 連携 (新しいアプリを作成)
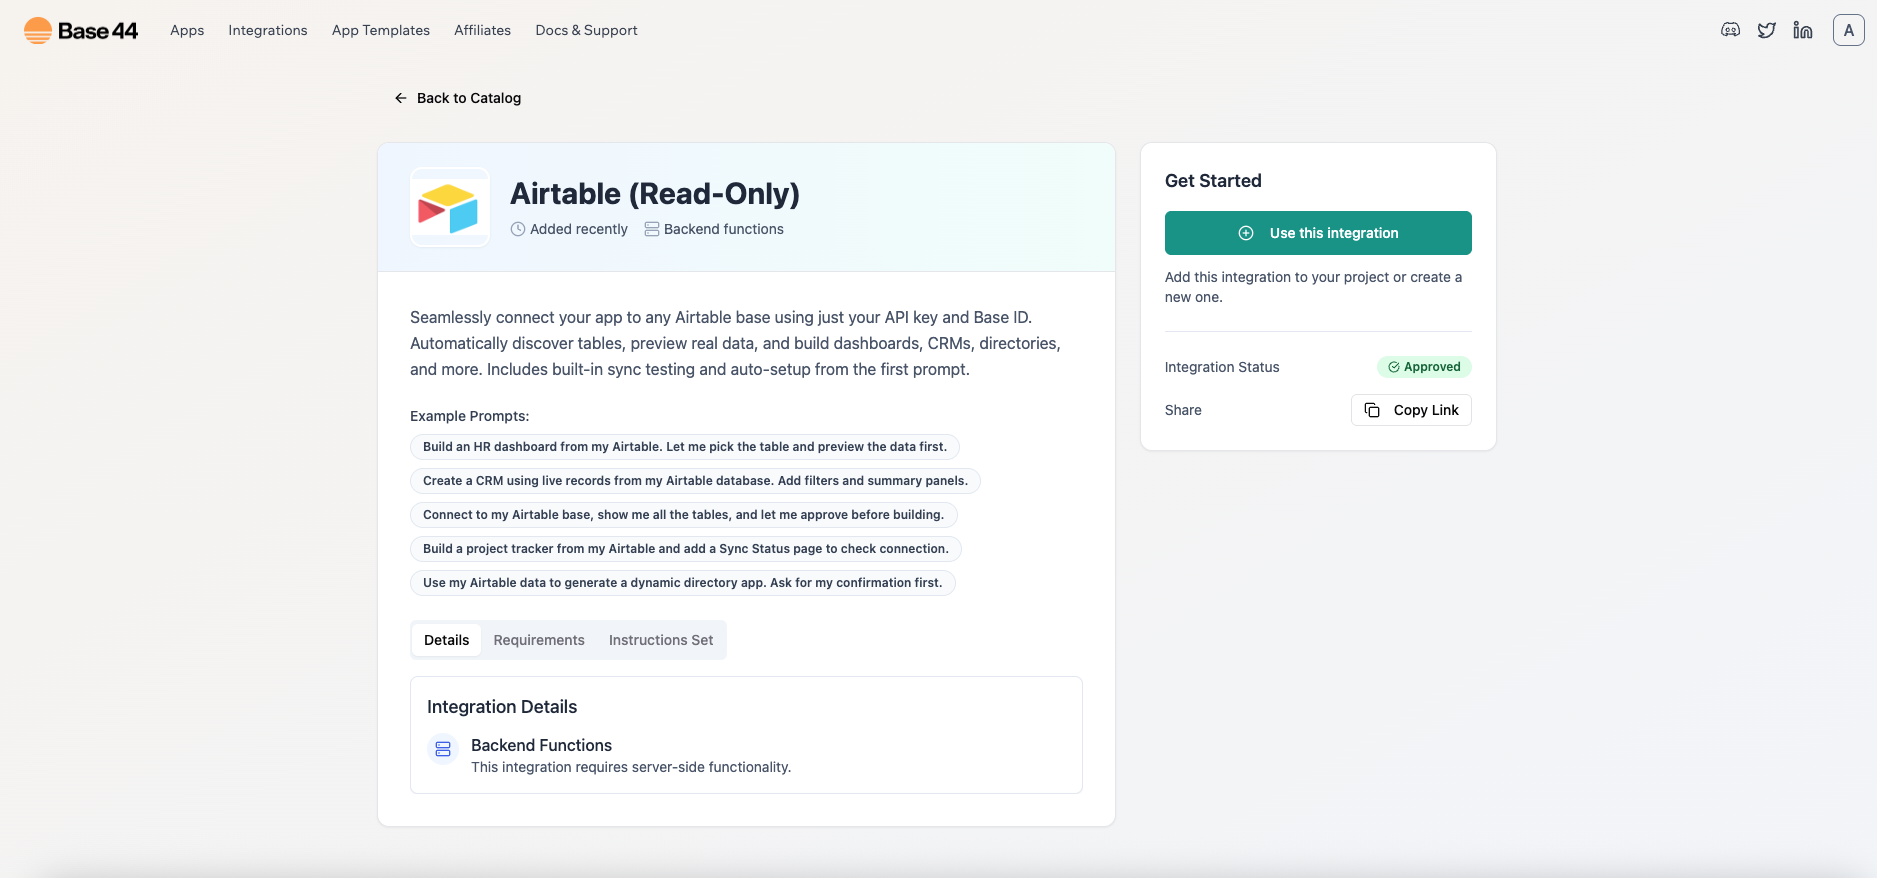
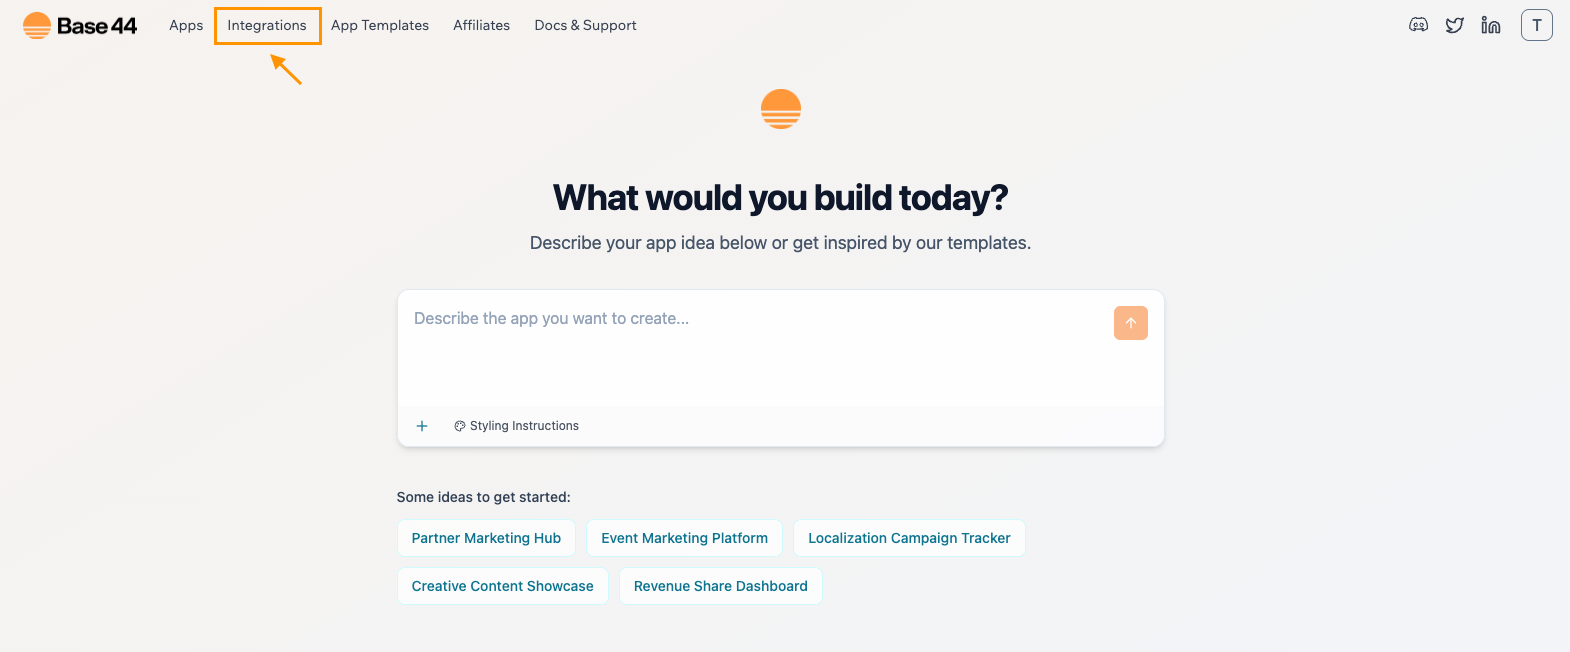 * Integrations カタログで Airtable を選択
* 続いて "Use this integration" をクリック
* Integrations カタログで Airtable を選択
* 続いて "Use this integration" をクリック
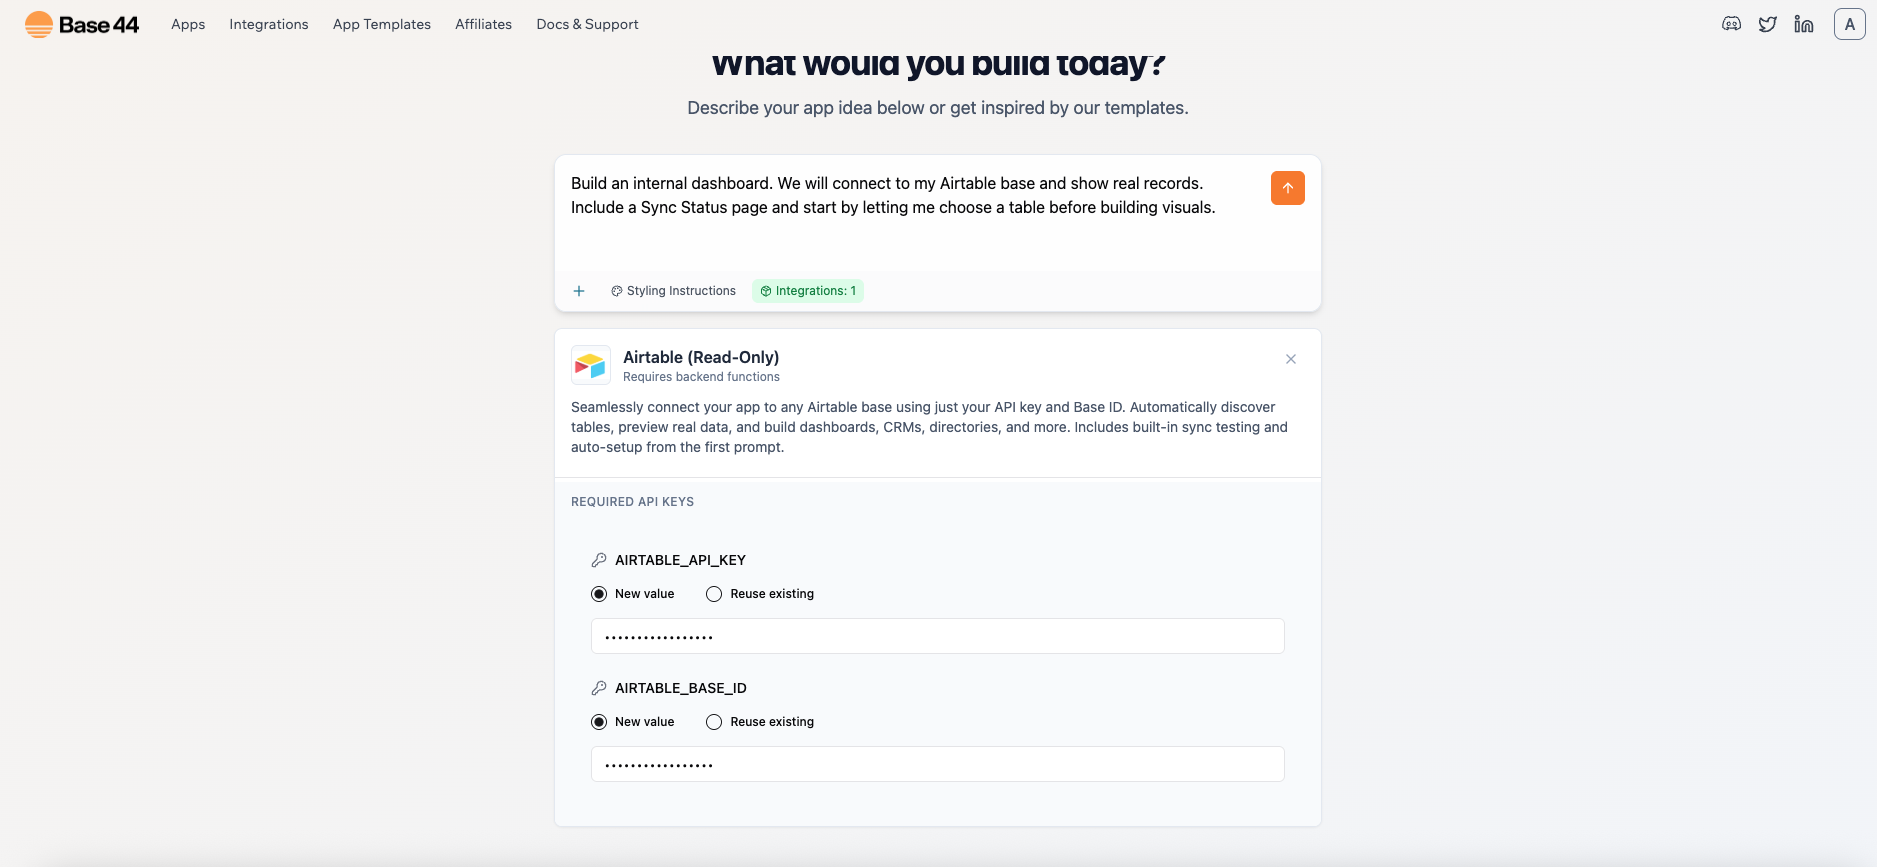 * プロンプトが表示されたら、次を貼り付けます:
* `AIRTABLE_API_KEY`
* `AIRTABLE_BASE_ID`
* 利用できるサンプルプロンプト:
`"Build an internal dashboard. We will connect to my Airtable base and show real records. Include a Sync Status page and start by letting me choose a table before building visuals."`
* アプリが Airtable へのテスト呼び出しを実行し、テーブル一覧を表示します
* 1 つを選択します
* 実際のレコードを取得し、スキーマが明確になるように生データテーブルを表示します
* プロンプトが表示されたら、次を貼り付けます:
* `AIRTABLE_API_KEY`
* `AIRTABLE_BASE_ID`
* 利用できるサンプルプロンプト:
`"Build an internal dashboard. We will connect to my Airtable base and show real records. Include a Sync Status page and start by letting me choose a table before building visuals."`
* アプリが Airtable へのテスト呼び出しを実行し、テーブル一覧を表示します
* 1 つを選択します
* 実際のレコードを取得し、スキーマが明確になるように生データテーブルを表示します
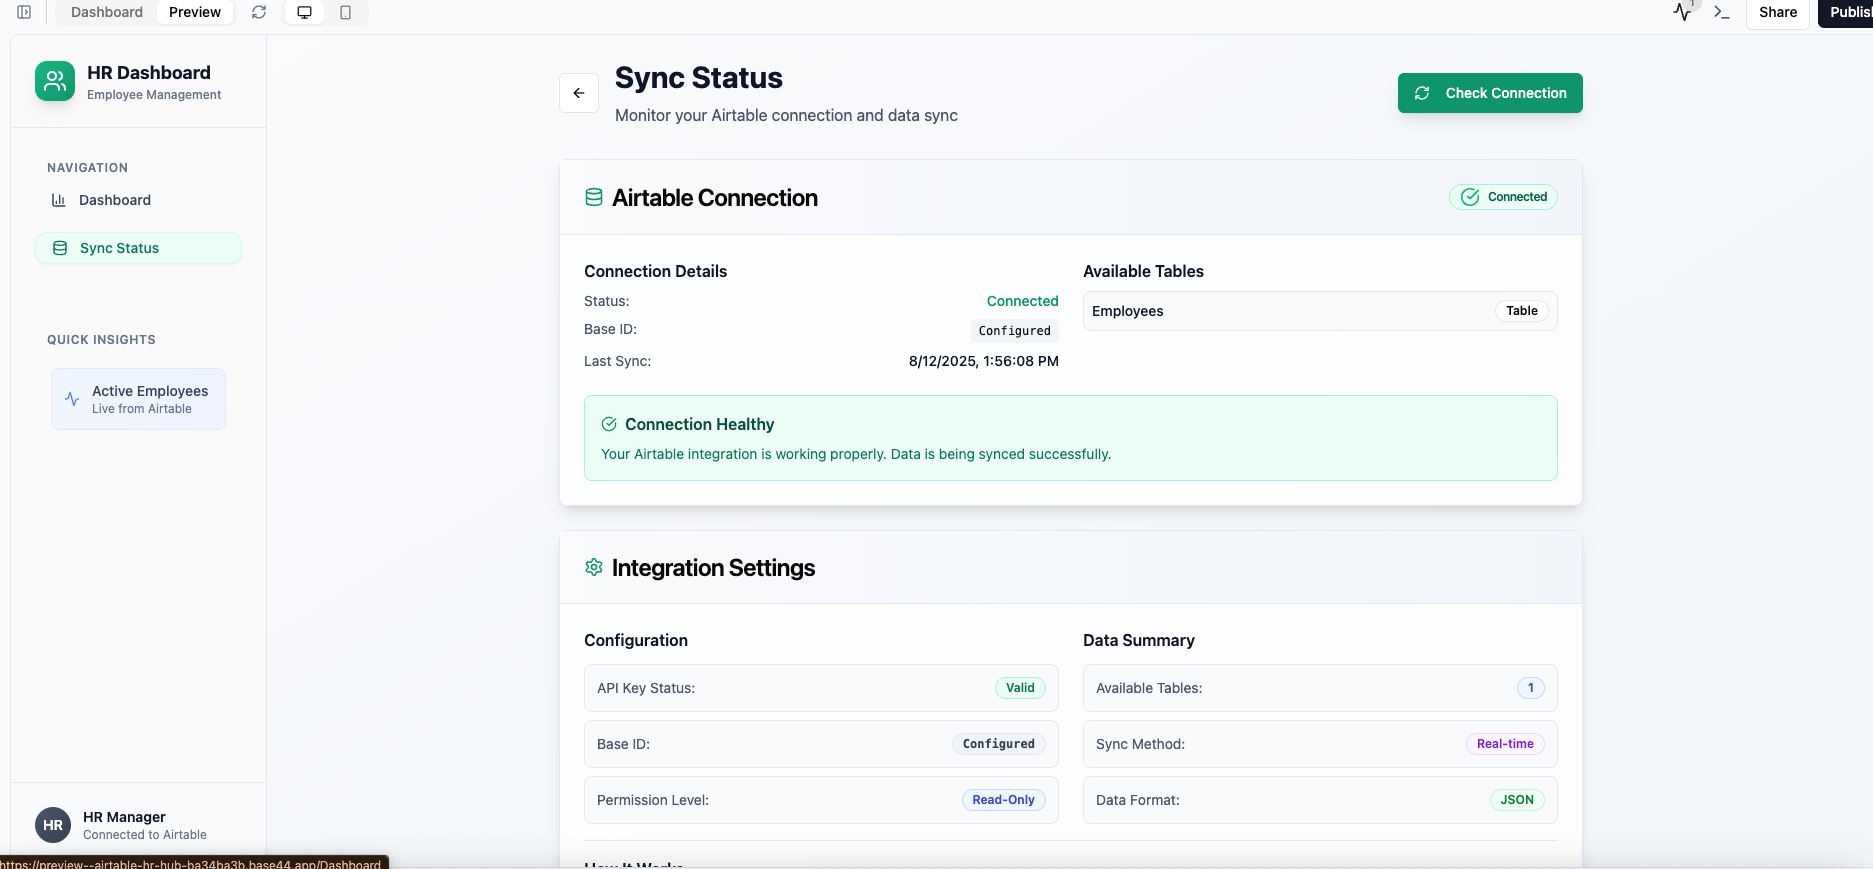 以下を含むページが用意されます:
* テストを再実行する **Check Connection** ボタン
* テーブル一覧
* 最終チェック時刻
* 接続ステータス
***
### **オプション B: Airtable を Instant 連携として追加**
進行中のアプリがある場合は、こちらの方法を選択してください。
以下を含むページが用意されます:
* テストを再実行する **Check Connection** ボタン
* テーブル一覧
* 最終チェック時刻
* 接続ステータス
***
### **オプション B: Airtable を Instant 連携として追加**
進行中のアプリがある場合は、こちらの方法を選択してください。
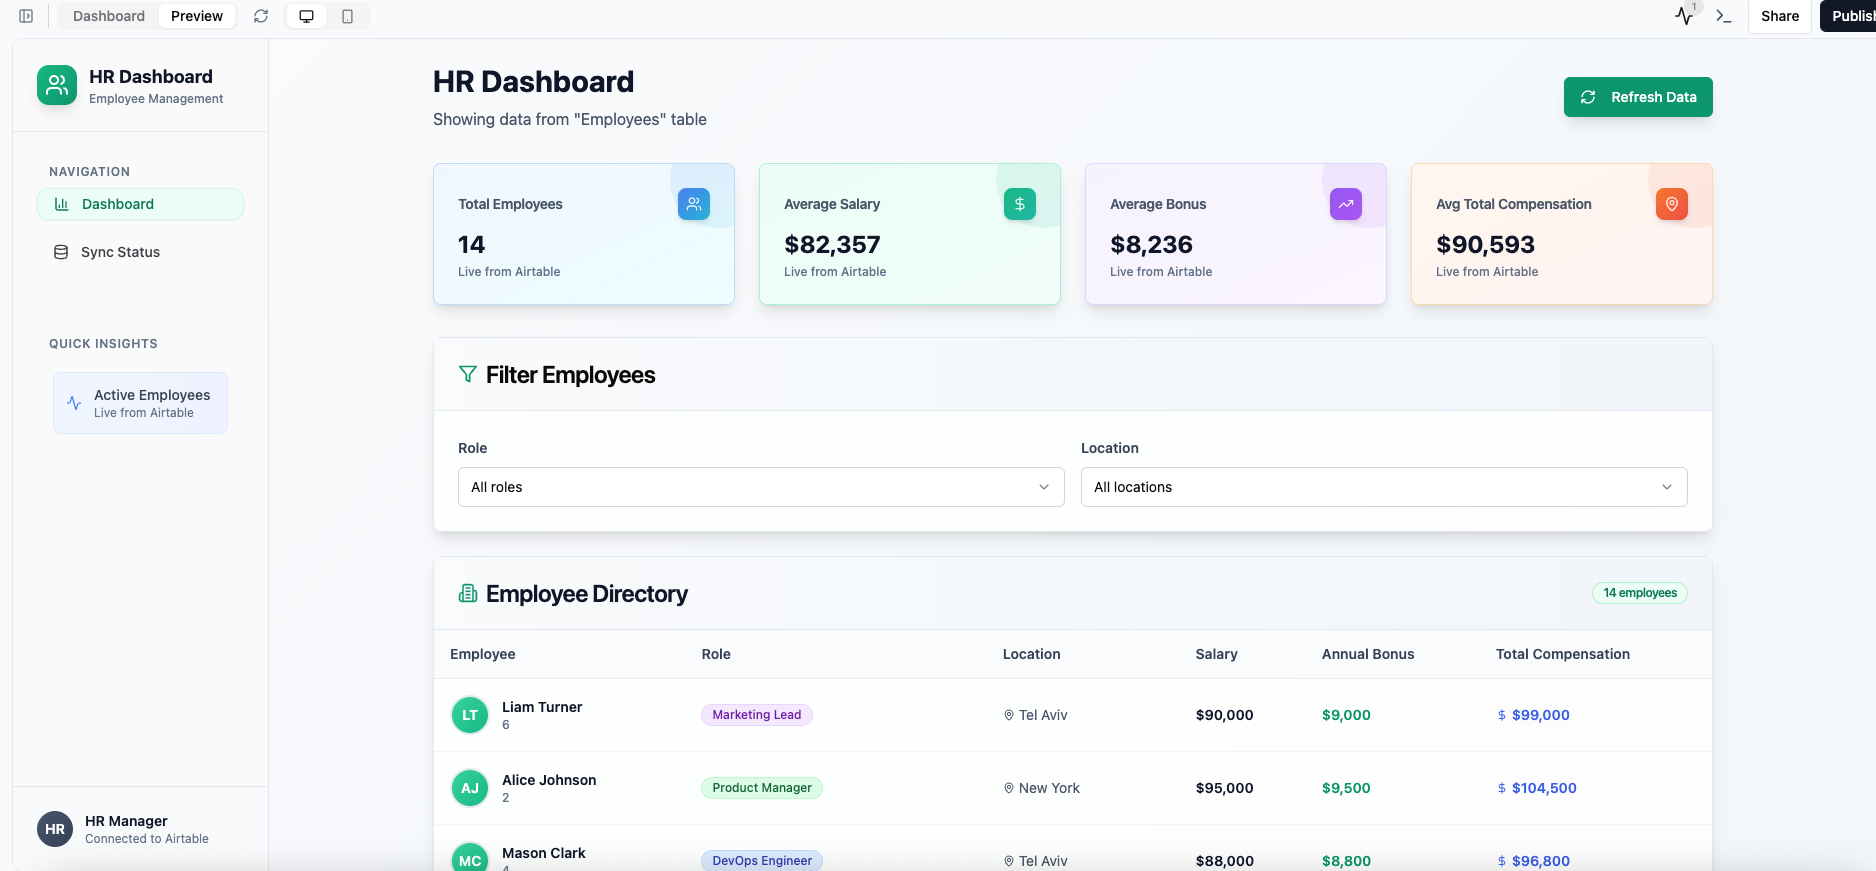 * サンプルアプリを構築するために AI チャットに入力したプロンプト:
`"Build an internal dashboard. Let me pick a data source later."`
* サンプルアプリを構築するために AI チャットに入力したプロンプト:
`"Build an internal dashboard. Let me pick a data source later."`
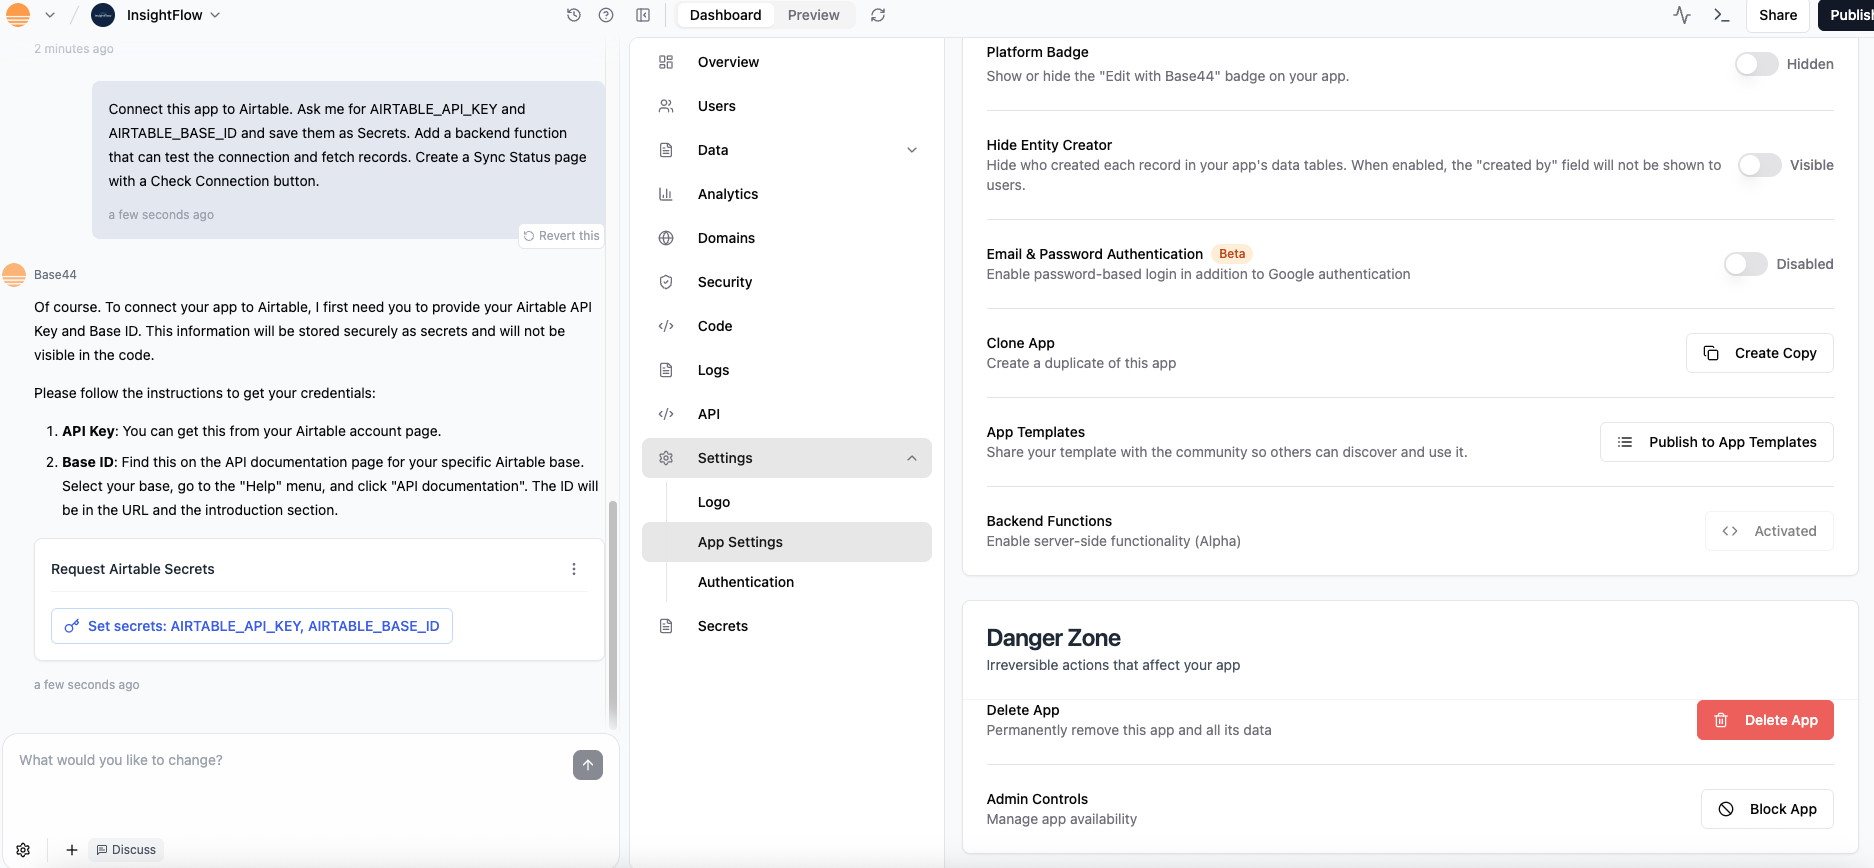 * AI チャットに貼り付けたサンプルプロンプト:
`Connect this app to Airtable. Ask me for AIRTABLE_API_KEY and AIRTABLE_BASE_ID and save them as Secrets. Add a backend function that can test the connection and fetch records. Create a Sync Status page with a Check Connection button.`
* AI チャットで "**Set secrets**" をクリックします
* プロンプトが表示されたら **API Key** と **Base ID** を貼り付けます
* AI チャットにデータを表示するよう促します
* 使用したサンプルプロンプト:
`Run the connection test to list my tables, let me pick one, then fetch records and show a raw table view before any visuals.`
* **Sync Status** を開き、**Check Connection** をクリック
* テーブルを選択し、ライブの行が表示されることを確認
***
## **トラブルシューティング**
* **403 または接続失敗** – トークンのスコープが間違っています。data.records:read が有効になっていることを確認してください。テーブル一覧が失敗する場合は schema.bases:read を追加します。
* **Base ID が間違っている** – URL からの app… 文字列を正しくコピーしたか再確認してください。
* **データが表示されない** – ベースに実際にレコードが存在し、トークンにアクセス権限があることを確認してください。
* **公開プレビューとビルダーセッション** – Sync Status のテスト中はビルダーにログインしたままにしてください。
***
## **よくあるユースケース**
チームが Base44 と Airtable をよく利用する方法をいくつかご紹介します:
* **ダッシュボード** – Airtable のデータを取り込み、リアルタイムで可視化。
* **データ管理** – Airtable レコードを表示・確認するための使いやすい UI をチームメイトに提供。
* **同期モニター** – 接続をすばやくテストし、更新を確認するための Sync Status ページを作成。
* **社内ツール** – カスタムコードなしで、Airtable 上に軽量アプリ (CRM ビューやコンテンツトラッカーなど) を構築。
このページは AI を使用して翻訳されました。最も正確で最新の情報については、[英語版](/) を参照してください。
* AI チャットに貼り付けたサンプルプロンプト:
`Connect this app to Airtable. Ask me for AIRTABLE_API_KEY and AIRTABLE_BASE_ID and save them as Secrets. Add a backend function that can test the connection and fetch records. Create a Sync Status page with a Check Connection button.`
* AI チャットで "**Set secrets**" をクリックします
* プロンプトが表示されたら **API Key** と **Base ID** を貼り付けます
* AI チャットにデータを表示するよう促します
* 使用したサンプルプロンプト:
`Run the connection test to list my tables, let me pick one, then fetch records and show a raw table view before any visuals.`
* **Sync Status** を開き、**Check Connection** をクリック
* テーブルを選択し、ライブの行が表示されることを確認
***
## **トラブルシューティング**
* **403 または接続失敗** – トークンのスコープが間違っています。data.records:read が有効になっていることを確認してください。テーブル一覧が失敗する場合は schema.bases:read を追加します。
* **Base ID が間違っている** – URL からの app… 文字列を正しくコピーしたか再確認してください。
* **データが表示されない** – ベースに実際にレコードが存在し、トークンにアクセス権限があることを確認してください。
* **公開プレビューとビルダーセッション** – Sync Status のテスト中はビルダーにログインしたままにしてください。
***
## **よくあるユースケース**
チームが Base44 と Airtable をよく利用する方法をいくつかご紹介します:
* **ダッシュボード** – Airtable のデータを取り込み、リアルタイムで可視化。
* **データ管理** – Airtable レコードを表示・確認するための使いやすい UI をチームメイトに提供。
* **同期モニター** – 接続をすばやくテストし、更新を確認するための Sync Status ページを作成。
* **社内ツール** – カスタムコードなしで、Airtable 上に軽量アプリ (CRM ビューやコンテンツトラッカーなど) を構築。
このページは AI を使用して翻訳されました。最も正確で最新の情報については、[英語版](/) を参照してください。