> ## Documentation Index
> Fetch the complete documentation index at: https://docs.base44.com/llms.txt
> Use this file to discover all available pages before exploring further.
# Using the canvas
> View and work on all your app pages at once. Add notes, drawings, and images, collaborate with your team in real time, and send ideas straight to the AI chat.
The canvas lets you view and work on all your app pages at once. Every page appears as a live-preview frame on an infinite board that you can arrange, annotate, and build on together with your team. Everything saves automatically as you work.
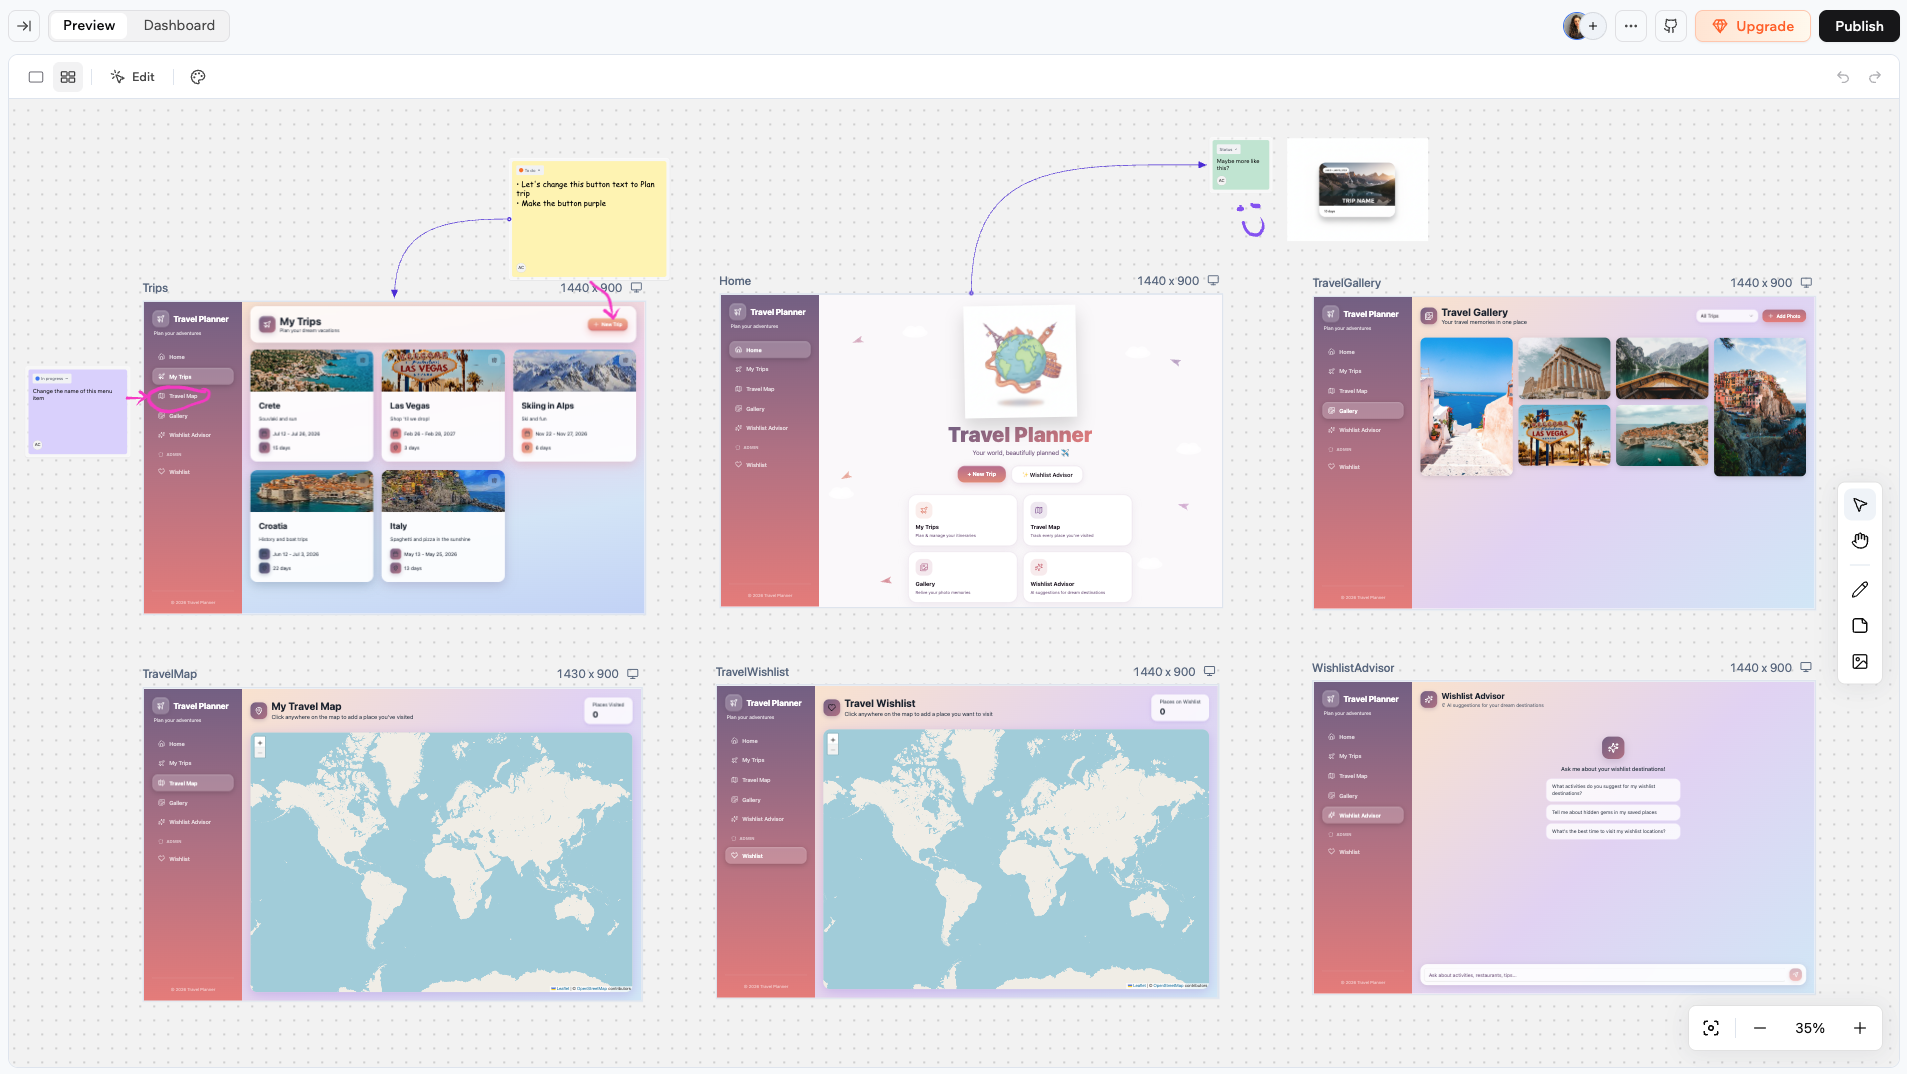 Use the canvas to plan your app layout, leave notes and feedback for yourself or your team, sketch ideas with drawings, or send instructions straight to the AI chat for implementation.
You can use **Edit** mode on the canvas just as you would in the regular editor. Click **Edit** in the top bar to select and style elements on any page frame.
***
## Accessing the canvas
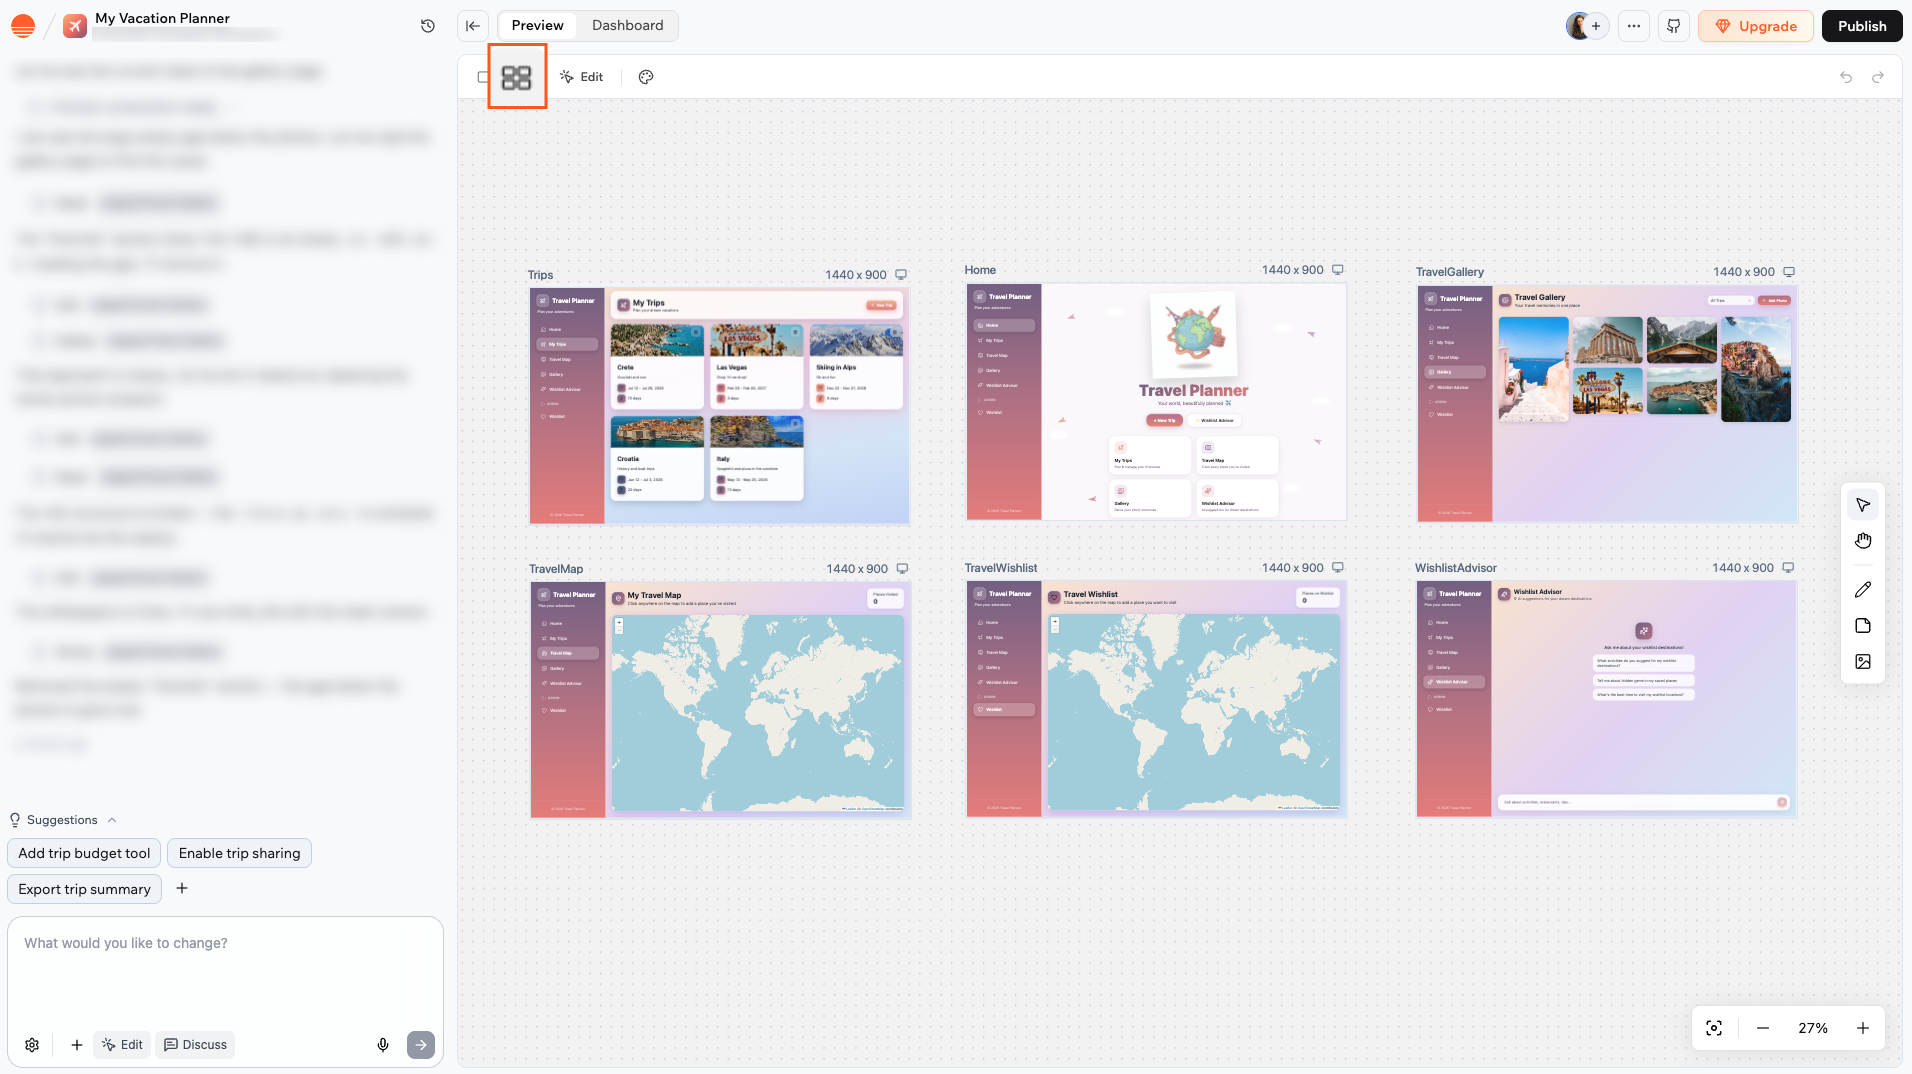
To access the canvas, open your app editor and click the Canvas icon in the top bar.
Use the canvas to plan your app layout, leave notes and feedback for yourself or your team, sketch ideas with drawings, or send instructions straight to the AI chat for implementation.
You can use **Edit** mode on the canvas just as you would in the regular editor. Click **Edit** in the top bar to select and style elements on any page frame.
***
## Accessing the canvas
To access the canvas, open your app editor and click the Canvas icon in the top bar.
 When you open the canvas for the first time, it fits all your app pages into view. After that, your zoom level and position are saved per device, so the canvas reopens where you left off.
***
## Collaborating on the canvas
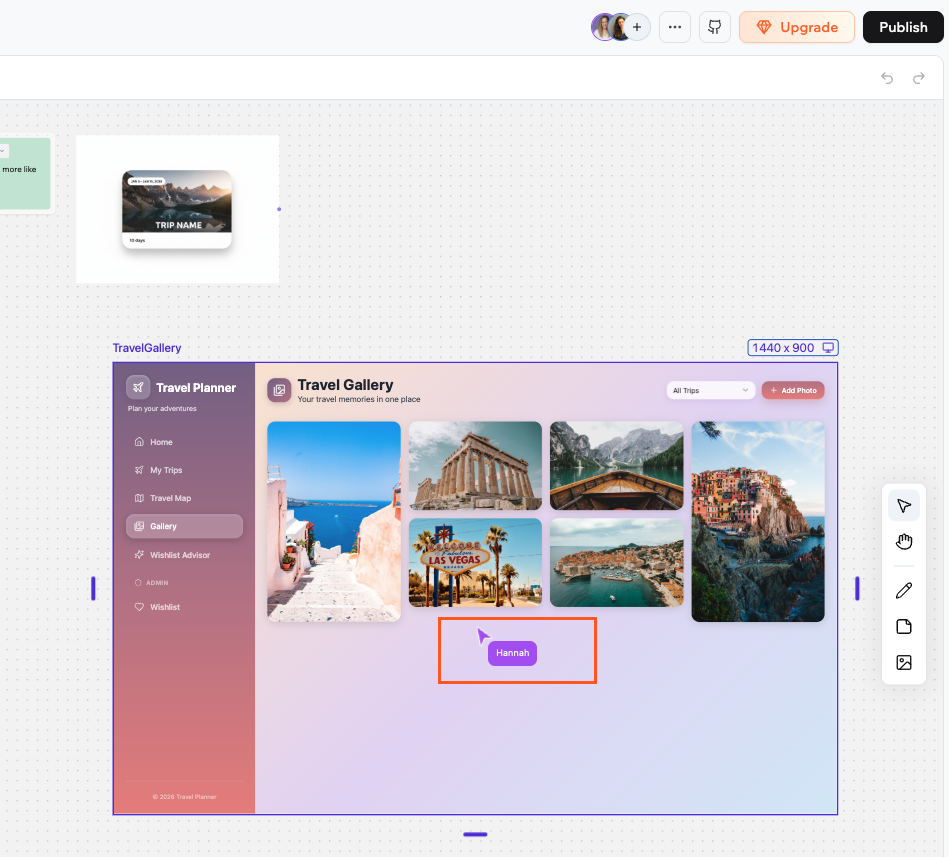
Multiple people can work on the canvas at the same time. Each collaborator's cursor appears as a named pointer as they move around. Colored outlines show which elements each person has selected.
When you open the canvas for the first time, it fits all your app pages into view. After that, your zoom level and position are saved per device, so the canvas reopens where you left off.
***
## Collaborating on the canvas
Multiple people can work on the canvas at the same time. Each collaborator's cursor appears as a named pointer as they move around. Colored outlines show which elements each person has selected.
 You can add collaborators to your app from the top of the editor. [Learn more about collaborators](/Setting-up-your-app/Managing-access#inviting-collaborators-to-your-app)
***
## Managing the page frames
Every page in your app appears as a frame on the canvas, showing a live preview of that page.
You can add collaborators to your app from the top of the editor. [Learn more about collaborators](/Setting-up-your-app/Managing-access#inviting-collaborators-to-your-app)
***
## Managing the page frames
Every page in your app appears as a frame on the canvas, showing a live preview of that page.
 You can do several actions on your page frames.
Click the frame to select it first, then click and drag the frame to move it wherever you want on the canvas.
Each frame has a viewport dropdown in the top right of its header. Click it to switch between **Desktop**, **Tablet**, and **Phone** to see how the page looks on different screen sizes.
You can do several actions on your page frames.
Click the frame to select it first, then click and drag the frame to move it wherever you want on the canvas.
Each frame has a viewport dropdown in the top right of its header. Click it to switch between **Desktop**, **Tablet**, and **Phone** to see how the page looks on different screen sizes.
 Click the frame to select it. Resize handles appear on the edges. Drag any handle to adjust the frame's width and height.
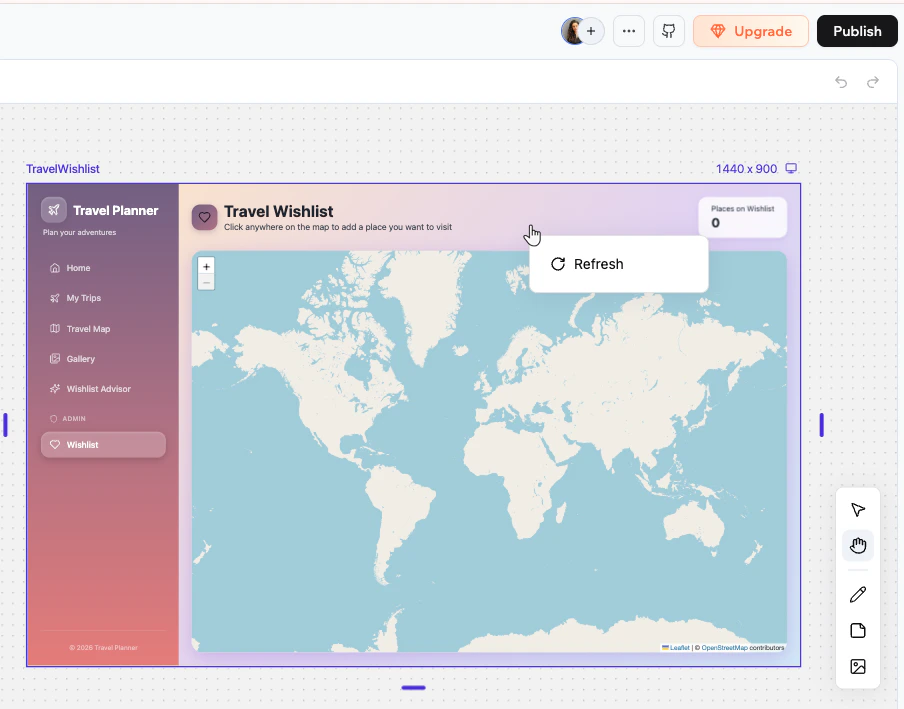
Right-click the frame and select **Refresh** to reload the page preview.
Click the frame to select it. Resize handles appear on the edges. Drag any handle to adjust the frame's width and height.
Right-click the frame and select **Refresh** to reload the page preview.
 Pages cannot be deleted from the canvas. To remove a page, ask the AI chat to delete it for you.
***
## Using the canvas toolbar
The toolbar on the right side of the canvas gives you access to the main tools.
Pages cannot be deleted from the canvas. To remove a page, ask the AI chat to delete it for you.
***
## Using the canvas toolbar
The toolbar on the right side of the canvas gives you access to the main tools.
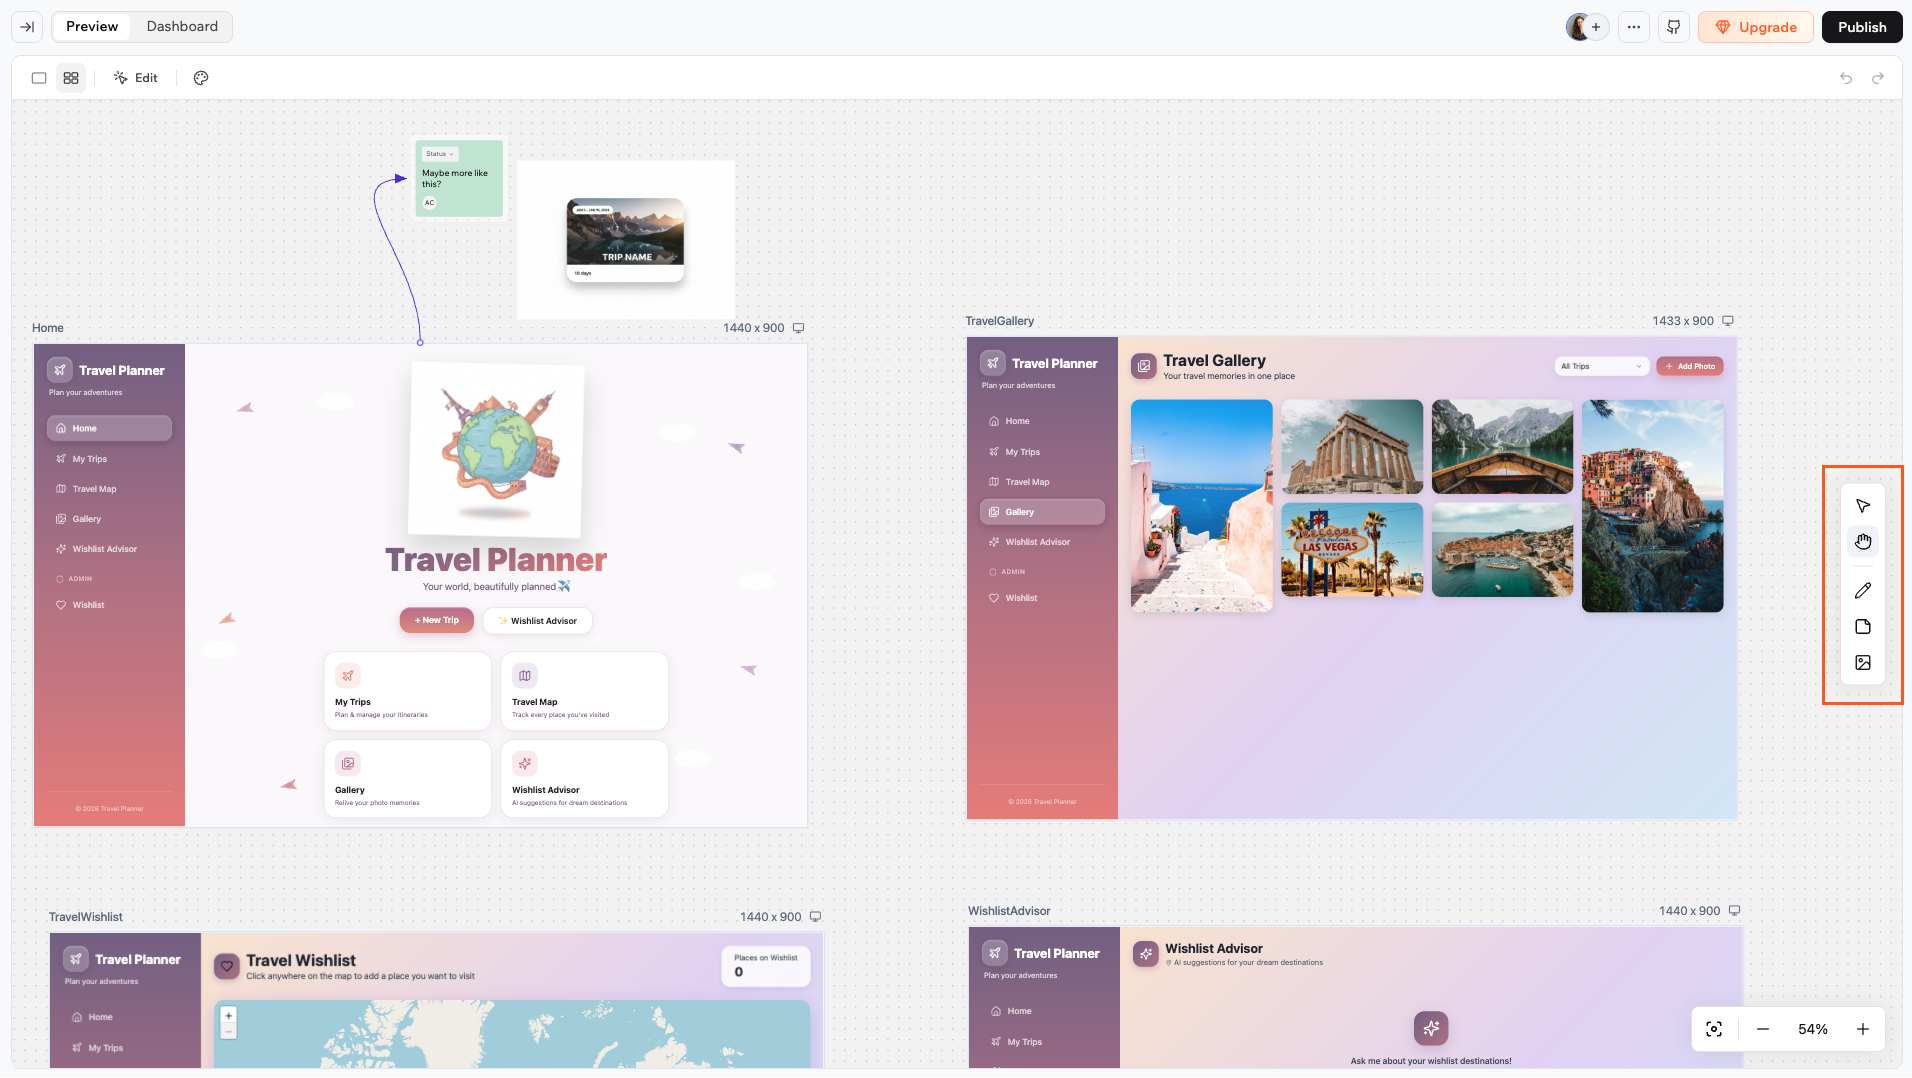 See what you can do with the toolbar:
| | **Tool** | **Shortcut** | **What it does** |
| ----------------------------- | --------------- | ------------ | ------------------------------------------------ |
| | **Select** | V | Select, move, and resize elements |
| | **Hand** | H | Pan around the canvas without selecting anything |
| | **Draw** | D | Freehand drawing |
| | **Sticky note** | N | Add sticky notes |
| | **Image** | I | Add images |
Press **Escape** at any time to return to the **Select** tool.
***
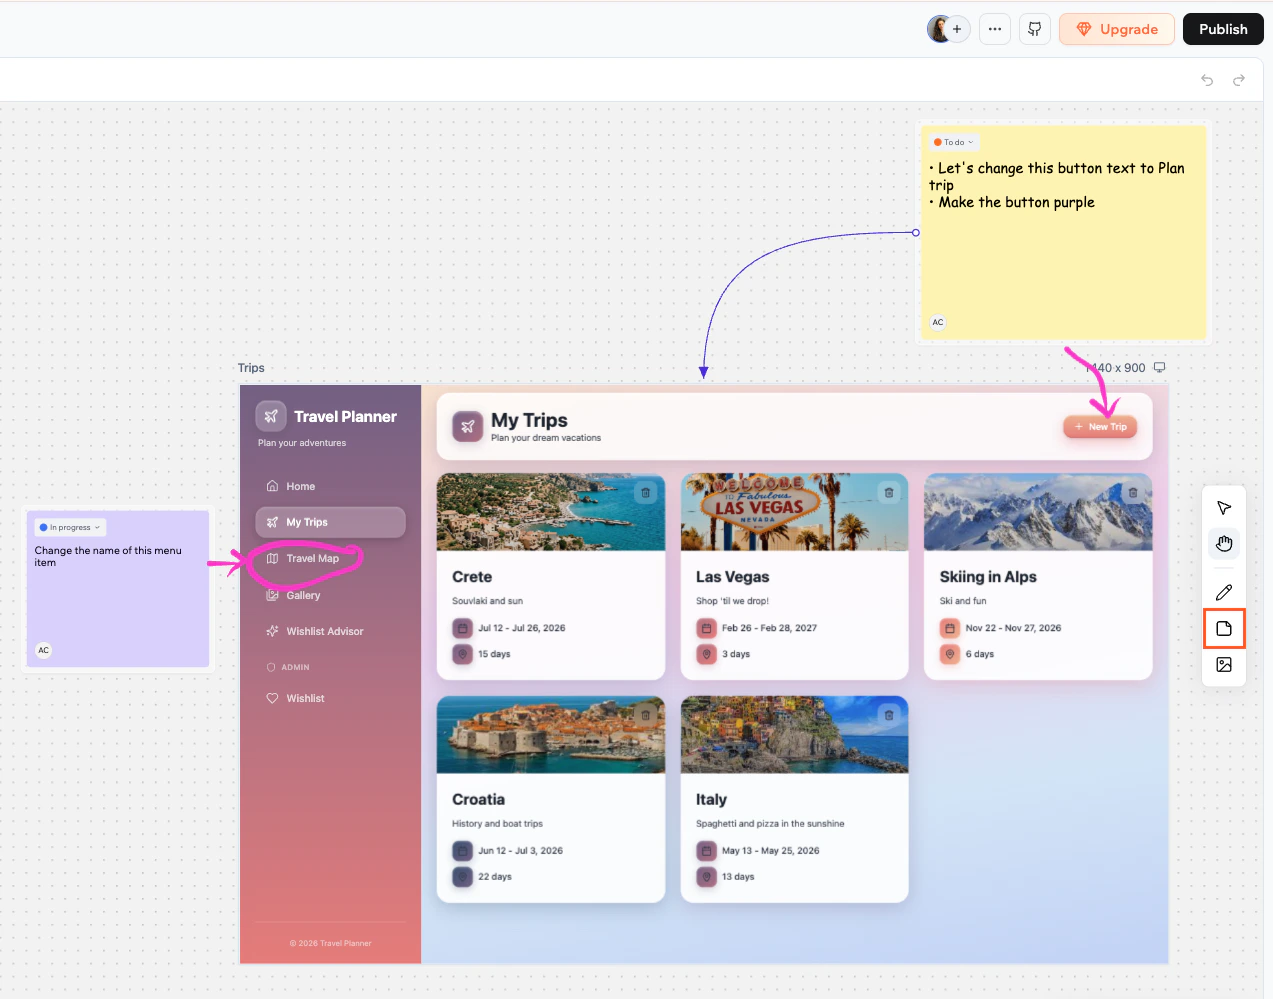
### Sticky notes
Sticky notes are the main way to leave ideas, feedback, and instructions directly on the canvas.
See what you can do with the toolbar:
| | **Tool** | **Shortcut** | **What it does** |
| ----------------------------- | --------------- | ------------ | ------------------------------------------------ |
| | **Select** | V | Select, move, and resize elements |
| | **Hand** | H | Pan around the canvas without selecting anything |
| | **Draw** | D | Freehand drawing |
| | **Sticky note** | N | Add sticky notes |
| | **Image** | I | Add images |
Press **Escape** at any time to return to the **Select** tool.
***
### Sticky notes
Sticky notes are the main way to leave ideas, feedback, and instructions directly on the canvas.
 Learn more about sticky notes:
**To add a sticky note:**
1. Click the **Sticky note** tool in the toolbar or press **N**.
2. Click anywhere on the canvas to place the note.
3. Double-click the note to start typing.
The avatar of the person who created the note appears at the bottom left.
When a sticky note is selected, a toolbar appears below it with formatting options:
* **Color**: choose a background color for the note.
* **Aa** **Font family**: choose from four styles: default, handwriting, mono, or serif.
* **S** **Font size**: Small, Medium, Large, or Extra large.
* **B** **Bold**: make the text bold.
* **Bullet list**: format the note as a bulleted list.
Each sticky note has a **Status** dropdown at the top. Click it to set the status:
* To do (orange)
* In progress (blue)
* Done (green)
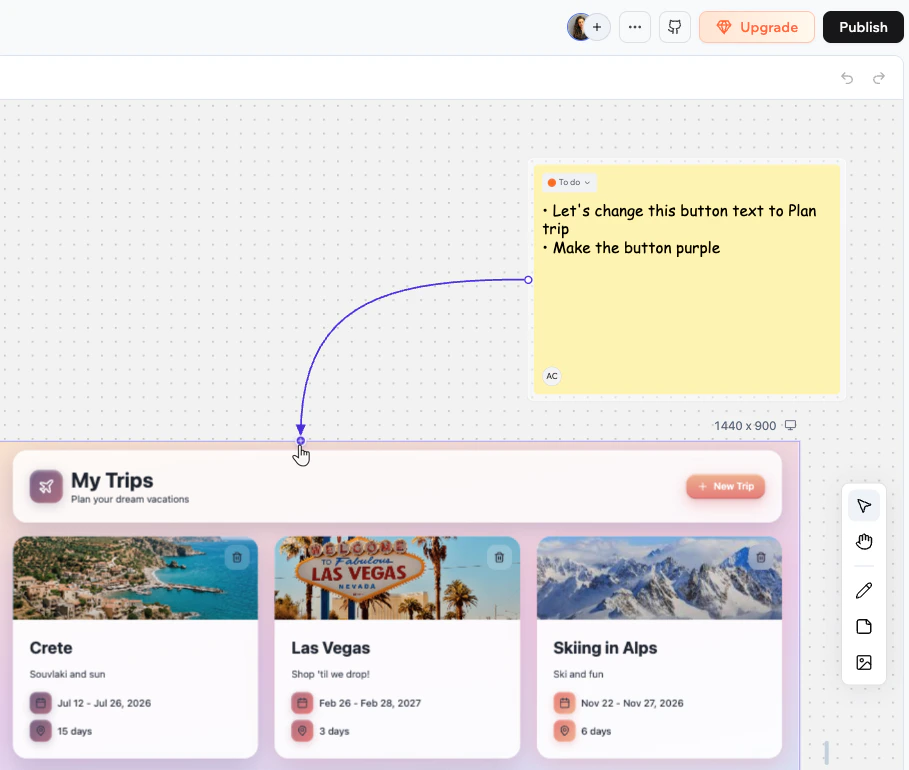
Connect a sticky note to a page frame to show which page it relates to.
**To connect a sticky note to a page:**
1. Hover over the note to reveal the connection handles on its edges.
2. Drag from a handle to the page frame you want to connect.
Once you write a note, you can send its content to the AI chat for implementation. Hover over or select the note, then click **Send to chat** at the bottom right of the note.
* If the note is connected to a page frame, the AI applies the change to that specific page.
* If the note is not connected to a page, the AI decides which page to update based on the content of the note.
***
### Drawings
The draw tool lets you sketch freehand anywhere on the canvas.
Learn more about sticky notes:
**To add a sticky note:**
1. Click the **Sticky note** tool in the toolbar or press **N**.
2. Click anywhere on the canvas to place the note.
3. Double-click the note to start typing.
The avatar of the person who created the note appears at the bottom left.
When a sticky note is selected, a toolbar appears below it with formatting options:
* **Color**: choose a background color for the note.
* **Aa** **Font family**: choose from four styles: default, handwriting, mono, or serif.
* **S** **Font size**: Small, Medium, Large, or Extra large.
* **B** **Bold**: make the text bold.
* **Bullet list**: format the note as a bulleted list.
Each sticky note has a **Status** dropdown at the top. Click it to set the status:
* To do (orange)
* In progress (blue)
* Done (green)
Connect a sticky note to a page frame to show which page it relates to.
**To connect a sticky note to a page:**
1. Hover over the note to reveal the connection handles on its edges.
2. Drag from a handle to the page frame you want to connect.
Once you write a note, you can send its content to the AI chat for implementation. Hover over or select the note, then click **Send to chat** at the bottom right of the note.
* If the note is connected to a page frame, the AI applies the change to that specific page.
* If the note is not connected to a page, the AI decides which page to update based on the content of the note.
***
### Drawings
The draw tool lets you sketch freehand anywhere on the canvas.
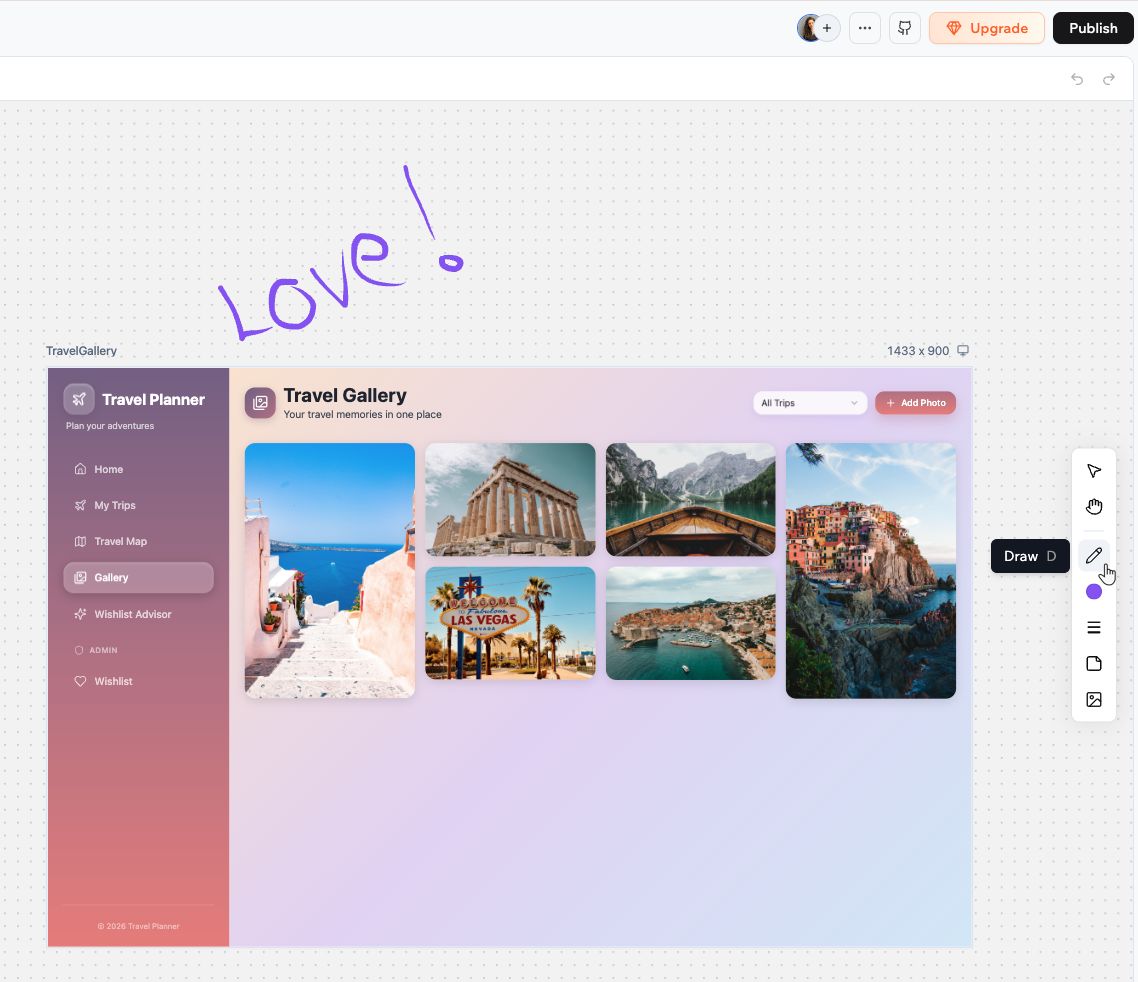 Learn more about drawing on the canvas:
**To draw on the canvas:**
1. Click the **Draw** tool in the toolbar or press **D**.
2. Click and drag on the canvas to draw.
When the draw tool is active, you can customize it:
* **Stroke color** : Click the drawing to open the color picker and choose your drawing color, or enter a hex value directly.
* **Stroke weight** : Click the drawing and drag the slider to adjust the thickness of your stroke.
* **Flip**: Right-click a drawing and select **Flip horizontal** or **Flip vertical**, or use the **⇧H** and **⇧V** shortcuts.
***
### Images
You can add images to the canvas from multiple sources. Images are placed in the center of your current view.
Learn more about drawing on the canvas:
**To draw on the canvas:**
1. Click the **Draw** tool in the toolbar or press **D**.
2. Click and drag on the canvas to draw.
When the draw tool is active, you can customize it:
* **Stroke color** : Click the drawing to open the color picker and choose your drawing color, or enter a hex value directly.
* **Stroke weight** : Click the drawing and drag the slider to adjust the thickness of your stroke.
* **Flip**: Right-click a drawing and select **Flip horizontal** or **Flip vertical**, or use the **⇧H** and **⇧V** shortcuts.
***
### Images
You can add images to the canvas from multiple sources. Images are placed in the center of your current view.
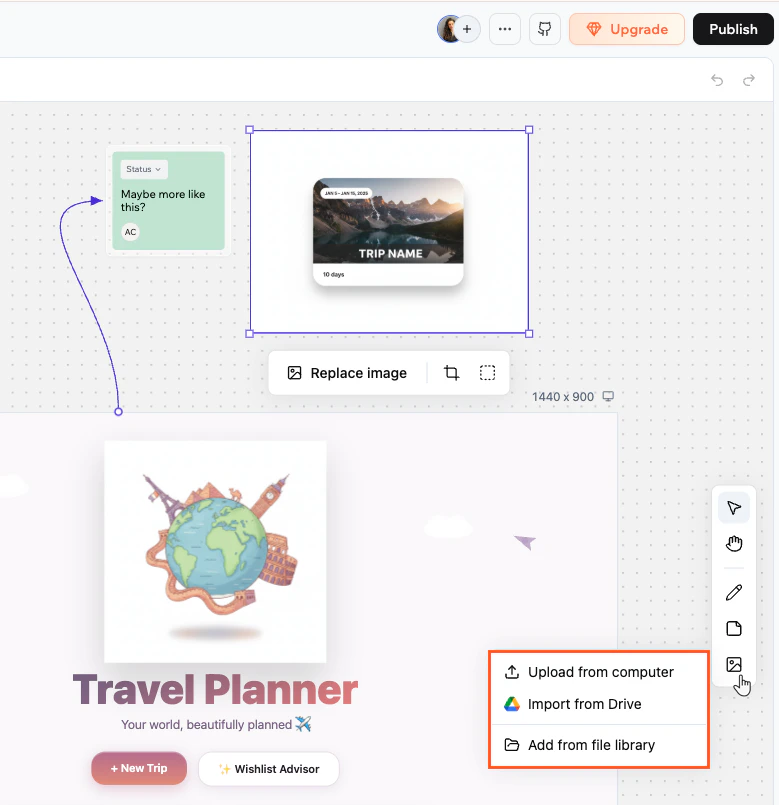 Learn more about adding images to the canvas:
**To add an image:**
1. Click the **Image** tool in the toolbar or press **I**.
2. Choose where to get the image from:
* **Upload from computer**: Select a file from your device.
* **Import from Drive**: Pick a file from your connected Google Drive.
* **Add from file library**: Choose from your app's existing assets.
Select the image to access the toolbar below it:
* **Replace image:** Swap the image for a different one.
* **Crop:** Trim the image.
* **Border:** Add or adjust a border around the image.
* **Flip:** Right-click to flip the image horizontally or vertically.
***
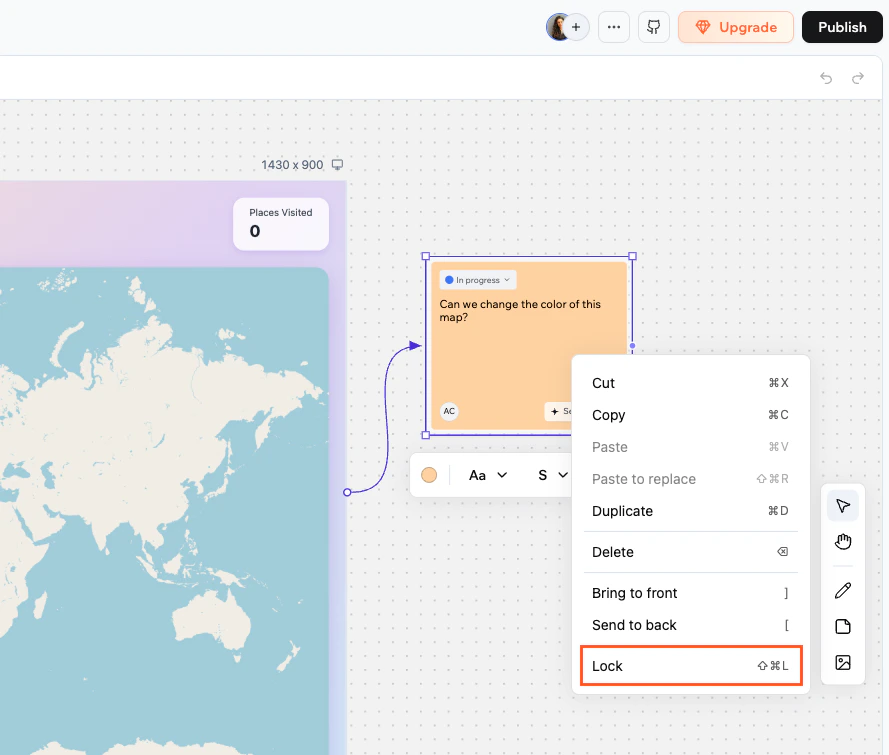
### Right-click actions
Right-click any sticky note, drawing, or image to open its context menu. The following actions are available:
| Action | Keyboard shortcut |
| ------------------------------------- | ------------------- |
| Cut | ⌘X |
| Copy | ⌘C |
| Paste | ⌘V |
| Paste to replace | ⇧⌘R |
| Duplicate | ⌘D |
| Delete | Delete or Backspace |
| Bring to front | ] |
| Send to back | \[ |
| Flip horizontal (drawings and images) | ⇧H |
| Flip vertical (drawings and images) | ⇧V |
| Lock / Unlock | ⇧⌘L |
***
## Adding arrows
You can connect any two elements on the canvas with an arrow to show relationships, for example linking a sticky note to the page it refers to.
Learn more about adding images to the canvas:
**To add an image:**
1. Click the **Image** tool in the toolbar or press **I**.
2. Choose where to get the image from:
* **Upload from computer**: Select a file from your device.
* **Import from Drive**: Pick a file from your connected Google Drive.
* **Add from file library**: Choose from your app's existing assets.
Select the image to access the toolbar below it:
* **Replace image:** Swap the image for a different one.
* **Crop:** Trim the image.
* **Border:** Add or adjust a border around the image.
* **Flip:** Right-click to flip the image horizontally or vertically.
***
### Right-click actions
Right-click any sticky note, drawing, or image to open its context menu. The following actions are available:
| Action | Keyboard shortcut |
| ------------------------------------- | ------------------- |
| Cut | ⌘X |
| Copy | ⌘C |
| Paste | ⌘V |
| Paste to replace | ⇧⌘R |
| Duplicate | ⌘D |
| Delete | Delete or Backspace |
| Bring to front | ] |
| Send to back | \[ |
| Flip horizontal (drawings and images) | ⇧H |
| Flip vertical (drawings and images) | ⇧V |
| Lock / Unlock | ⇧⌘L |
***
## Adding arrows
You can connect any two elements on the canvas with an arrow to show relationships, for example linking a sticky note to the page it refers to.
 **To create an arrow:**
1. Hover over an element to reveal the connection handles on its edges.
2. Drag from a handle to another element.
To remove an arrow, select it and press **Delete** on your keyboard.
***
## Locking elements
Locking an element prevents anyone from moving, resizing, or editing it until it is unlocked. This helps avoid conflicts when multiple people are working on the same canvas. You can lock sticky notes, drawings, and images.
**To create an arrow:**
1. Hover over an element to reveal the connection handles on its edges.
2. Drag from a handle to another element.
To remove an arrow, select it and press **Delete** on your keyboard.
***
## Locking elements
Locking an element prevents anyone from moving, resizing, or editing it until it is unlocked. This helps avoid conflicts when multiple people are working on the same canvas. You can lock sticky notes, drawings, and images.
 **To lock or unlock an element:**
* Right-click the element and select **Lock** or **Unlock**.
* Or select the element and press **⇧⌘L**.
***
## Undoing and redoing changes
You can undo and redo your recent canvas edits using keyboard shortcuts or the undo/redo buttons that appear in the toolbar when there is history to step through.
Undo and redo cover most canvas actions: creating, moving, resizing, editing, deleting, locking, and connecting elements.
| Action | Mac | Windows |
| ------ | --- | ---------------------- |
| Undo | ⌘Z | Ctrl+Z |
| Redo | ⇧⌘Z | Ctrl+Shift+Z or Ctrl+Y |
Undo and redo are personal. Your history is separate from your collaborators', so undoing a change only reverses your own edits, not theirs. The canvas keeps up to 50 steps of history.
***
## Zoom and navigation
The zoom bar sits at the bottom right of the canvas.
| Control | Shortcut | Action |
| --------------- | -------- | ------------------------------------------------ |
| **Zoom to fit** | ⌘1 | Fit the whole canvas into view |
| **−** | ⌘- | Zoom out one step |
| Percentage | | Click to open a dropdown with preset zoom levels |
| **+** | ⌘+ or ⌘= | Zoom in one step |
| | ⌘0 | Reset to 100% |
**To lock or unlock an element:**
* Right-click the element and select **Lock** or **Unlock**.
* Or select the element and press **⇧⌘L**.
***
## Undoing and redoing changes
You can undo and redo your recent canvas edits using keyboard shortcuts or the undo/redo buttons that appear in the toolbar when there is history to step through.
Undo and redo cover most canvas actions: creating, moving, resizing, editing, deleting, locking, and connecting elements.
| Action | Mac | Windows |
| ------ | --- | ---------------------- |
| Undo | ⌘Z | Ctrl+Z |
| Redo | ⇧⌘Z | Ctrl+Shift+Z or Ctrl+Y |
Undo and redo are personal. Your history is separate from your collaborators', so undoing a change only reverses your own edits, not theirs. The canvas keeps up to 50 steps of history.
***
## Zoom and navigation
The zoom bar sits at the bottom right of the canvas.
| Control | Shortcut | Action |
| --------------- | -------- | ------------------------------------------------ |
| **Zoom to fit** | ⌘1 | Fit the whole canvas into view |
| **−** | ⌘- | Zoom out one step |
| Percentage | | Click to open a dropdown with preset zoom levels |
| **+** | ⌘+ or ⌘= | Zoom in one step |
| | ⌘0 | Reset to 100% |